


If you have been using ChatGPT to get ready answers to your personal and professional queries, you might want to go one step further and learn about Auto-GPT, the new kid on the block. What’s the deal with this new AI-powered tool? How do you install Auto-GPT? And how should you use Auto-GPT?
We’ve put together a detailed guide to the tool that might eliminate the constant brainstorming required for ChatGPT prompts. Here’s what you need to know.
Why you should try free ChainGPT bot designed for Blockchain Technology and Crypto-related topics:
– ChainGPT understands all languages.
– Generates images within less than a minute.
– Native token: CGPT listed on Bybit, GateIO, Kucoin, Bitget, MEXC and others.
What is Auto-GPT?
Auto-GPT isn’t exactly an application but a way to use specific OpenAI resources — the large language model(s) — to make your life easier. Unlike ChatGPT, where you still need to manually feed your prompts to get responses, Auto-GPT can use text-generating and text-completion AI models to form a recursive agent that creates a loop of “asking and answering” questions towards goal completion.
So let’s dive right into installing and using Auto-GPT — the next big thing in AI.
How to install Auto-GPT: The prerequisites
Before we move ahead with Auto-GPT installation, here are a few things to keep in mind:
- Auto-GPT works by creating multiple ChatGPT agents that can interact and process information among each other to fulfill a common goal. Consider this as creating an army of bots to help you achieve a holistic task.
- Installing Auto-GPT requires GPT4 APIs. However, if you are still on the waiting list, even the GPT 3.5 APIs would work.
- It is still an open-source app built using the Python virtual environment. And to procure the source code for running the same, you would need to install the Git repository on your computer or download the codebase. The steps might vary depending on which OS you are using — macOS or Windows. However, the essence remains the same — you must clone the code to a specific path and run Auto-GPT from there.
- You can use different environments like Python, Conda, Docker, and more for installing Auto-GPT locally. For the sake of simplicity, we shall use Python combined with Git and VSCode to make things easier to understand.
Do note that if you are new to Python, setting up a virtual environment might be useful. This way, you can keep projects isolated, allowing you to handle multiple iterations of the same on the same PC. Also, if you plan to use Python and Auto-GPT to work on images using DALL.E, you might look at a version that supports Stable Diffusion and other image-specific tasks.
If all that sounded confusing, fret not. We shall explain everything in detail throughout this piece.
How to install Auto-GPT: Steps and explanations
Let us jump right into a step-by-step Auto-GPT installation guide.
Step 1: Install GitHub
If you are using Windows, you need to install Git on your machine. This will help pull resources from GitHub to your PC, per your requirements.
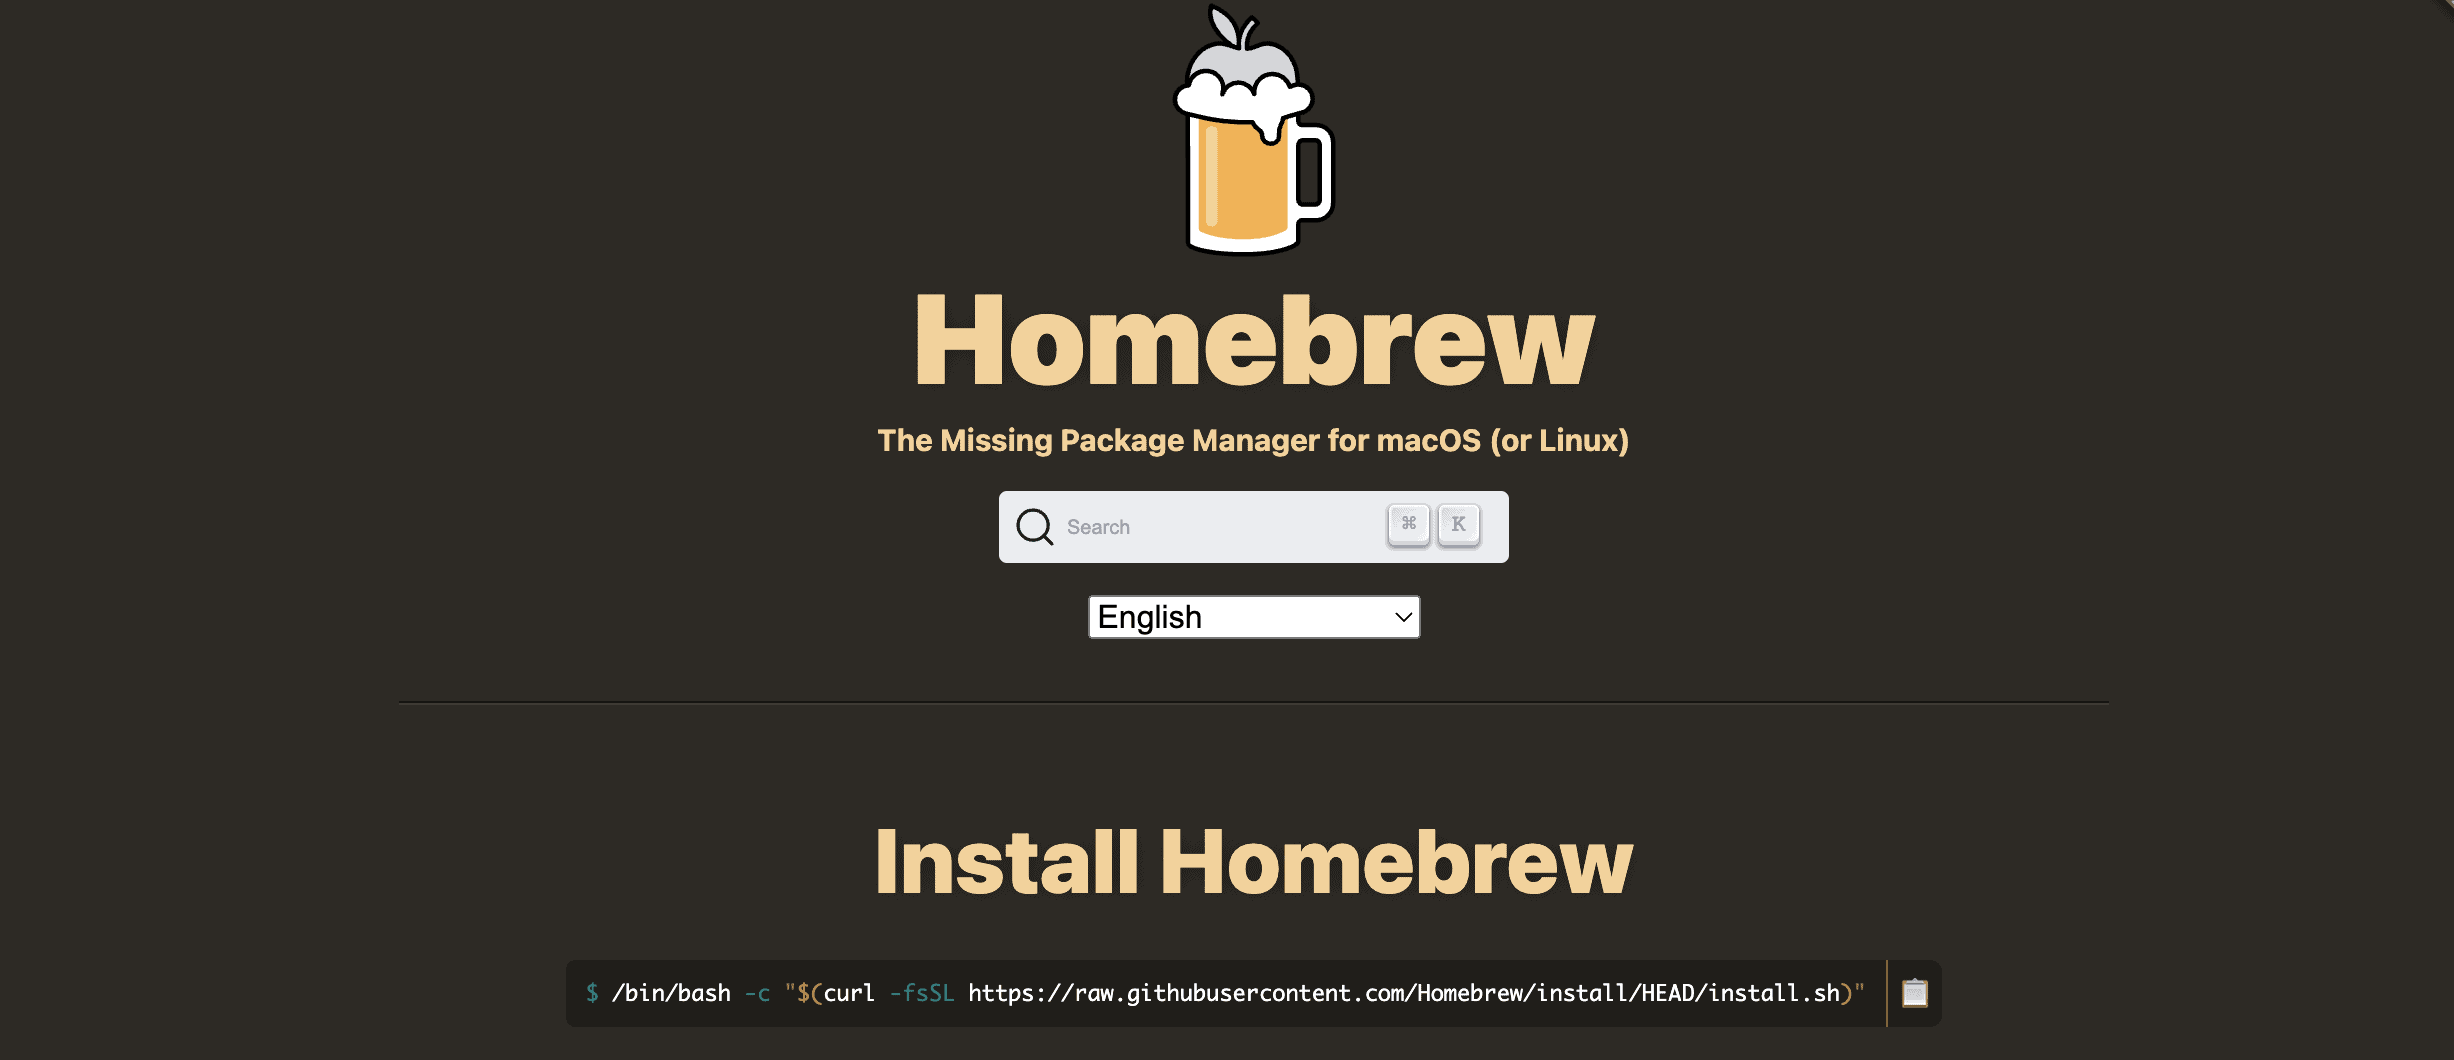
If you are on a Mac, you can simply head over to the “Terminal” and type in the following command to first get “Homebrew” installed on the machine.
The terminal is the command-line interface for Mac.
Homebrew is a macOS package manager that can help you install resources easily. After getting Homebrew, type in or paste the following code right into the terminal:
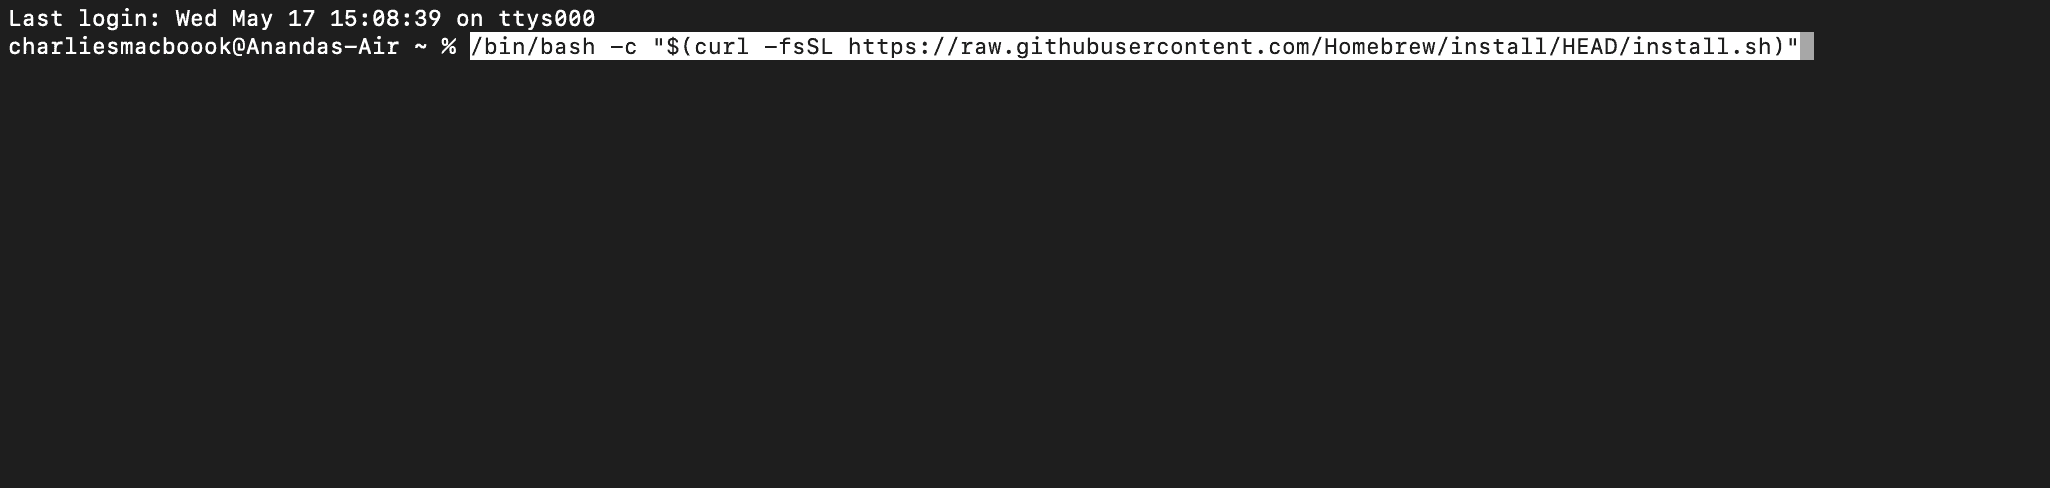
Once you paste the command into the Terminal, you will need to offer “sudo” access by typing in your PC password.
Post that, type in:
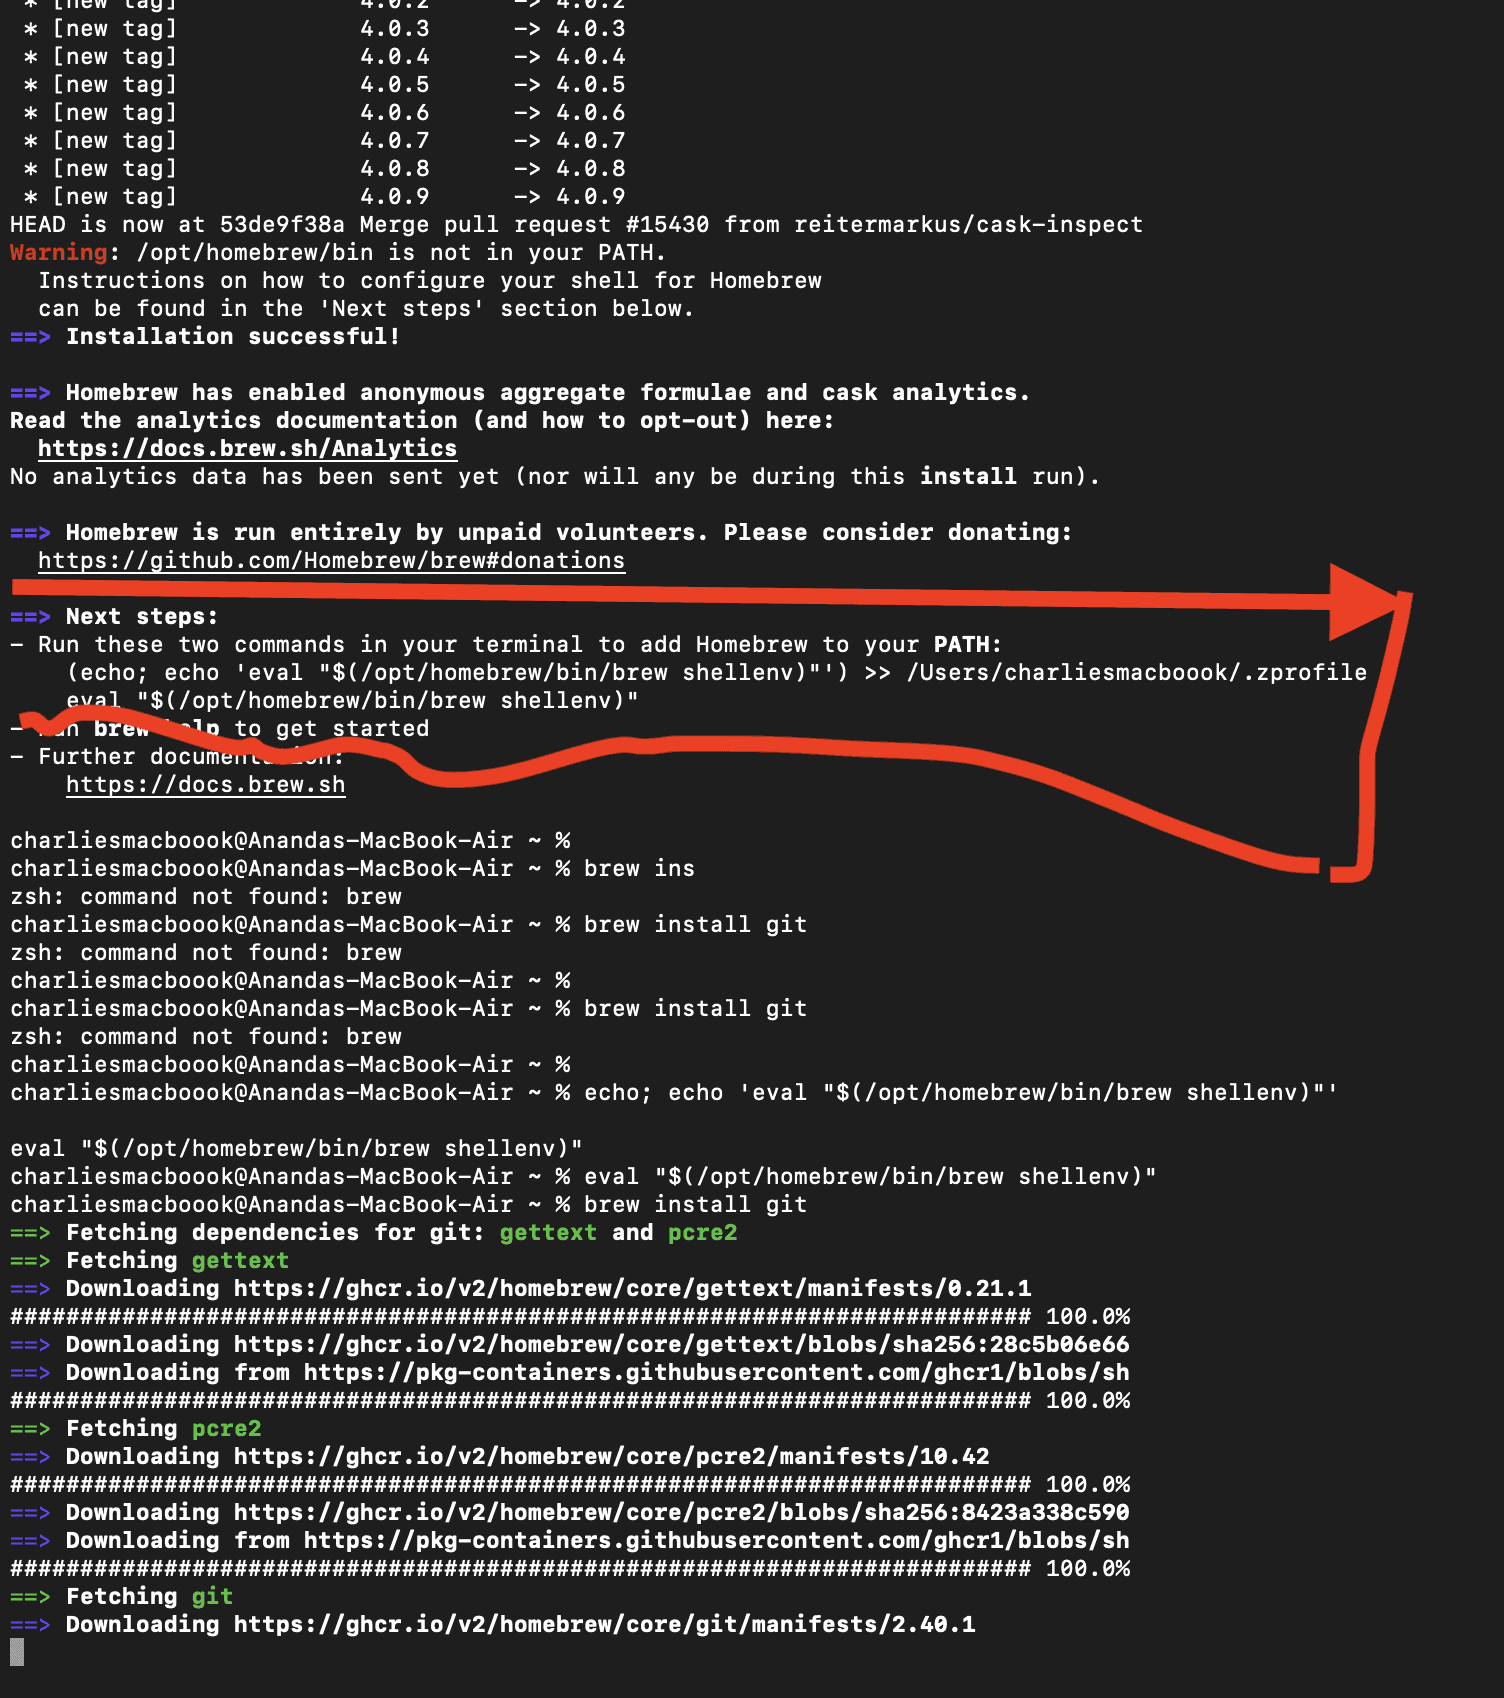
Note: Once you have pasted the Homebrew code and run the same, you might have to run additional commands to add Homebrew to your path. Adding it to the path means ensuring that the macOS recognizes the associated commands, especially when you have to directly install Git and Python.
Here are the commands that you might have to paste or type in to install Git successfully using Homebrew.
Step 2: Install Python
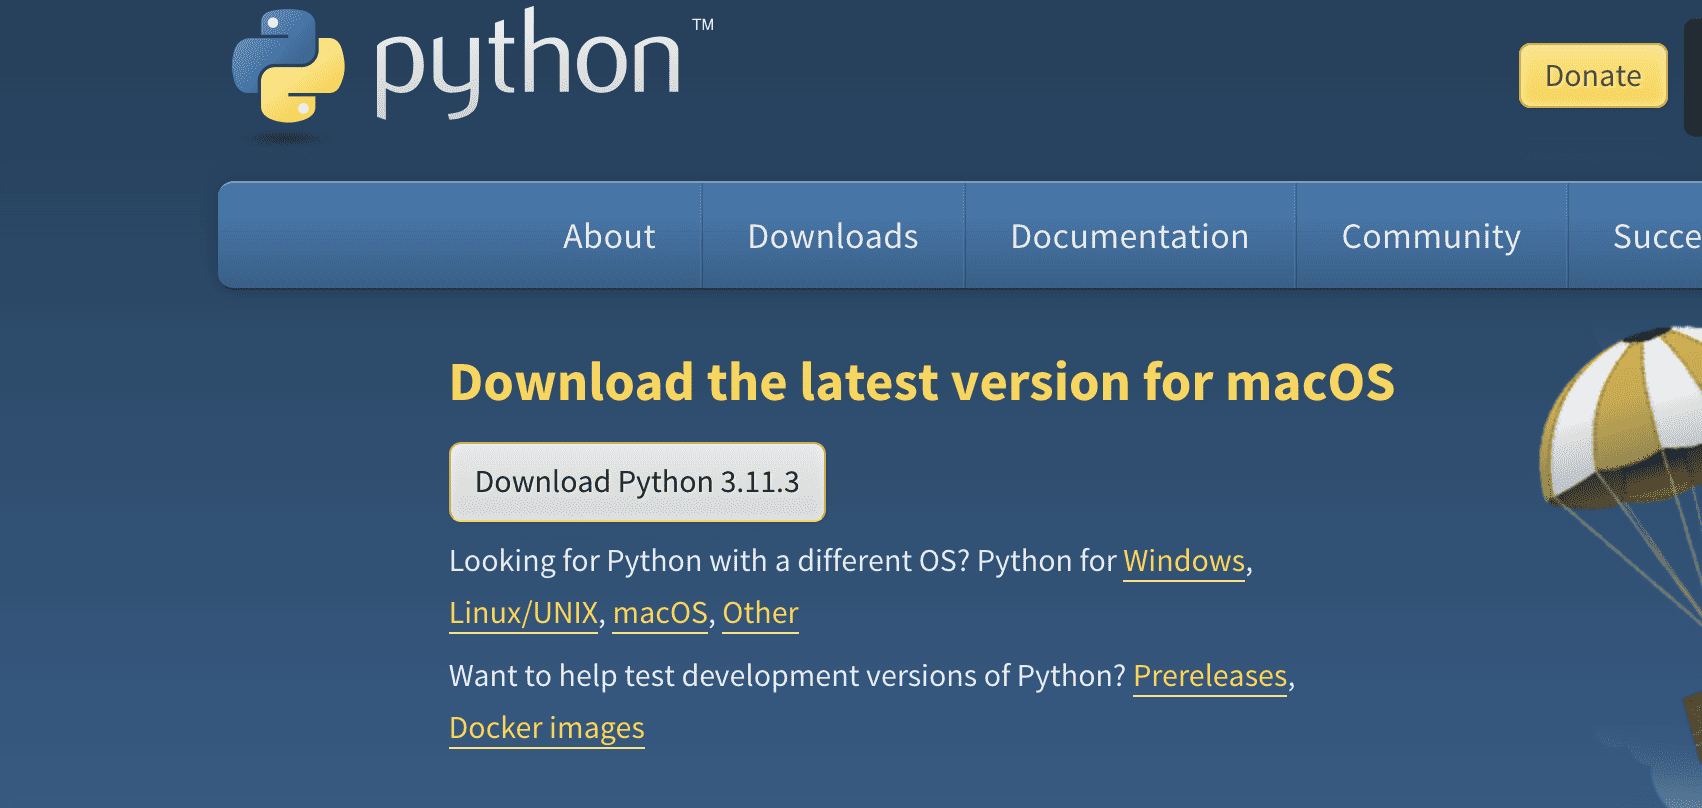
The first move would be to download the right Python version for macOS and get the same installed.
Or, you can use the following command to install Python and the associated PIP or the Package Manager using Homebrew.

Check if the correct version is in by typing:
PIP lets you explore outside of Python and embark upon tasks like the installation of Auto-GPT. PIP stands for pip install Packages and comes pre-staked with any version of Python equal to or later than 3.4.
Once you install Python via Homebrew, you should have access to Python and its utilities.
For Windows, head over to the official website and install a stable release via the Windows Installer 64-bit.
Note: The stable versions might keep changing depending on the Python version releases. Keep tracking the available downloads and install the right version accordingly.
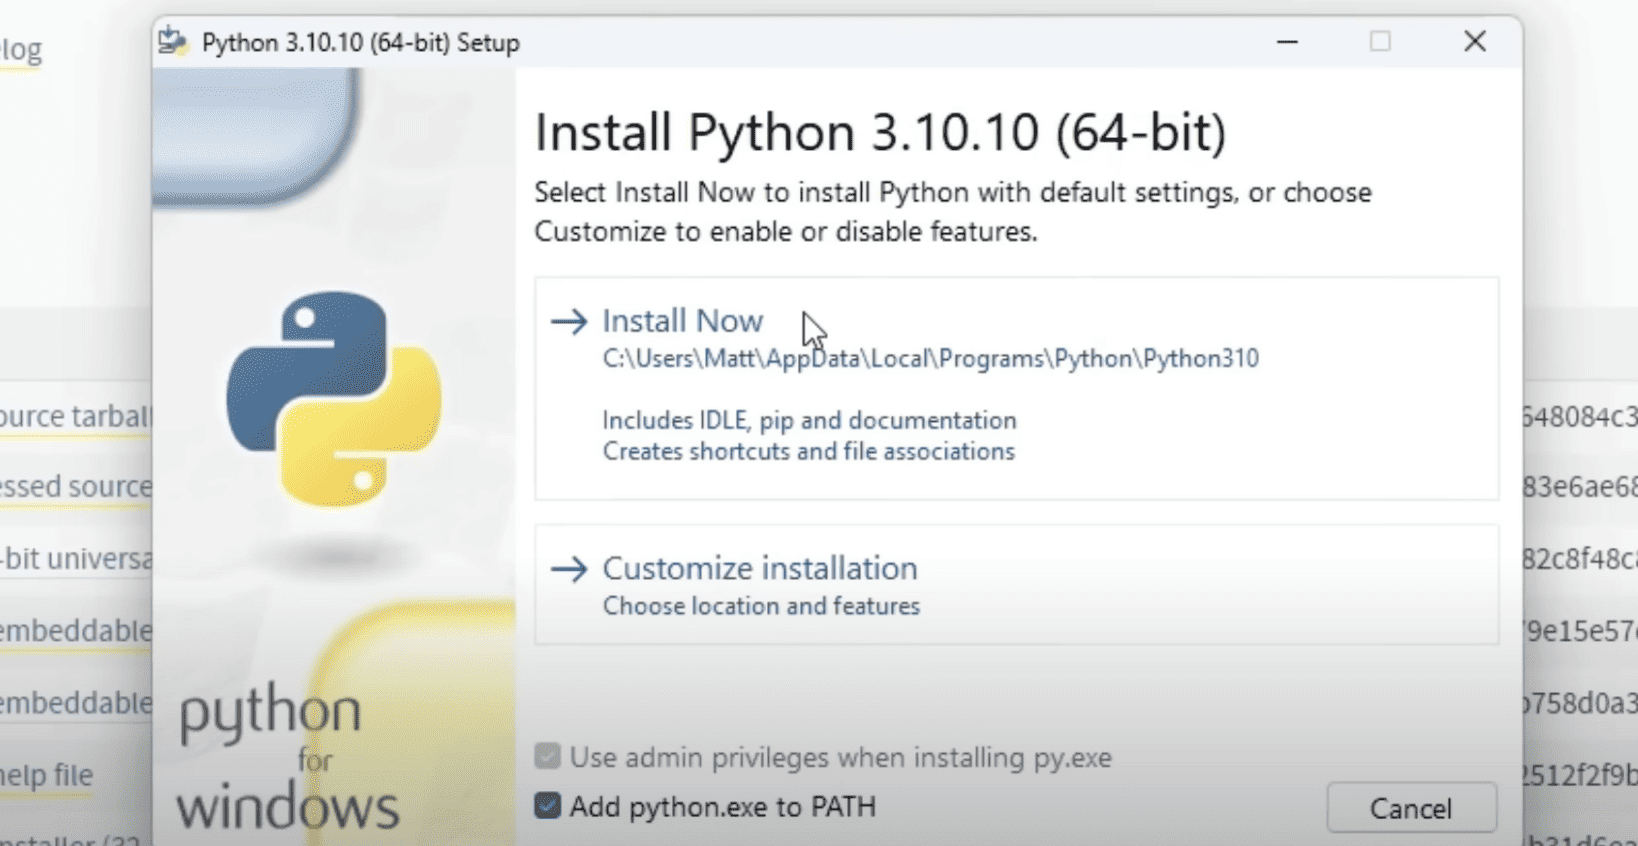
In that case, while installing, you must select “Add Python.exe to Path.” This way, you should be able to use the same for a specific project like Auto-GPT.
Understanding why we installed Git and Python
As mentioned earlier, Auto-GPT is a Python-based AGI or Artificial General Intelligence that eliminates the need for manual input prompt (s). So the machine you plan to run Auto-GPT on locally needs to have Python installed. And you need Git to access the stable version of the Auto-GPT code directly from the terminal or the command-line prompt.
We will later see that proceeding without Git is also possible. For that, you will need to download the code as a zip file, extract the same, and then paste it inside the directory on the PC from where you would be running the Auto-GPT app.
Now let us head back to the steps.
Step 3: Clone Auto-GPT
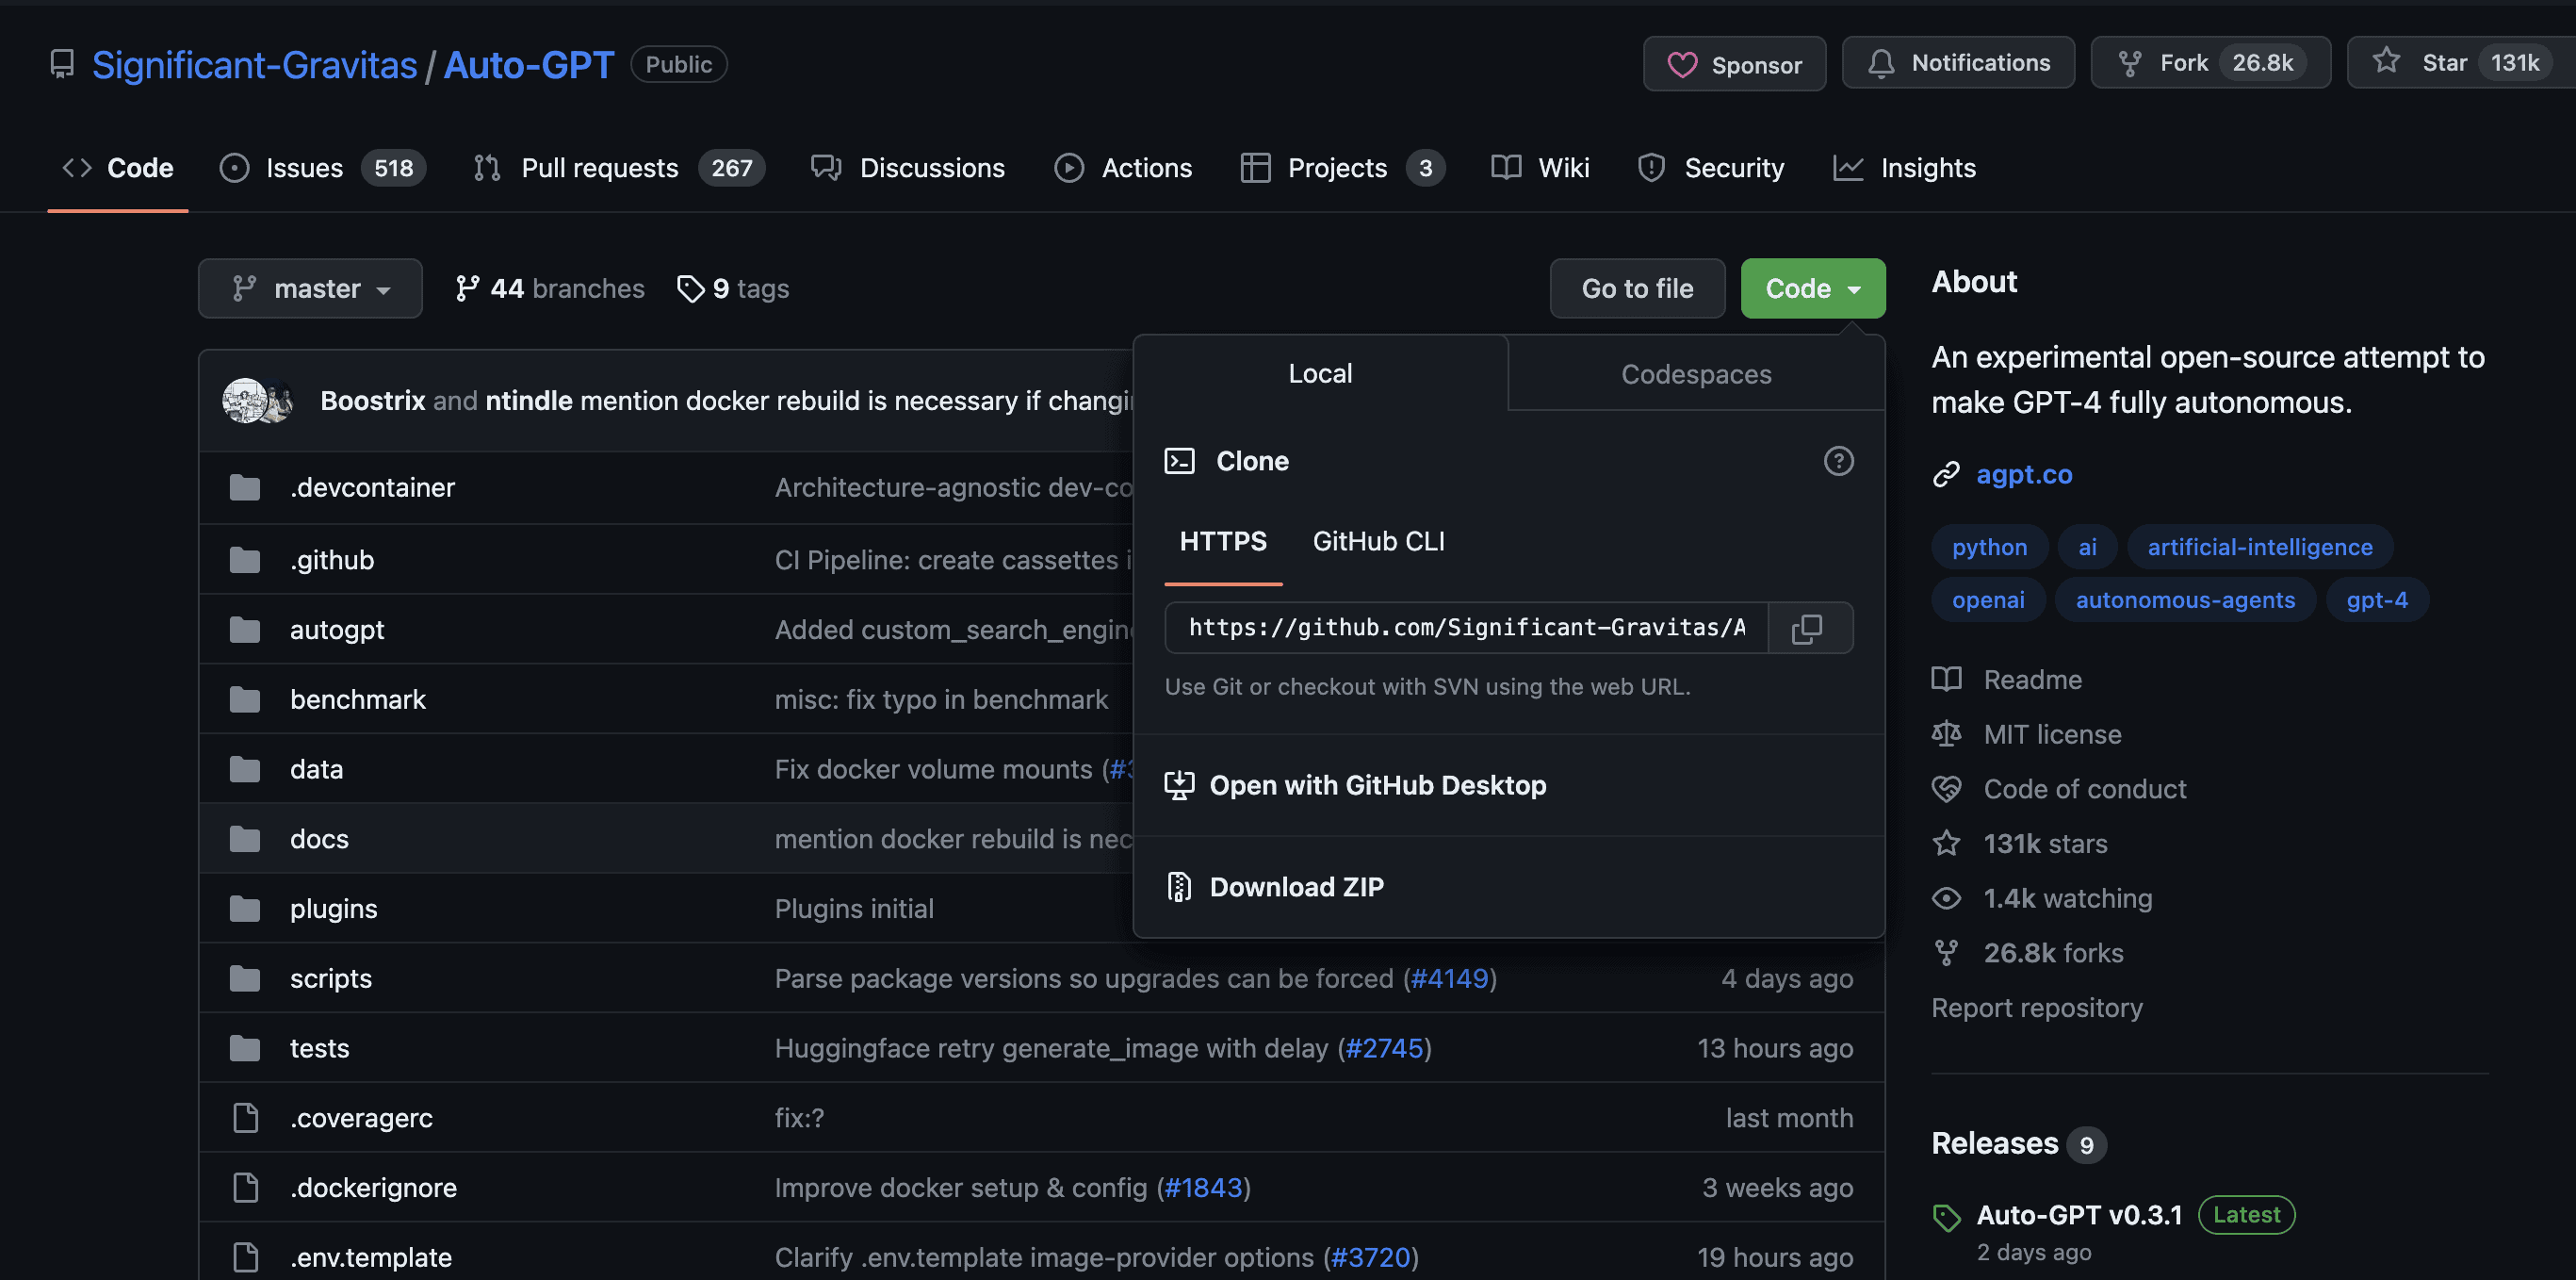
Once Python and Git are ready, you need to head over to the official Git repository of Auto-GPT to locate the correct code.
Do note that Toran Bruce Richards, otherwise termed the Significant Gravitas on Git, is the technical brain behind Auto-GPT’s code. Richards took to Twitter to show appreciation for the open-source community in April 2023.
“The open-source community is incredible. Huge thank you to all 219 of the incredible contributors and to everyone who’s submitted one of the almost 3000 issues/pull requests.”
Significant Gravitas, inventor of Auto-GPT: Twitter
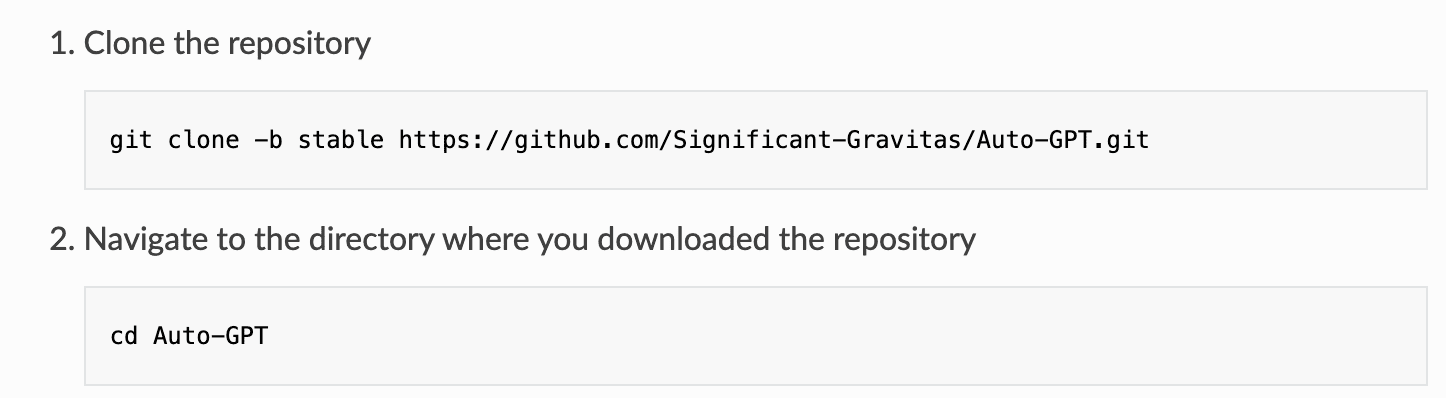
Our task is to clone this piece of code to our directory — the folder or location on the computer that we want the application to work out of. To clone, we need to copy the link from the official Git repository.
- You can right-click on the folder and select “Terminal for Folder” to open the same in the Command Line version.
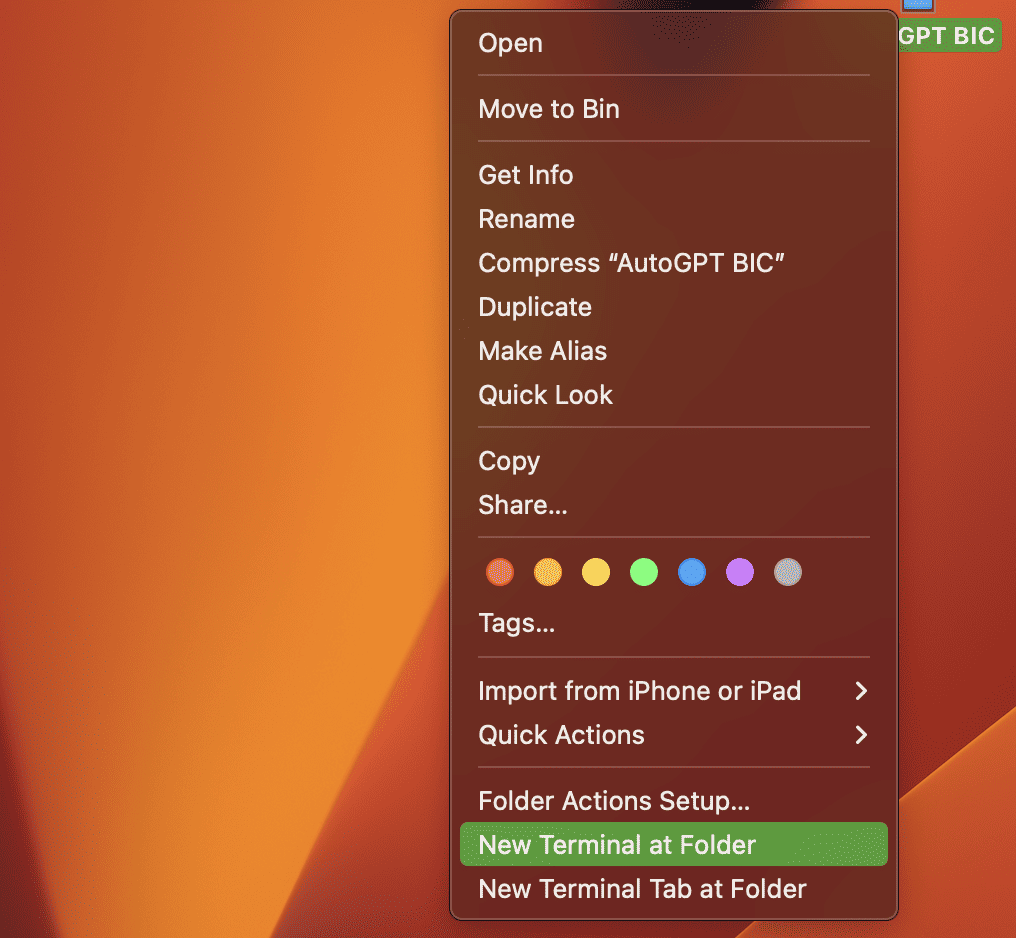
- Once the terminal for the folder (for us, it is Auto-GPT BIC) — is ready, we need to use the command “git clone” followed by the link we copied from the Git repo.
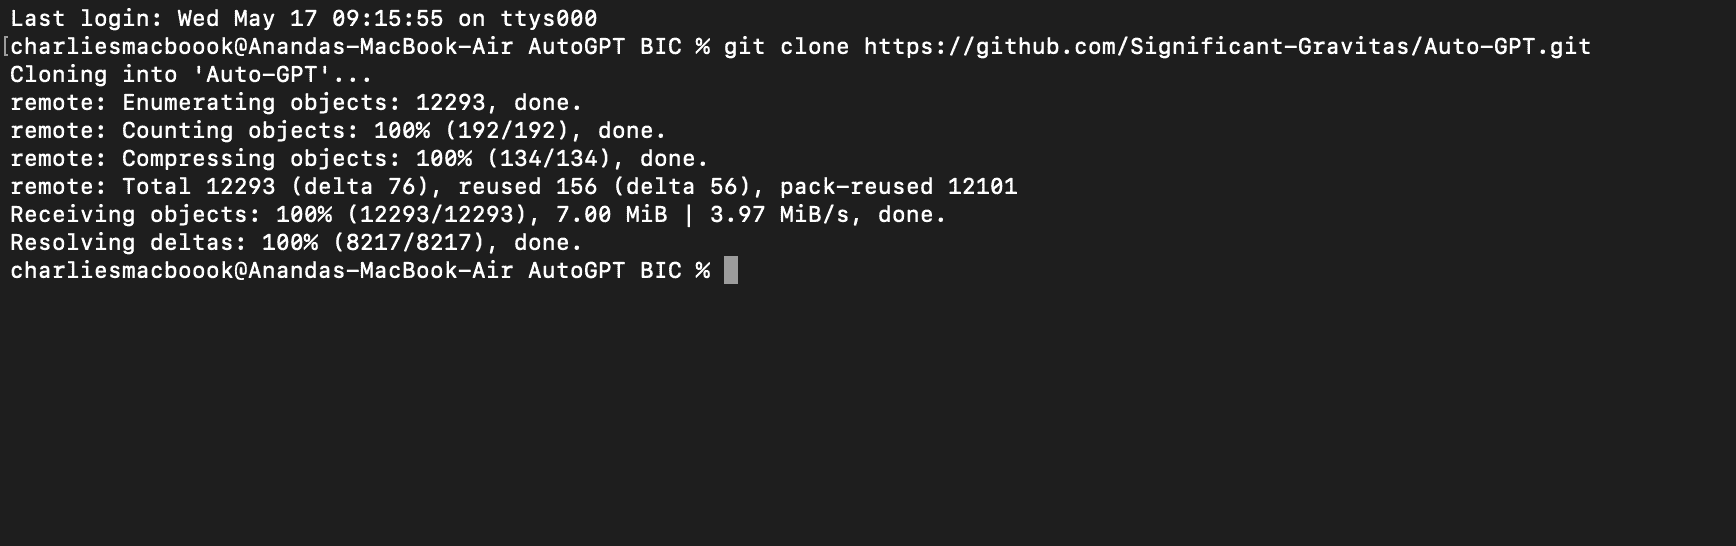
This clones the contents of the Git resource into our Auto-GPT BIC folder or directory. You will see that within the Auto-GPT BIC (or folder), another folder called Auto-GPT will be created by default. This folder will contain all the essential tools to run and deploy Auto-GPT.
- For Windows, you can head over to the Git repo, scroll down, download the source code, and unzip the same into the relevant folder.

- The same Auto-GPT folder with all the relevant resources will show up similarly. (This way, you can proceed without having to install GitHub on the PC)
Now that you have cloned or copied the official resource, you need a code editor to modify the cloned code per your needs.
Step 4: Install dependencies
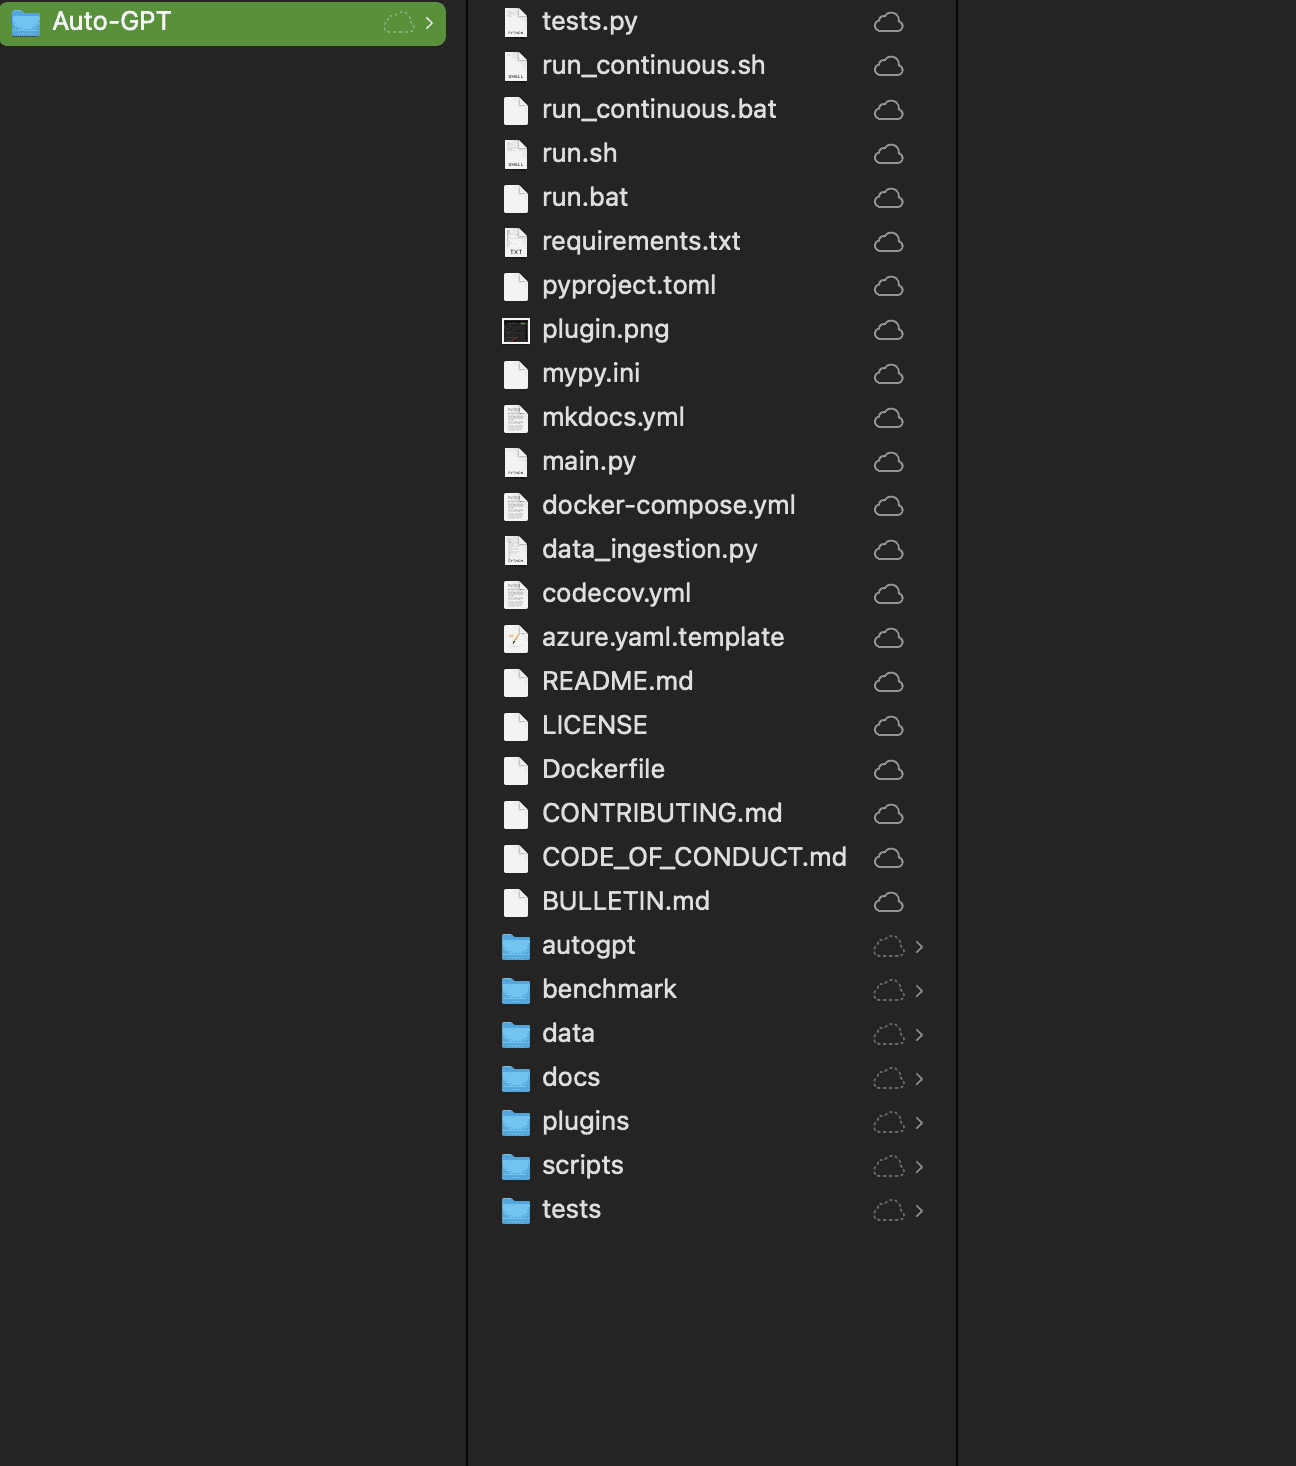
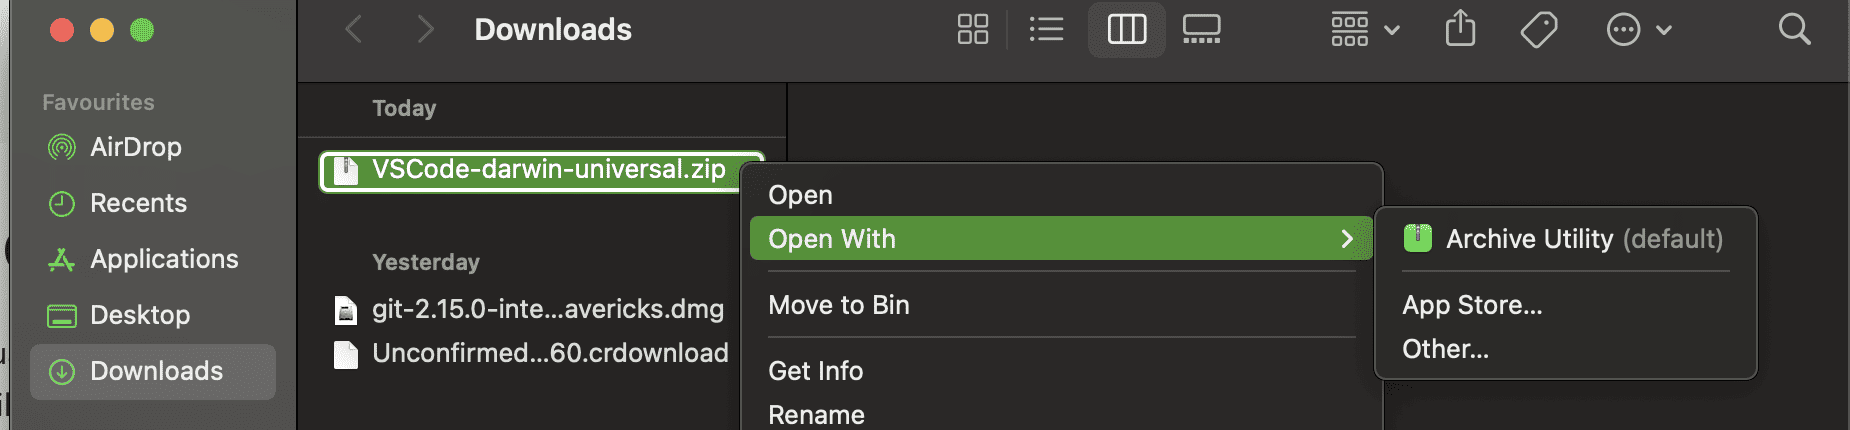
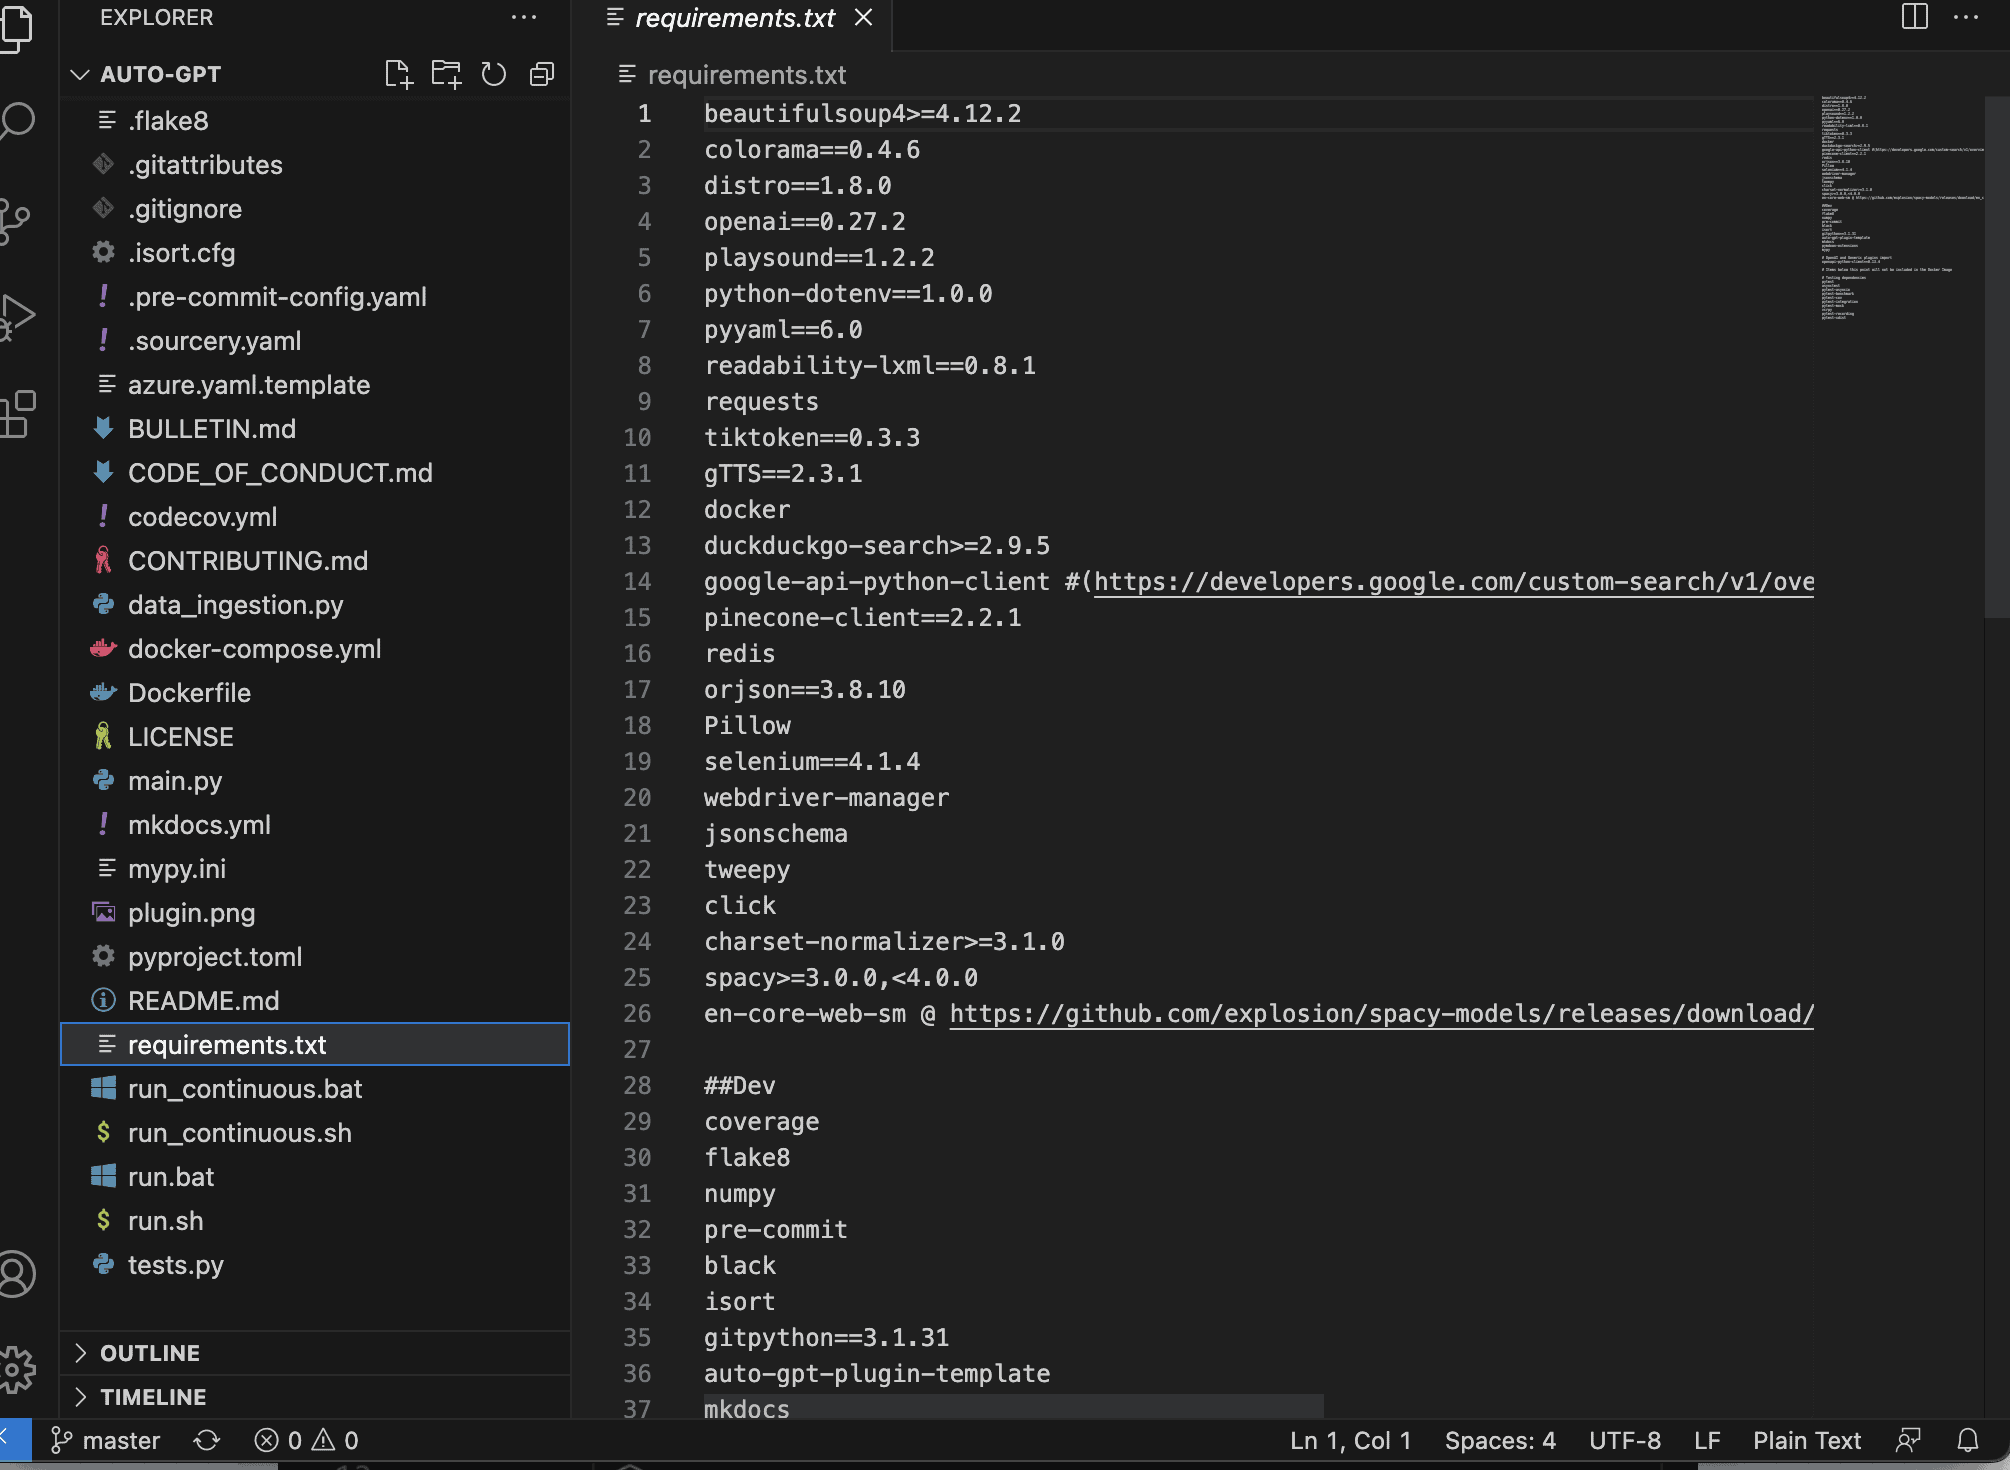
Now install the VSCode —the code editor. If you are on Mac, you can use VSCode to open and edit the contents of the Auto-GPT folder. Once there, you will find the requirements.txt document with all the necessary dependencies.
This is only for reference, and to install dependencies, you still need to head over to the “Terminal” and stay inside the “Auto-GPT” or directory folder. If you have moved out of the path, you can always type in cd Auto-GPT to move back in.
Step 5: Access APIs and make the final adjustments
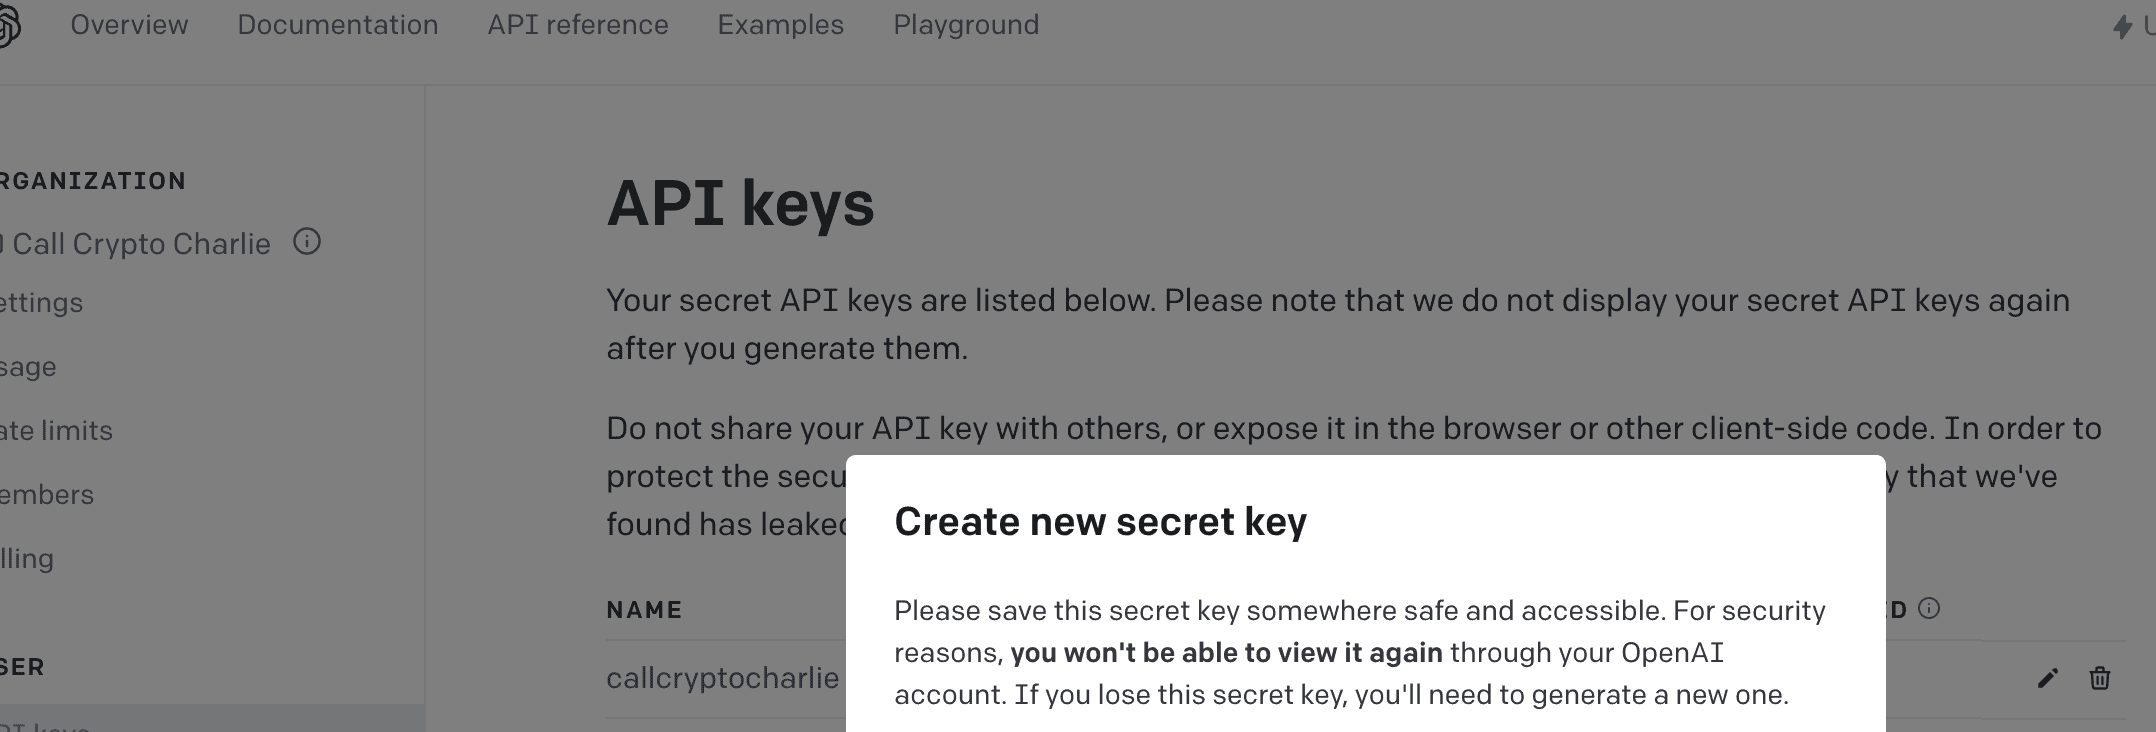
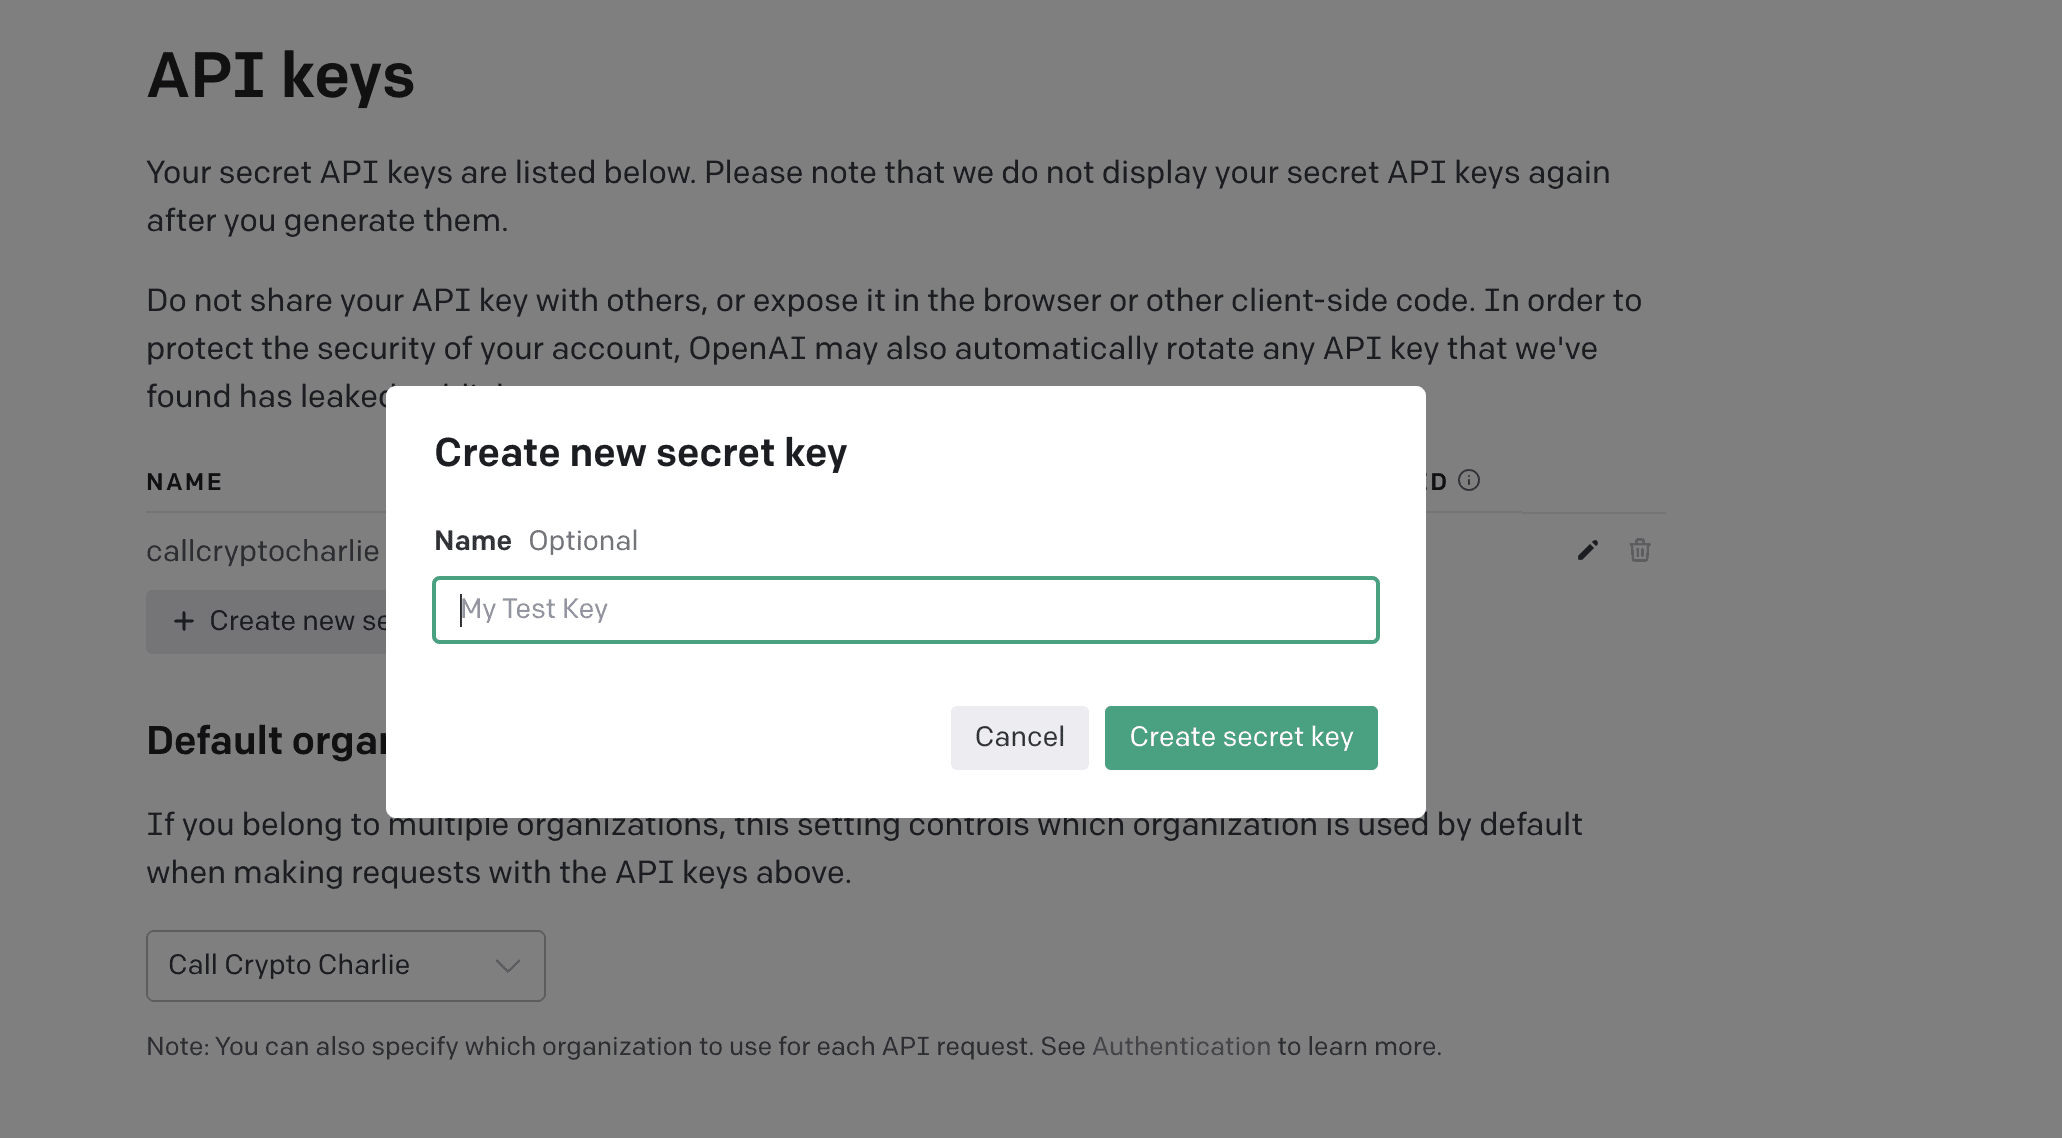
Head over to OpenAI and look for API keys. Create an OpenAI account if you already haven’t, and create a new “secret key” to use for connecting your Python app to ChatGPT’s capabilities. You need to create a secret key and copy it. We will use this copied information later.
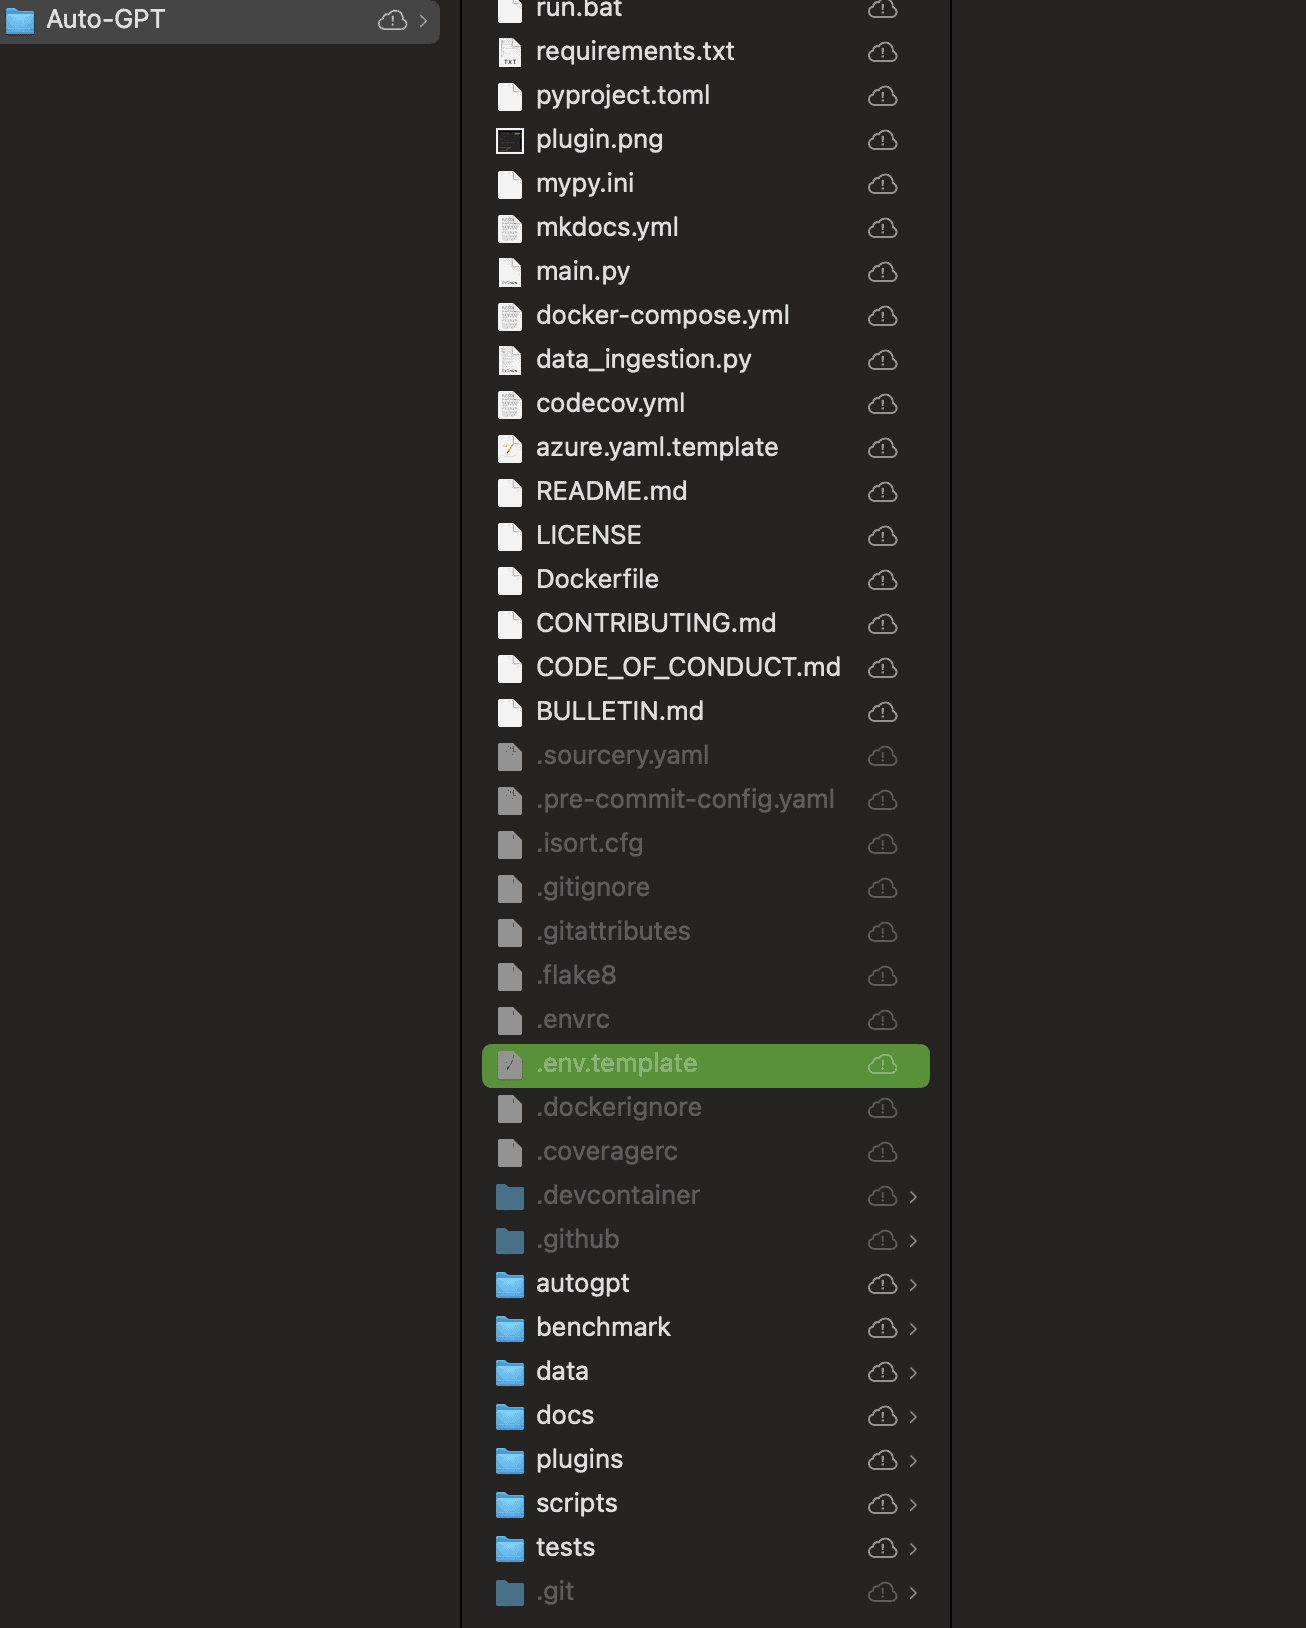
Now head over to the code editor — VSCode in our case. Locate the entity termed env.template and rename it as .env.
Did you know: In case you cannot find the .env.template, click on the Auto-GPT folder on your Mac and hit “Command + Shift + .” to expose the hidden files. This is a standard MacBook trick to help you uncover hidden files.
Now circle back to the VSCode interface, open the .env entity (post finding and renaming it), and look for a section that says OPENAI_API_KEY. Simply paste the copied stuff from OpenAI and exit the .env section.

Step 6: Configure Auto-GPT (very important)
Here is a screenshot of the terminal post activating Auto-GPT.
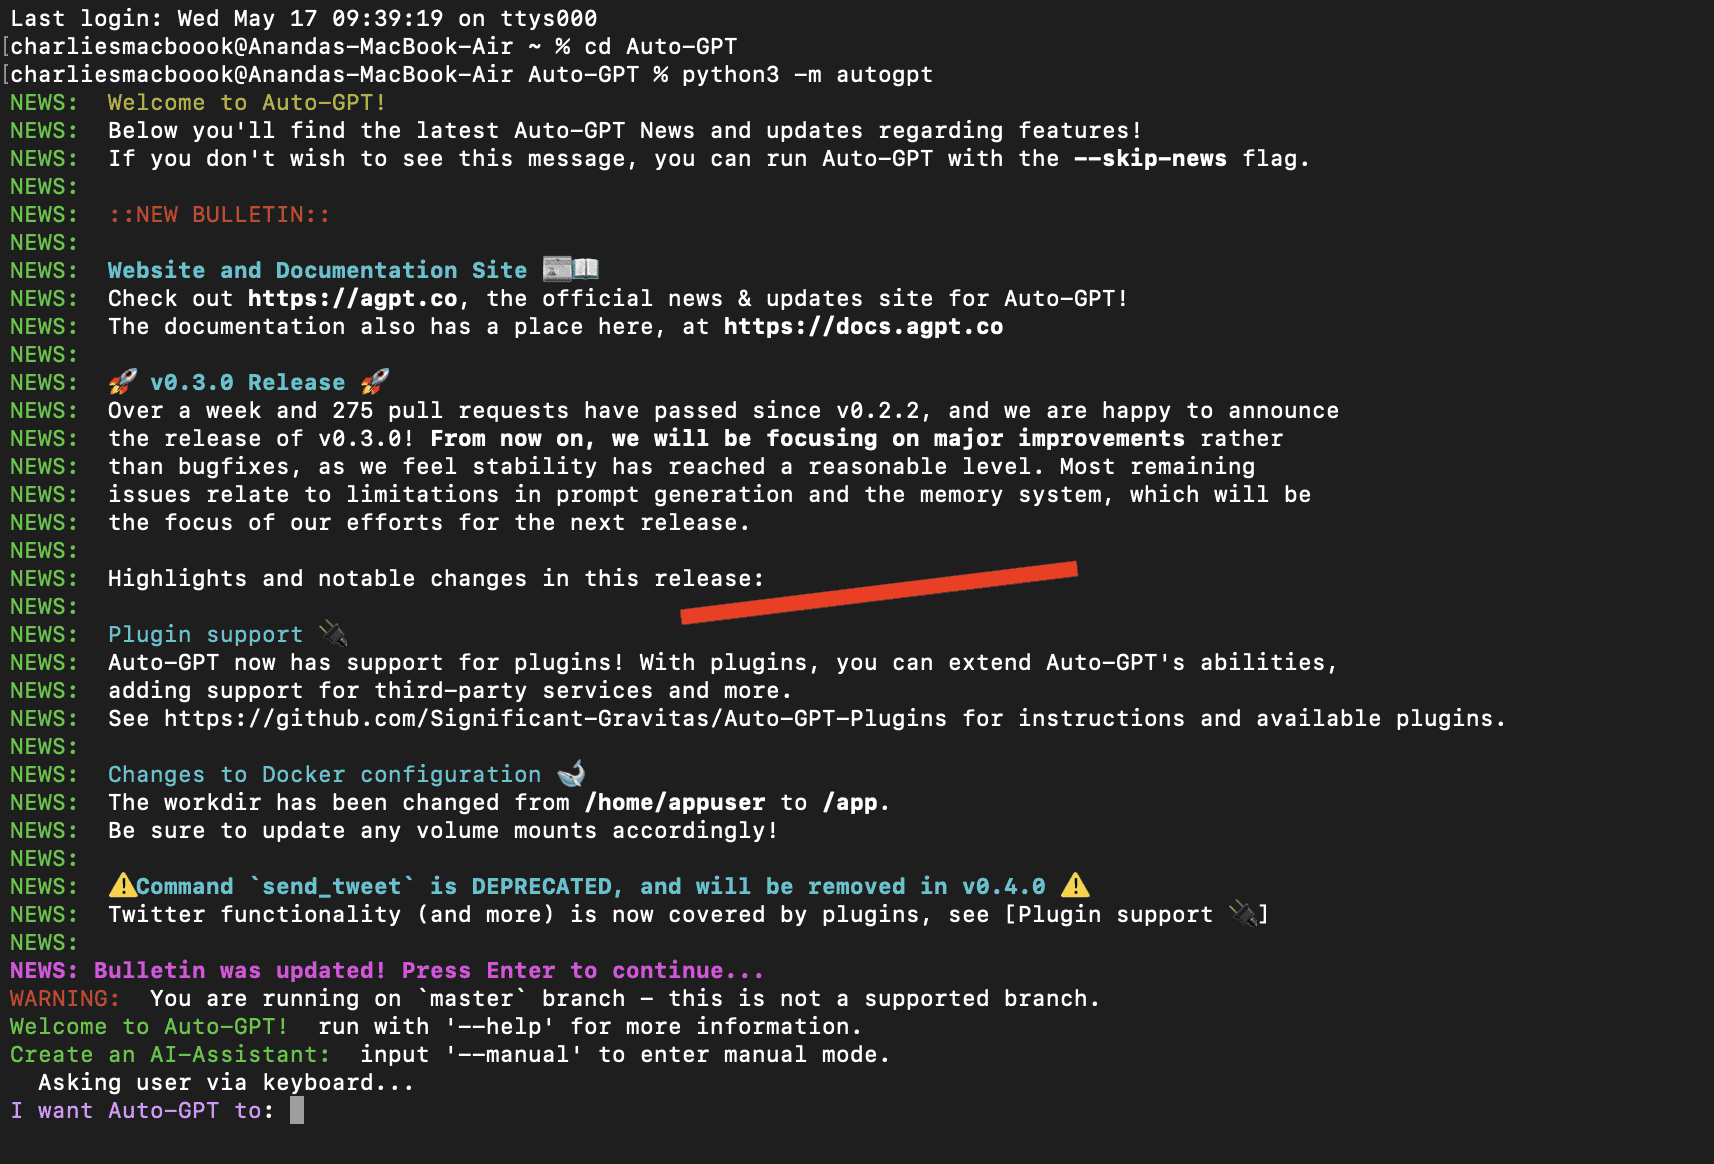
You will get an instruction asking: I want Auto-GPT to:
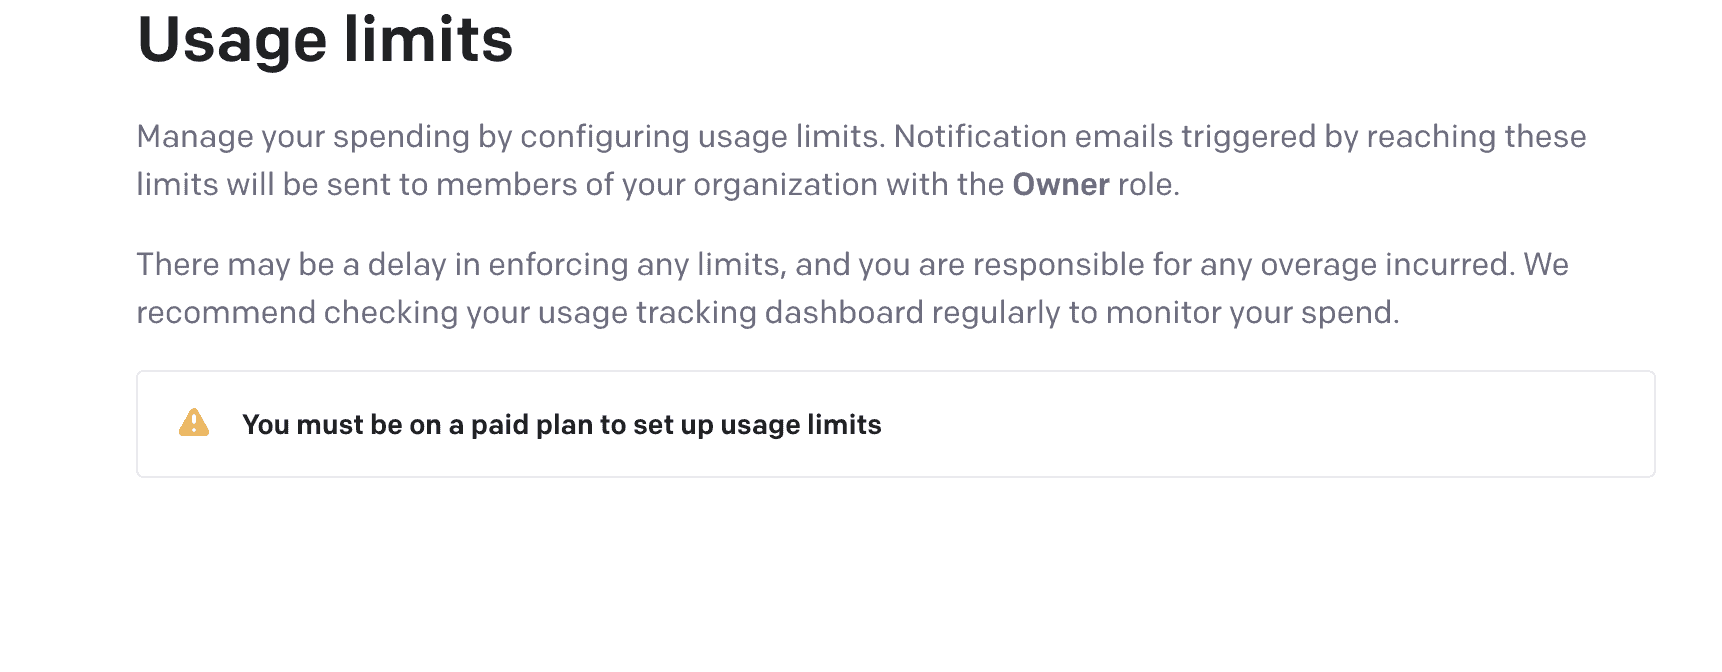
You need to use this instruction and see if you have a paid API subscription or not. Using the free plan also requires you to have a paid subscription.

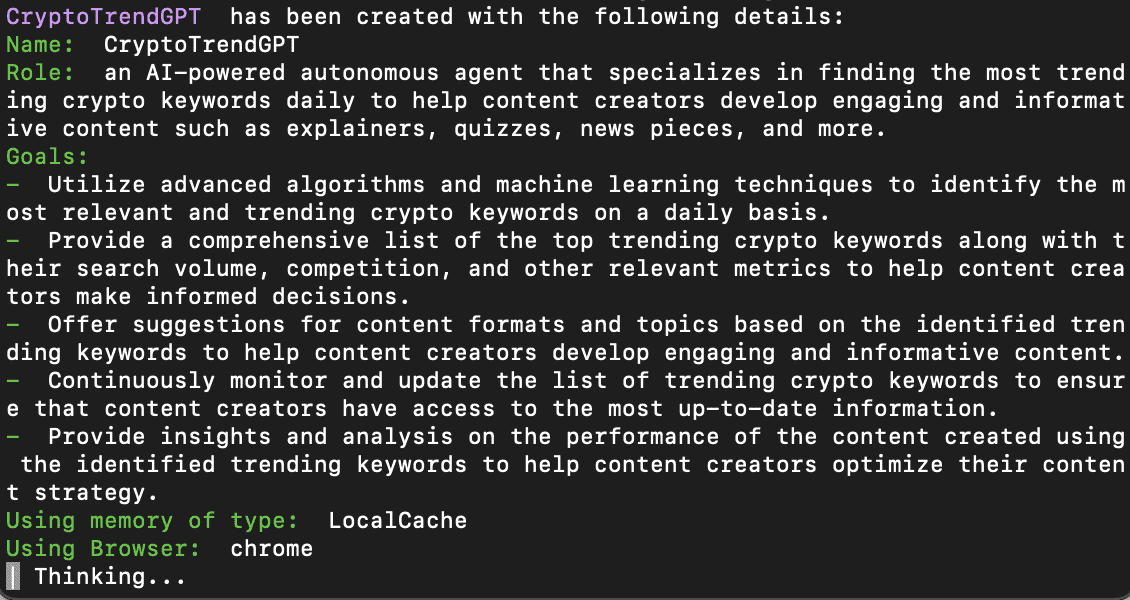
Here is what we would be using our Auto-GPT app for:
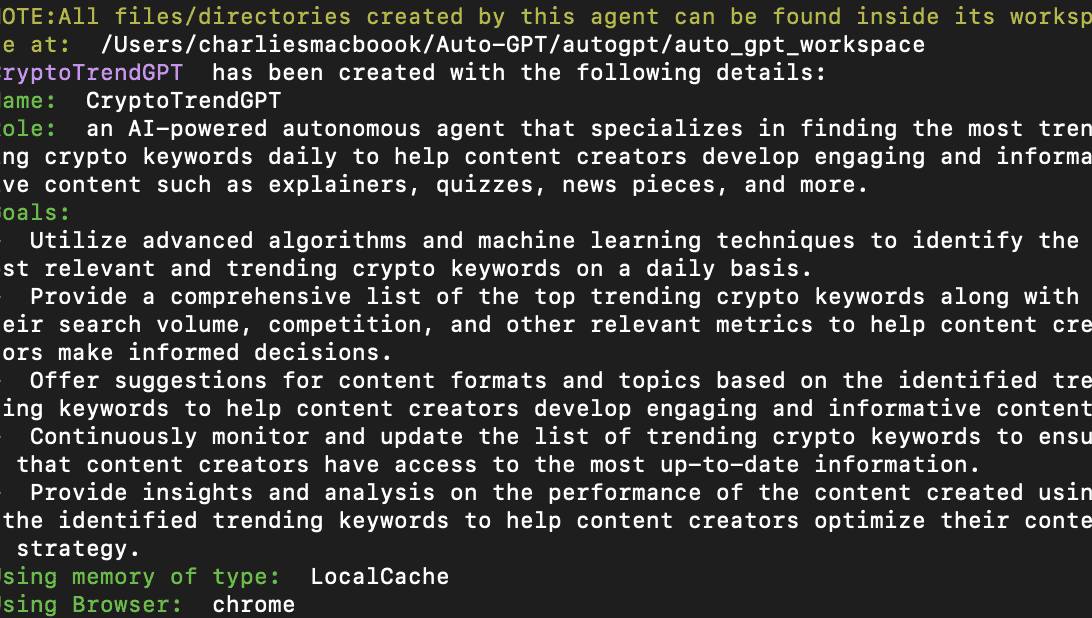
It is named CryptoTrendGPT with the following Role and Goals. Do note that the Goals have been picked up automatically based on our Role-based instruction.
Here is how CryptoTrendGPT is picking up topics and inching toward task completion.
Here are some other interesting applications that people have been developing using Auto-GPT, Python, and more:
Is Pinecone necessary?
You may have seen some descriptive tutorials talking about Pinecone APIs — APIs from a vector database that can lend long-term memory to Auto-GPT. Yet, heading over to Pinecone to create APIs to empower AI agents like Auto-GPT is only necessary if you plan on deploying AI models to build commercial-grade products.
For anything else, like personal use, you can proceed without Pinecone.
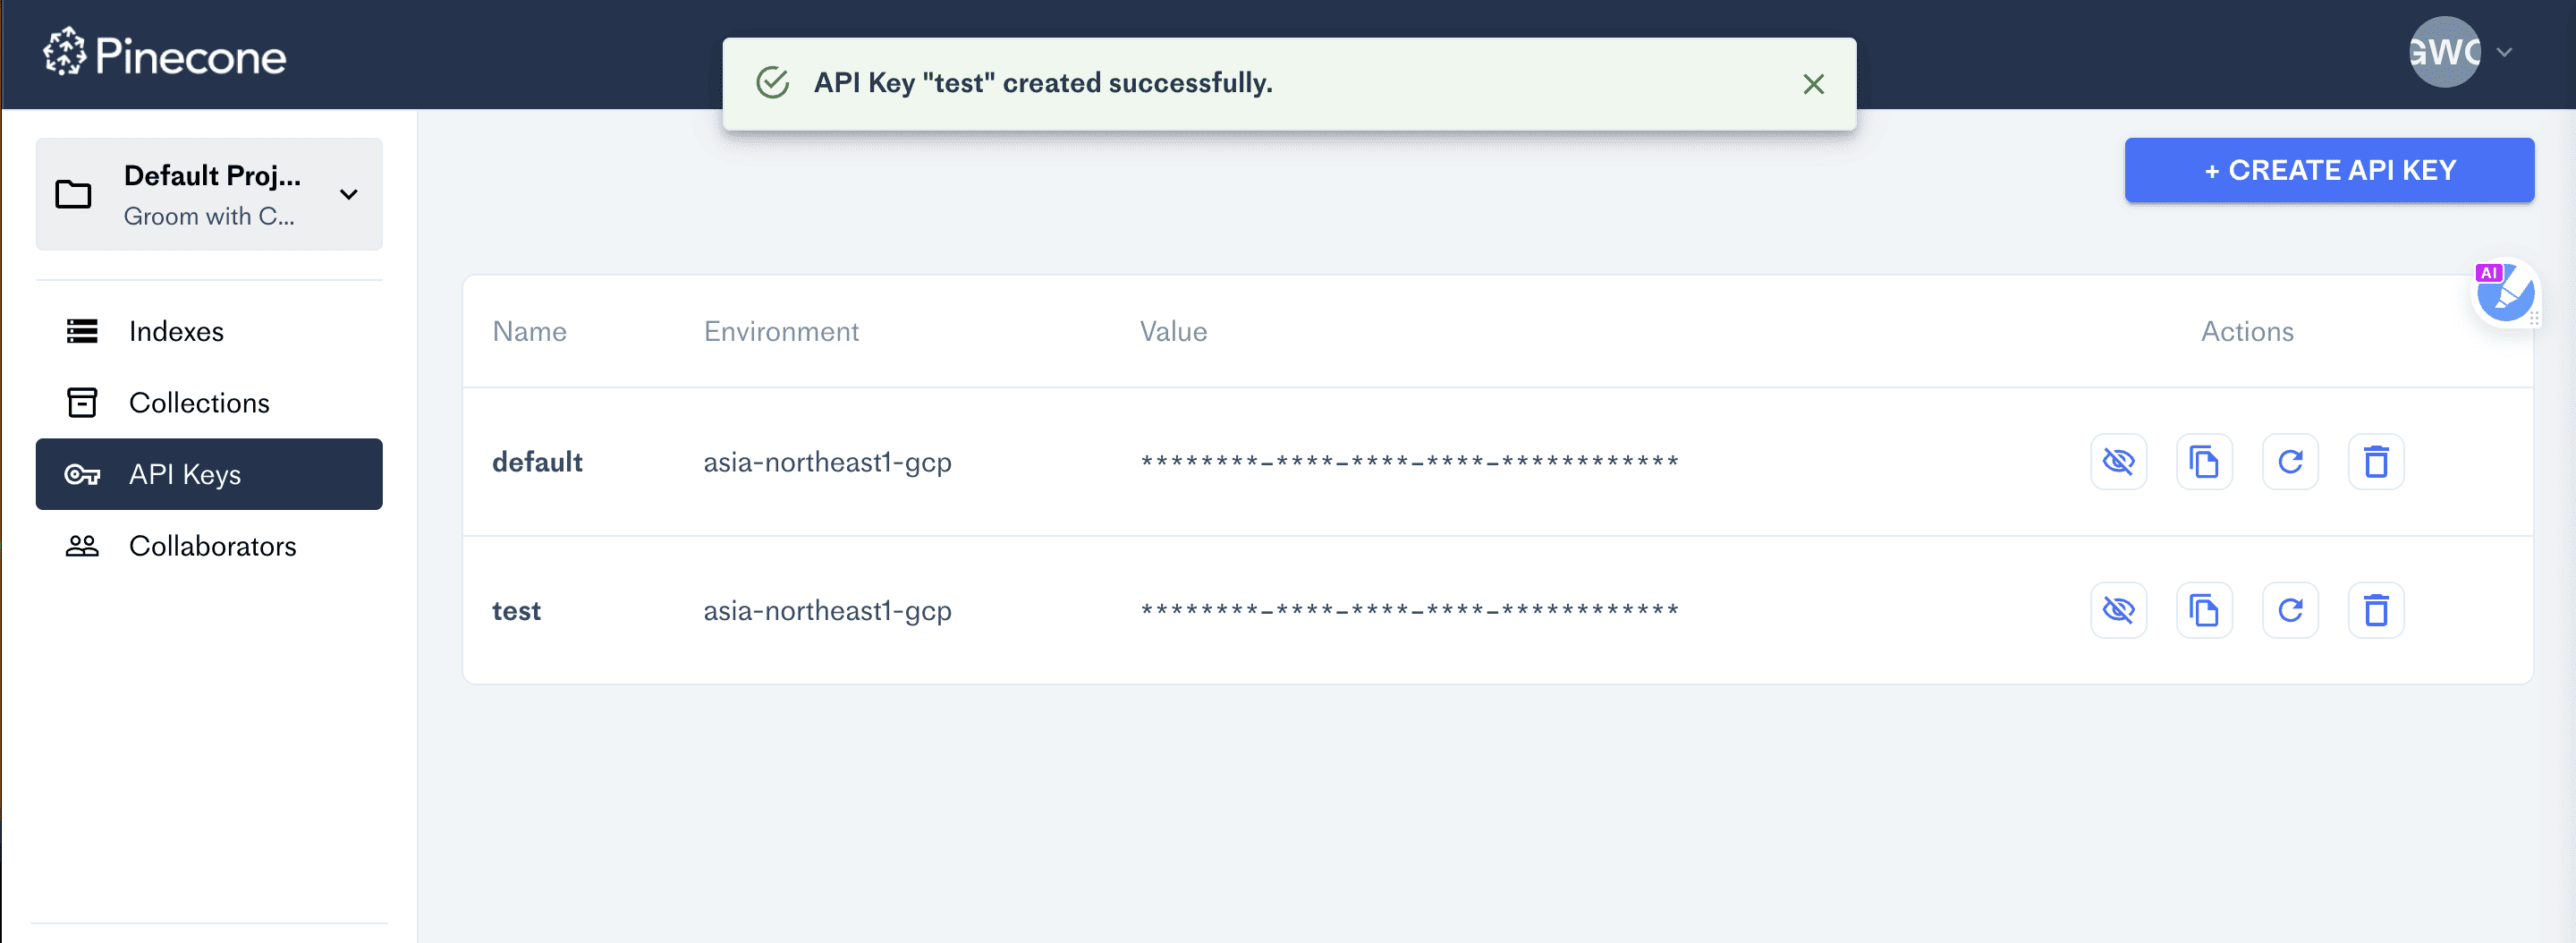
However, to use the tech, you can head to Pinecone, choose the right plan per your needs, and generate the API key. This feels more like the secret key you generated using the OpenAI API dashboard.
Once you have the Pinecone key, you need to open the .env entity using the VSCode editor and replace the blank Pinecone API field with the key value. You also need to change the “Environment” per the data on the Pinecone dashboard. Do note that you need to save the .env file before exiting or trying to restart the Auto-GPT work mode via the terminal or CLI.

Step 7: Run Auto-GPT
Do note that once you run Auto-GPT, the program will ask for user authorization. While you can press y to authorize each action or set y -n (n being the number of self-executing instances), it depends entirely on you.
As we run the CryptoTrendGPT in continuous mode, it keeps on self-executing commands to the best of its abilities to create a recursive flow that can handle the requirements without human intervention. However, you should be careful while selecting the Continous mode while using Auto-GPT.
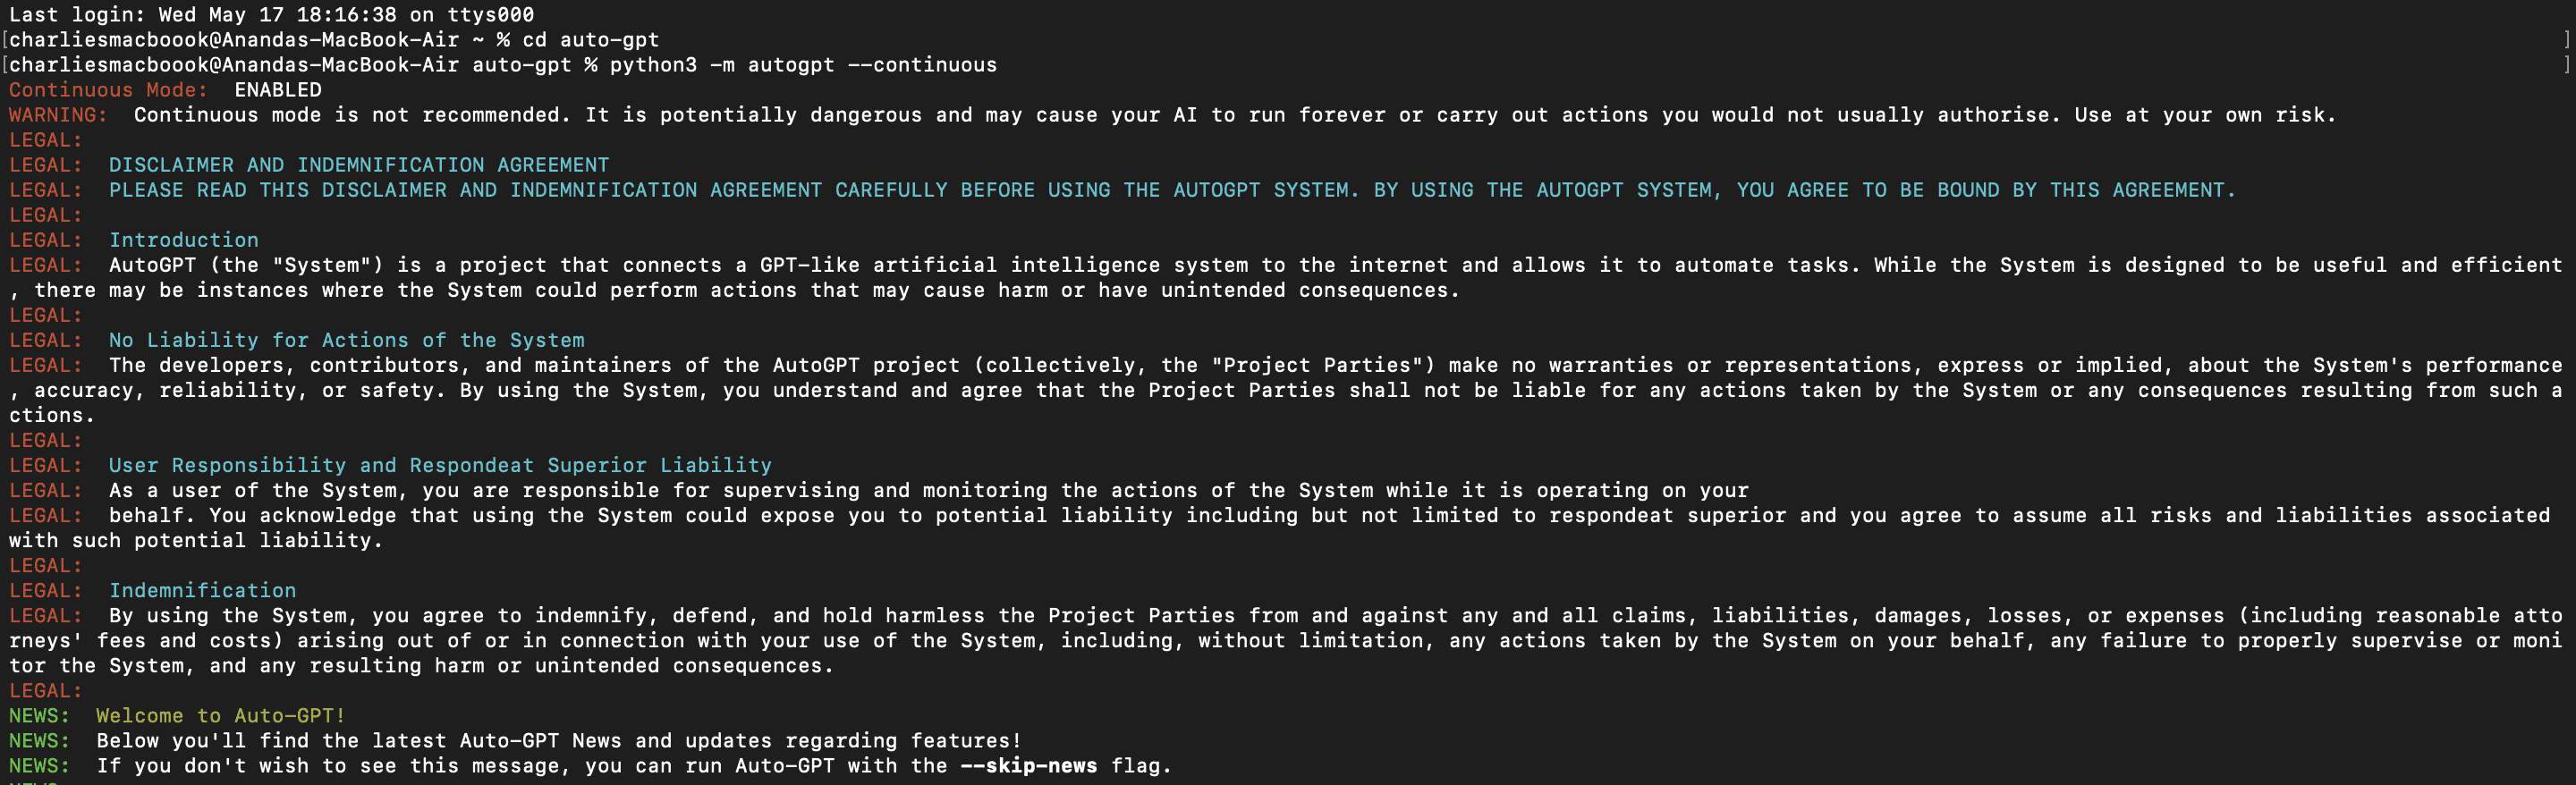
Auto-GPT will keep running till it is satisfied that the goal has been completed. Every resource accessed, procured, and curated will be available in the “Workspace” folder within the Auto-GPT directory already on your Mac.
Here is the type-in instruction for the continuous mode:
Also, you can interact with Auto-GPT via audio if you choose to type in the following command:

Step 8: Run Auto-GPT with plugins
Now that ChatGPT has officially rolled out the plugins to enhance the capabilities of its large language model, the same can be used with Auto-GPT as well.
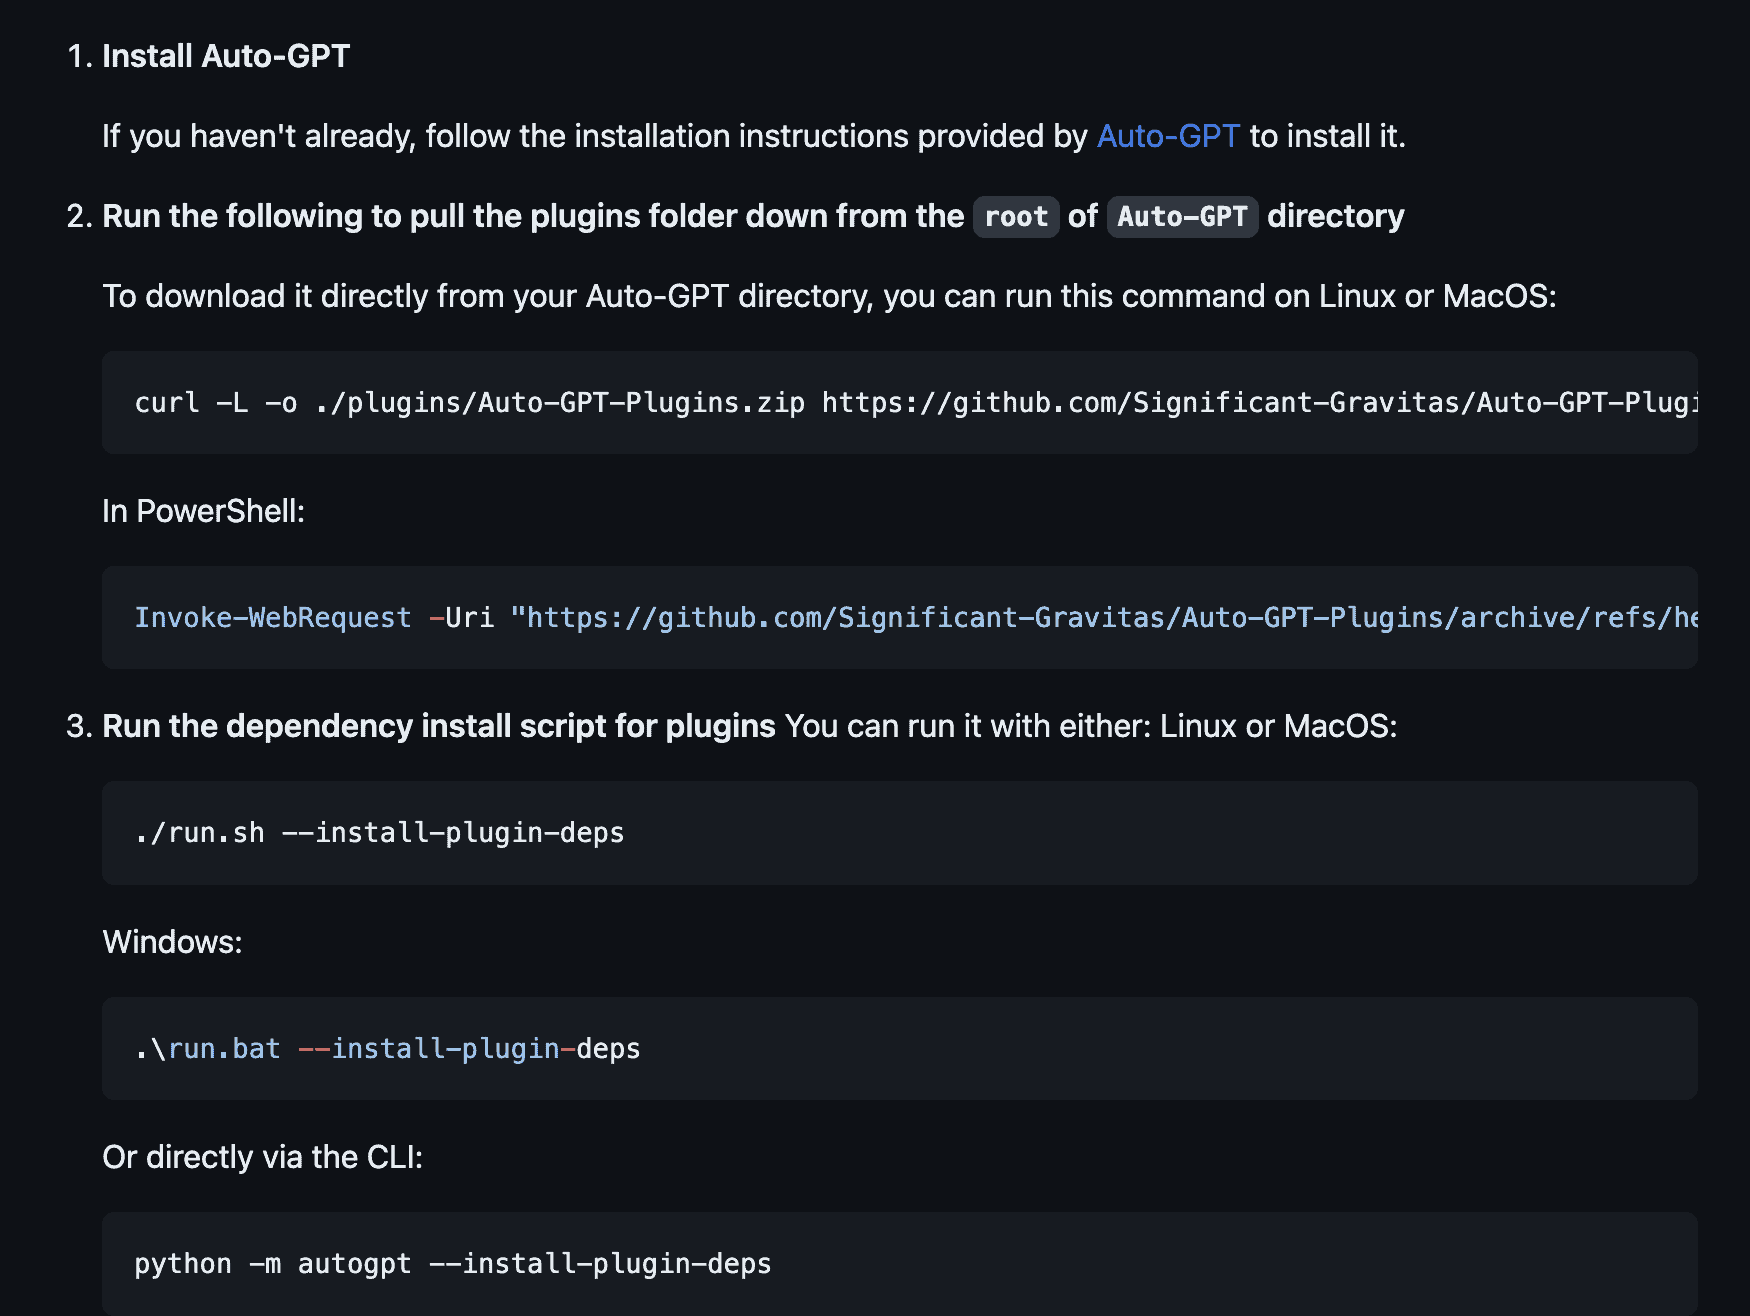
Head over to the following Plugin repo.
Here is how you can directly download the same onto your Mac. Simply type in the following command in the CLI or Terminal:
curl -L -o ./plugins/Auto-GPT-Plugins.zip https://github.com/Significant-Gravitas/Auto-GPT-Plugins/archive/refs/heads/master.zip
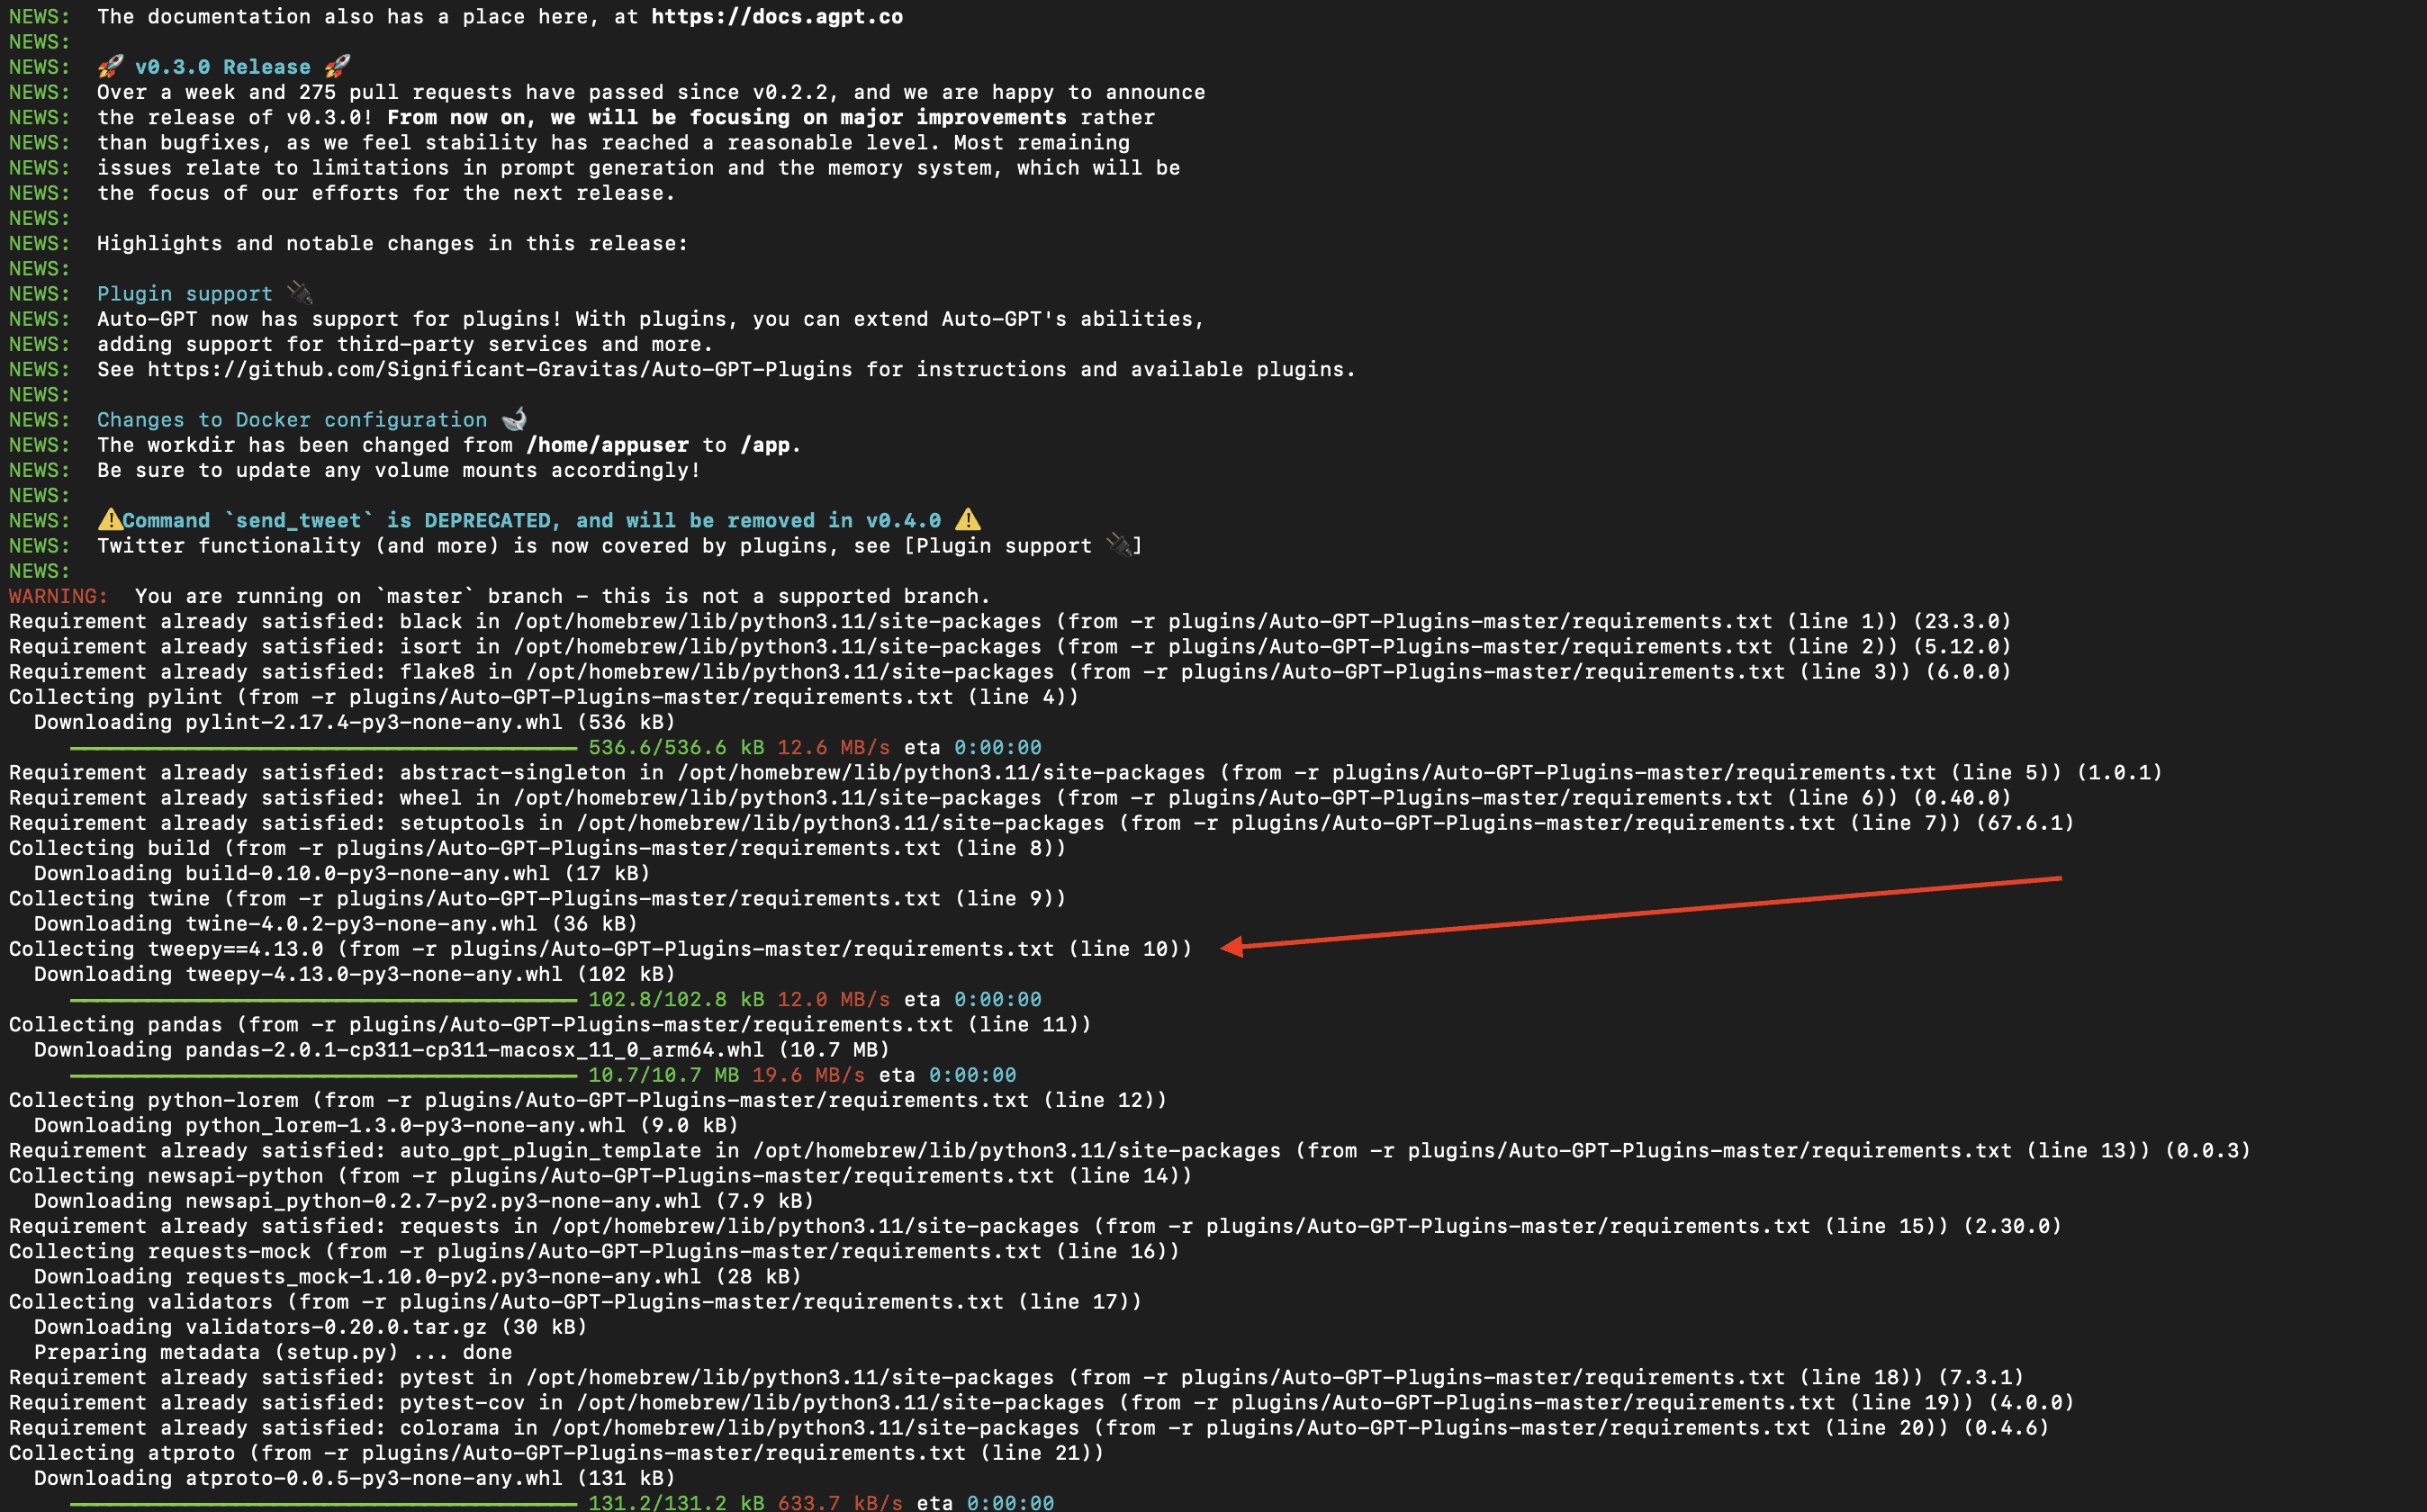
Authorize the usage by hitting either Y or N. You can choose the plugin that you can empower Auto-GPT with. Also, if you want to add something like a Twitter-scanning plugin, you need to input the Twitter credentials by heading over to the .env element of the Auto-GPT directory.

The same can be accessed within the VSCode, like before.
Also, if you want the plugin experience to be interactionless, you can simply head over to the .env part of the Auto-GPT directory and allow for the same:
How to install Auto-GPT without the elaborate Python-specific setup?
If you do not want to go through the process of using the CLI, terminal, Python virtual environment, .env tweaks, and more — there are still a couple of ways to use Auto-GPT.
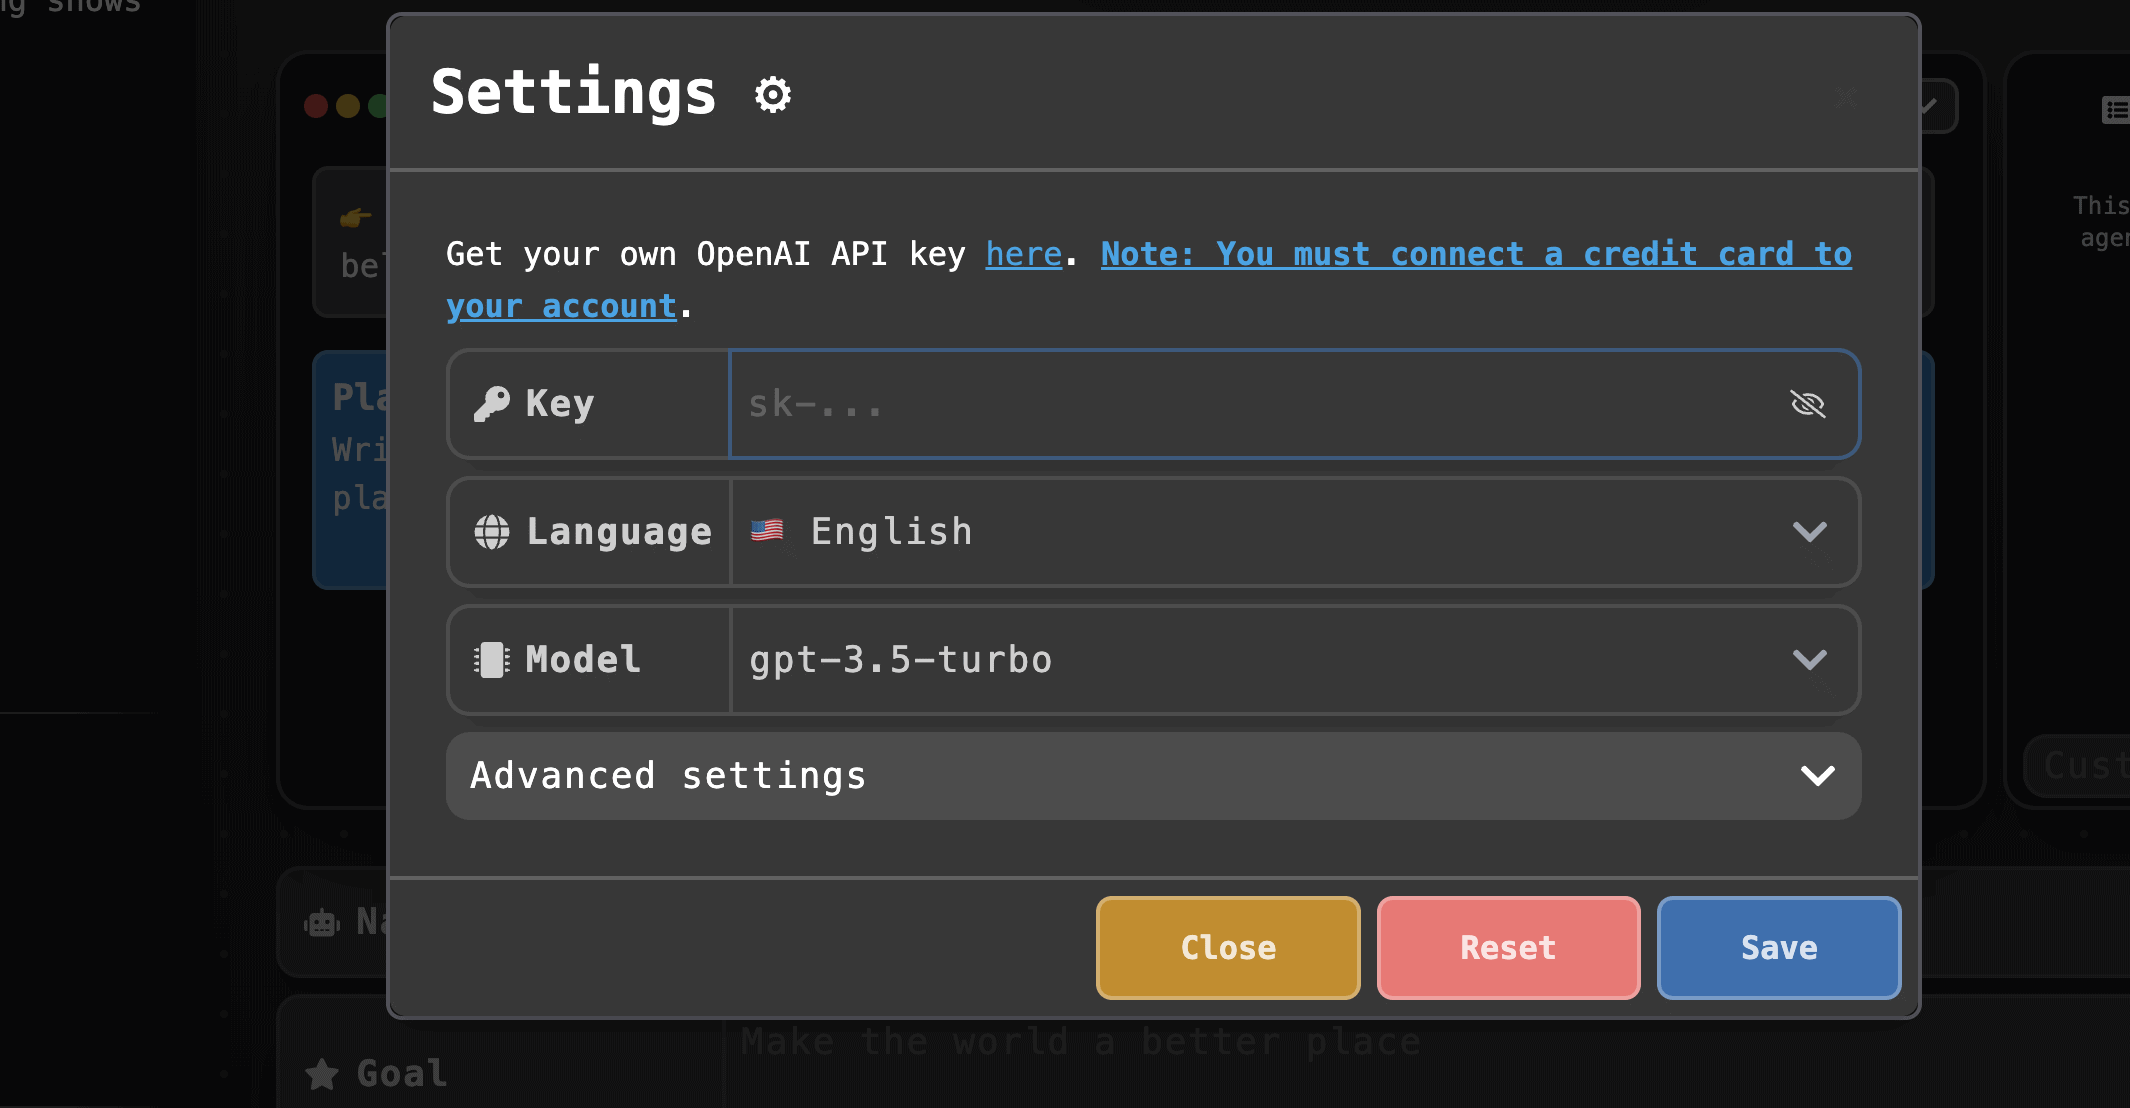
AgentGPT
Some AI agents, like the AgentGPT with an Auto-GPT backend, can help you deploy and automate tasks in a similar way to the artificial general intelligence of AGI. To use AgentGPT, you simply need to head over to the official website and sign in.
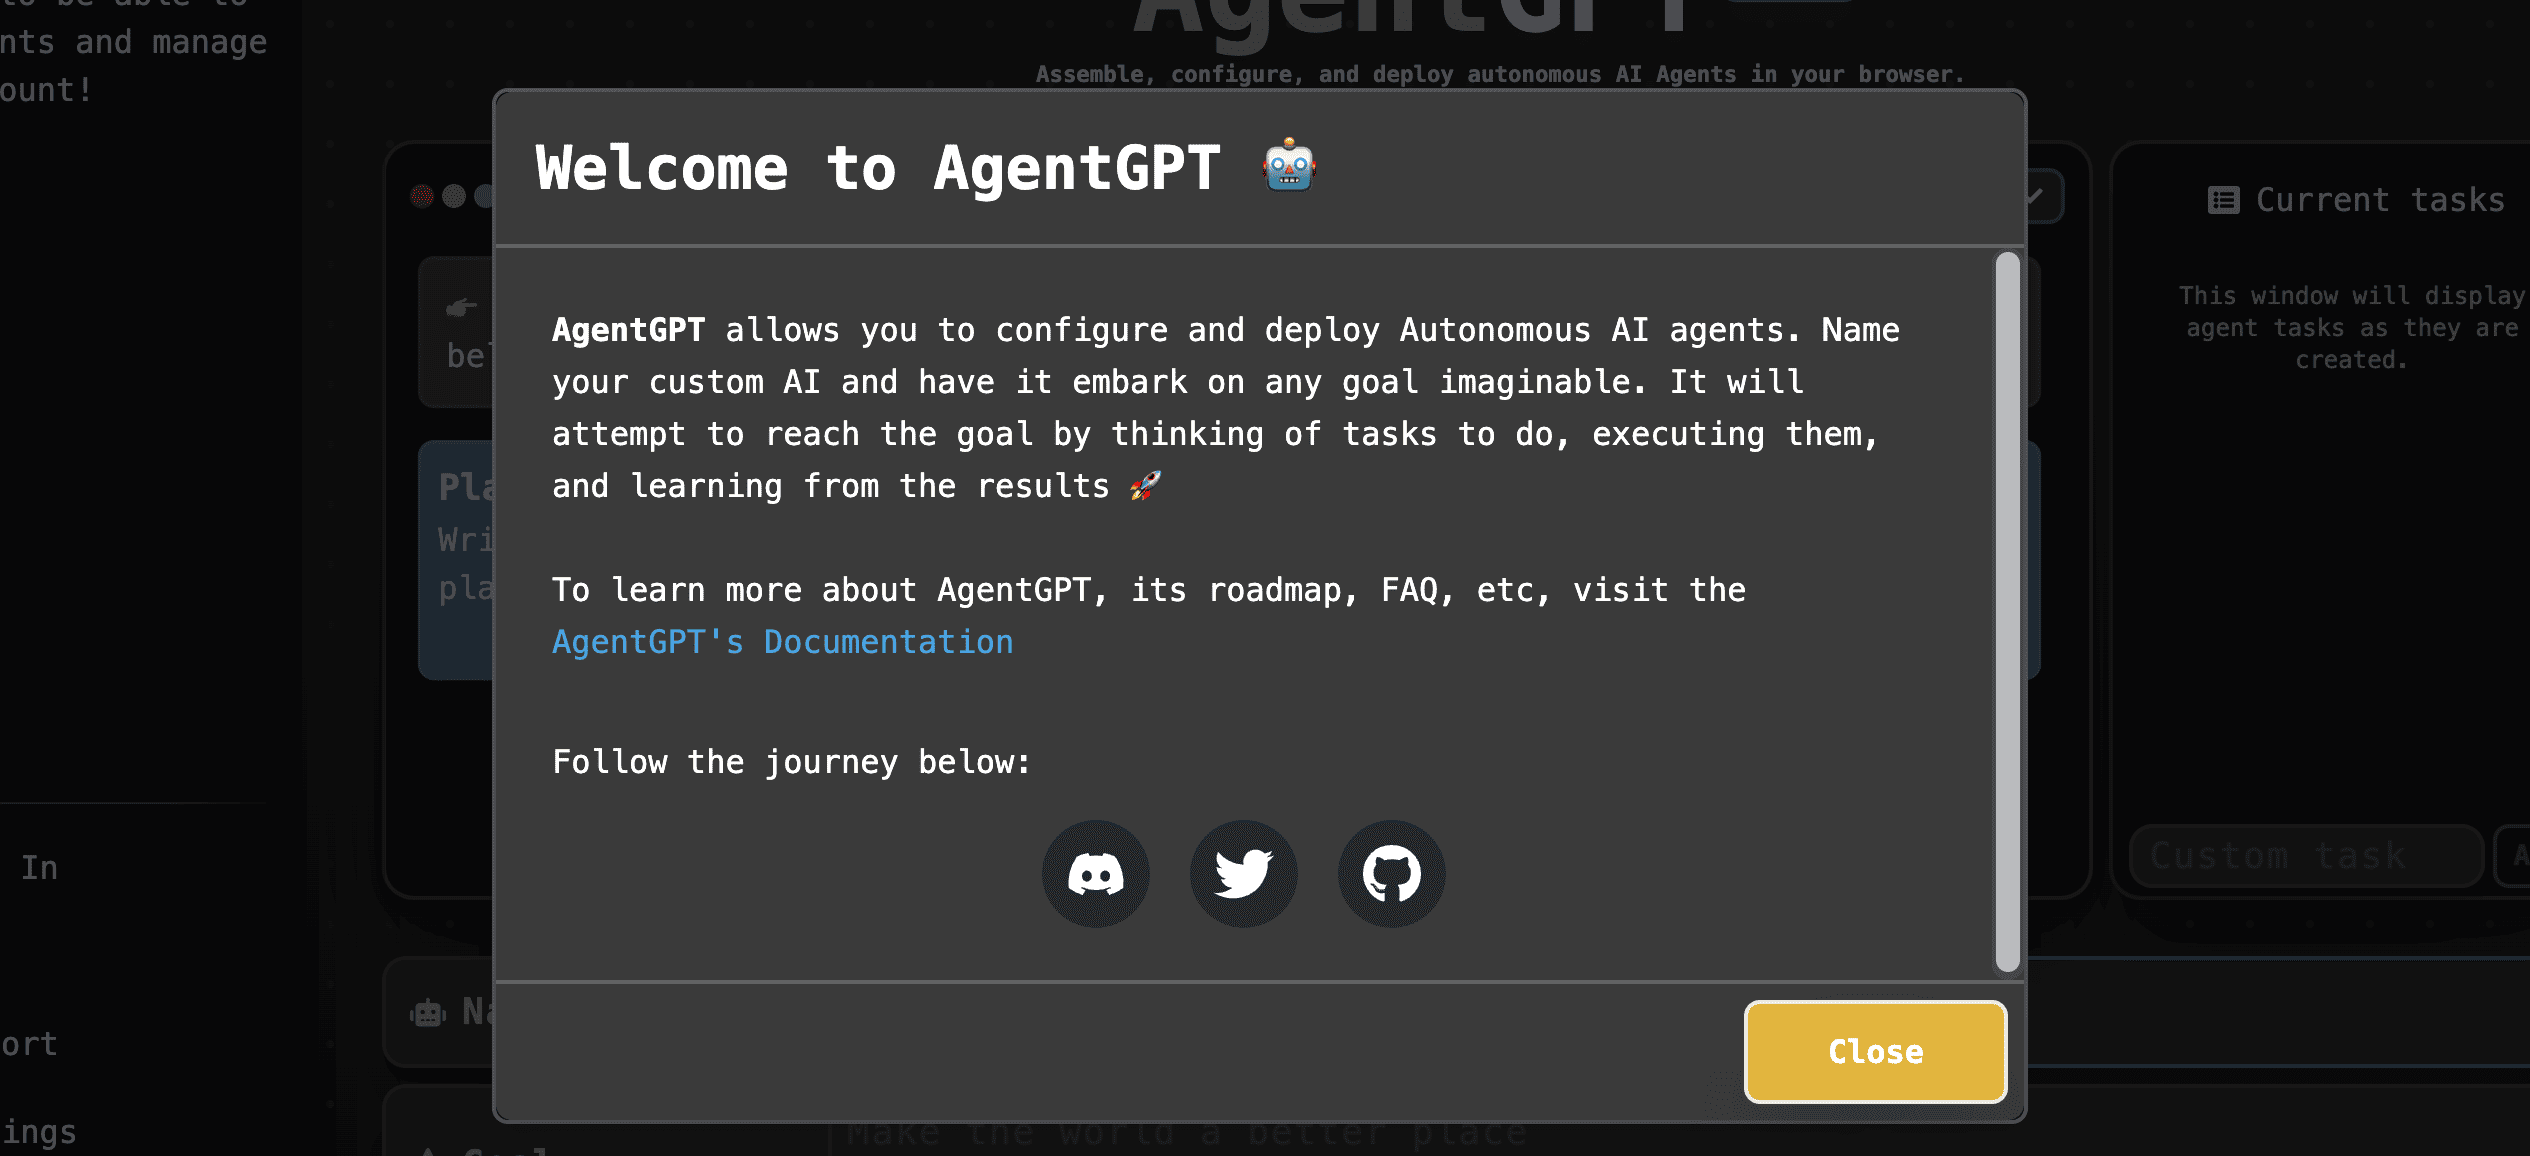
You still need to use your GPT-3/GPT-3.5/GPT-4 secret key, set the number of tokens you want to assign and pay for the API services using the OpenAI account. However, this is one of the few AI models, or rather AI agents, that can be deployed from the browser and doesn’t need local installation.
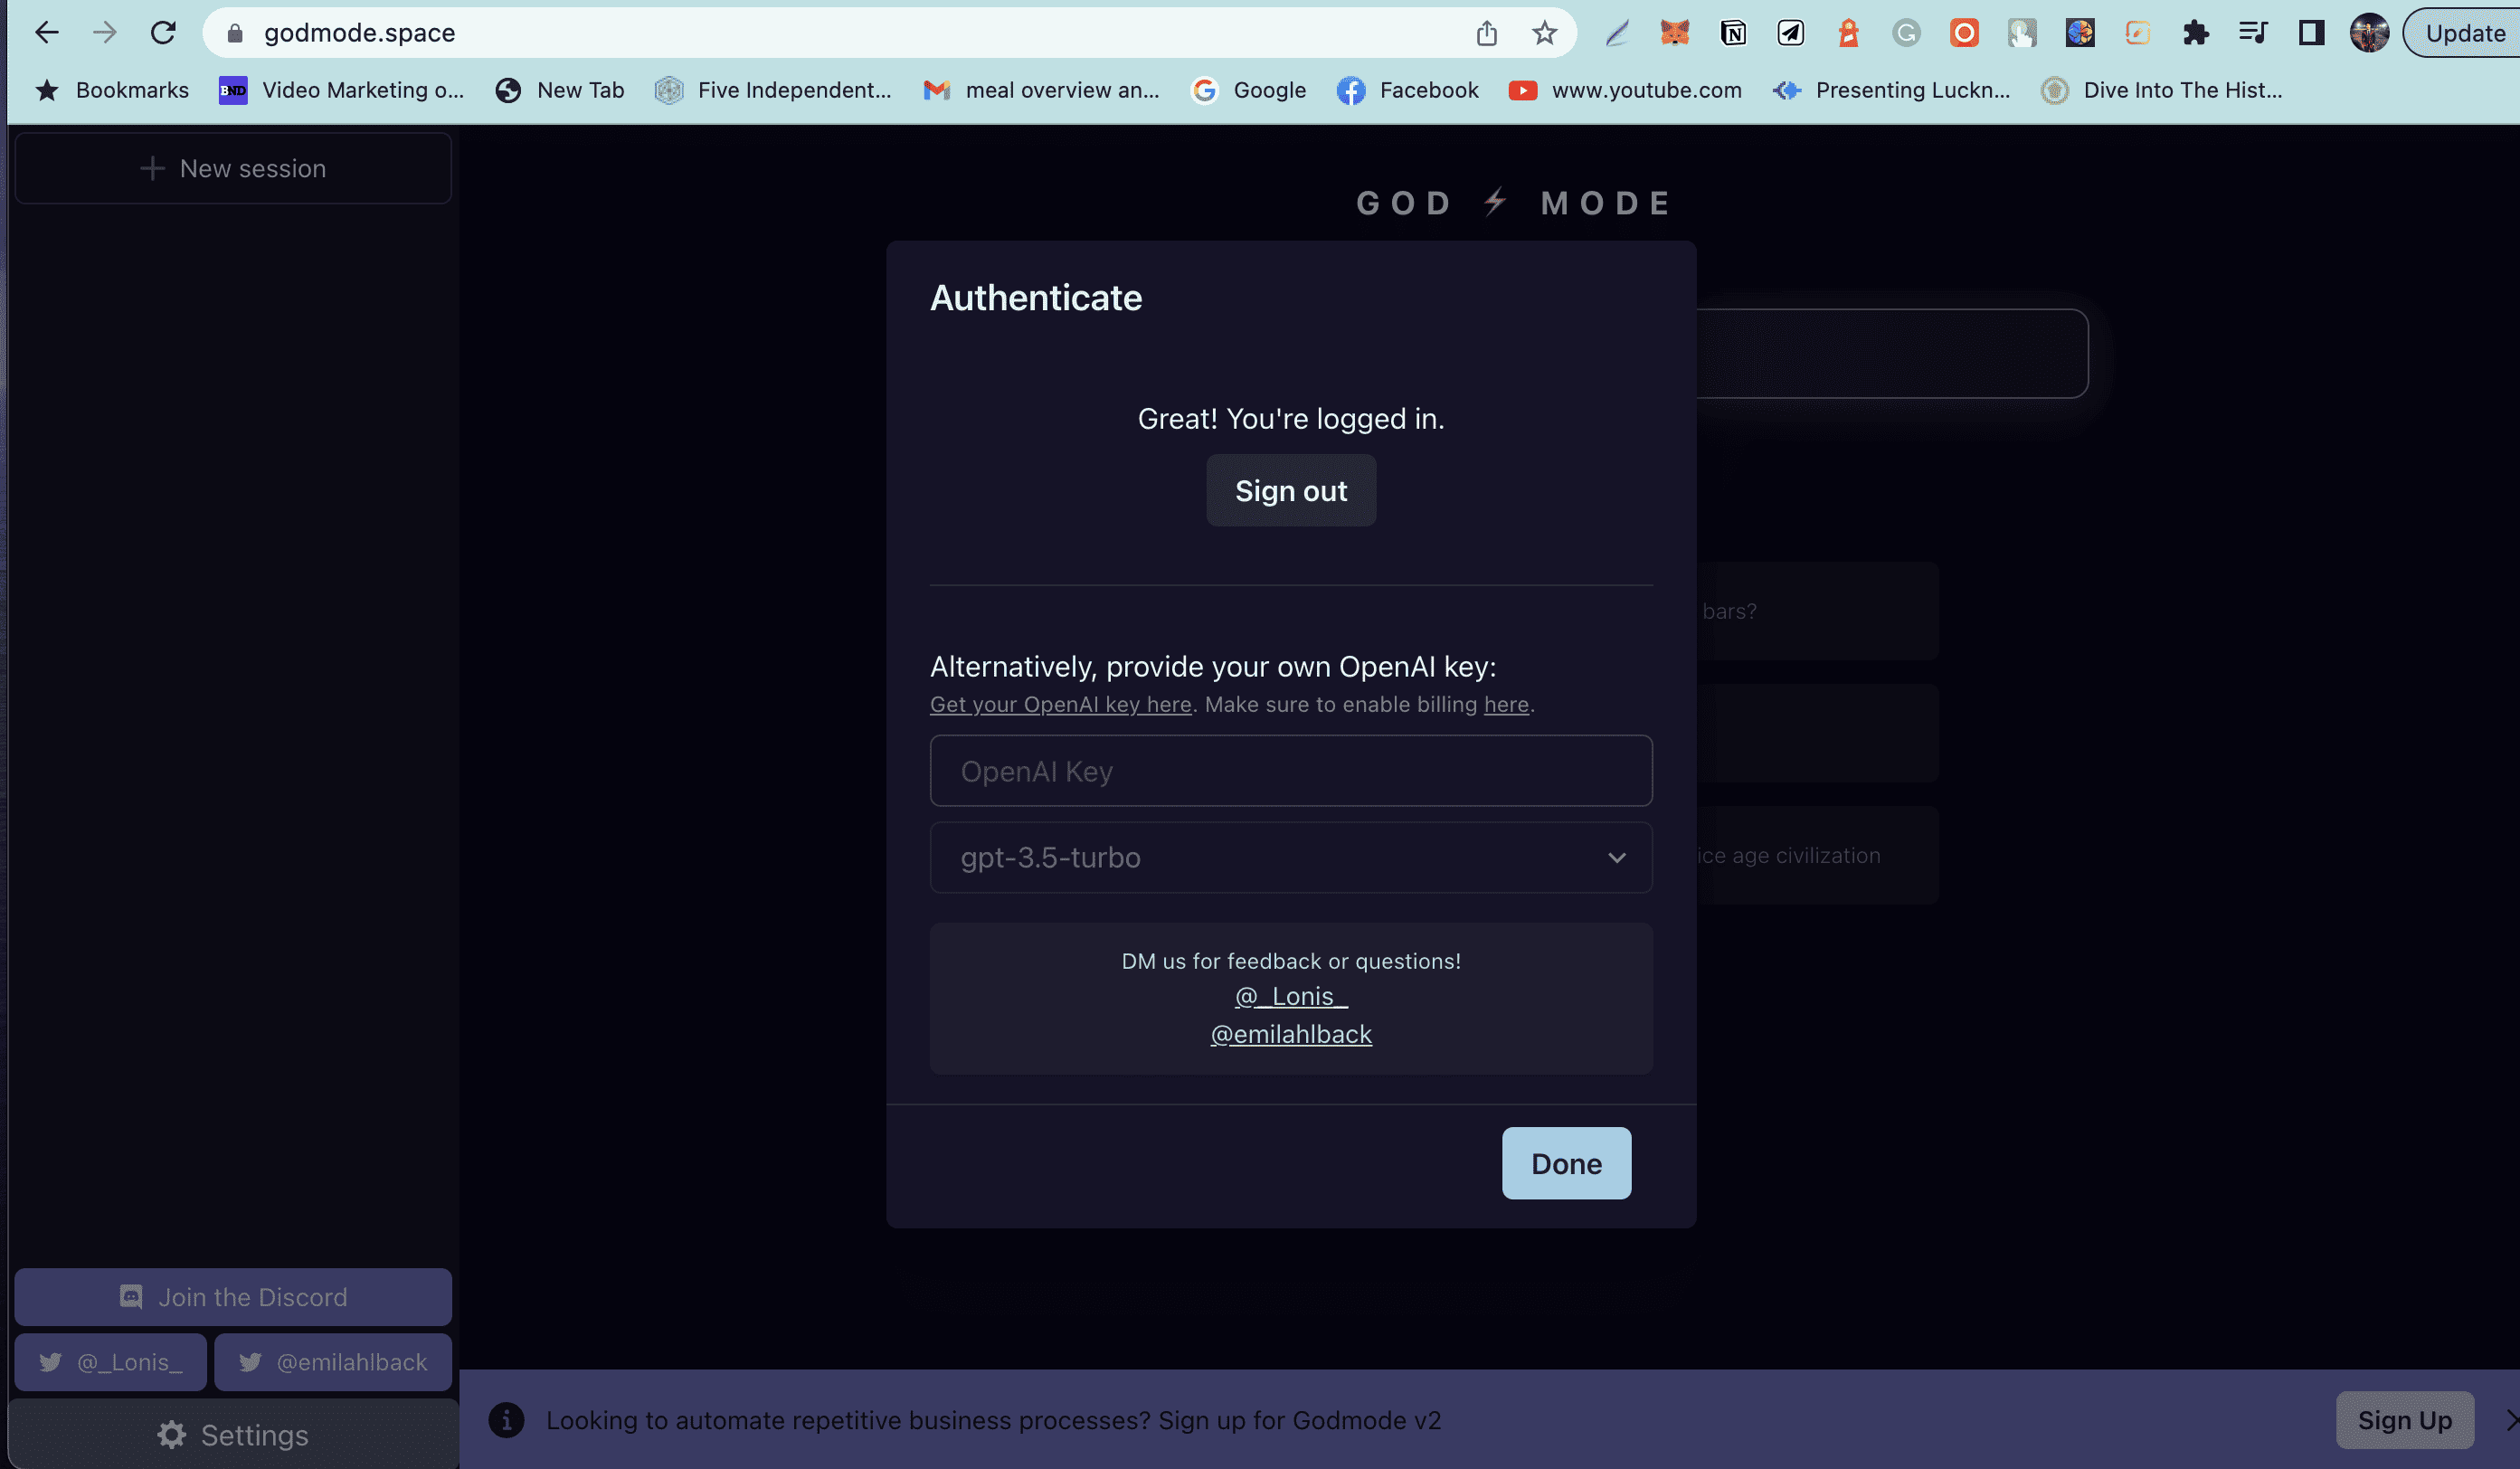
Godmode
Another AI agent is the Godmode.space, with a simplistic UI. You still need to use the chatGPT OpenAI APIs and the billing details to get this agent to work. However, this does not require setting up a Python directory, virtual environment, or anything else via the command-line interface or code editors like VSCode.
Is Auto-GPT an AI game changer?
Learning how to install Auto-GPT may seem a little complex at first. But, as long as you carefully follow the steps above, you should have no problem using this game-changing tool. With Auto-GPT, a new wave of innovation has arrived in the world of AI and machine learning.
With questions and answers flowing in a recursive loop, the future of the input prompt seems less decisive than ever. Right now, the output response associated with Auto-GPT might feel a bit generic, but the open-source autonomous AI tool is certainly on the right track.


