Stable Diffusion, the star of the AI-generated imagery world, is like a digital paintbrush that can transform pixels into artistry. However, unlike most other popular AI art generators, Stable Diffusion is somewhat trickier to use. It is not officially available as an app on your app store, nor can you access it by simply logging into a website. Instead, you must download and run the model locally on your computer. To help you with that, we have prepared this detailed guide explaining how to install Stable Diffusion regardless of your technological skill level.
Try Simple-to-use AI Image Generators Online
ChainGPT NFT Generator

Wombot AI Image Generator
Picsart AI Image Generator

What do you need to run Stable Diffusion on your PC?
Let’s start by highlighting the system requirements for running Stable Diffusion on your Windows machine. First off, you’ll need either Windows 10 or 11.
Next, you’ll need an NVIDIA graphics card, preferably with 4GB or more of VRAM. But don’t fret if you don’t have a compatible graphics card! You can still use the “Use CPU” setting. The performance with a CPU will not be as smooth as that with a compatible GPU, but it is a working solution nonetheless.
SponsoredMoving on, you’ll need 8GB of RAM — of course, the higher, the better. And finally, you’ll need at least 20GB of free disk space. Think of this as the backstage area to store all the tools for StableDiffusion to operate locally.
Hardware requirements for Stable Diffusion (Windows):
- Windows 10 or higher (32-bit or 64-bit)
- NVIDIA graphics card with 4GB VRAM (not mandatory)
- 8GB of RAM
- 20GB of free storage
These are just the hardware and OS requirement, though. We will discuss the other requirements as we delve deeper into the “how-to” part.
How to install Stable Diffusion locally on your computer: a step-by-step guide
Step 1: Install Python
Let’s kick off the Stable Diffusion installation by getting Python 3.10.6 (or higher) up and running on your Windows machine.
You can download the 64-bit Windows installer from the download section of the official Python website. Once the installer is downloaded, pop it open to get the ball rolling.
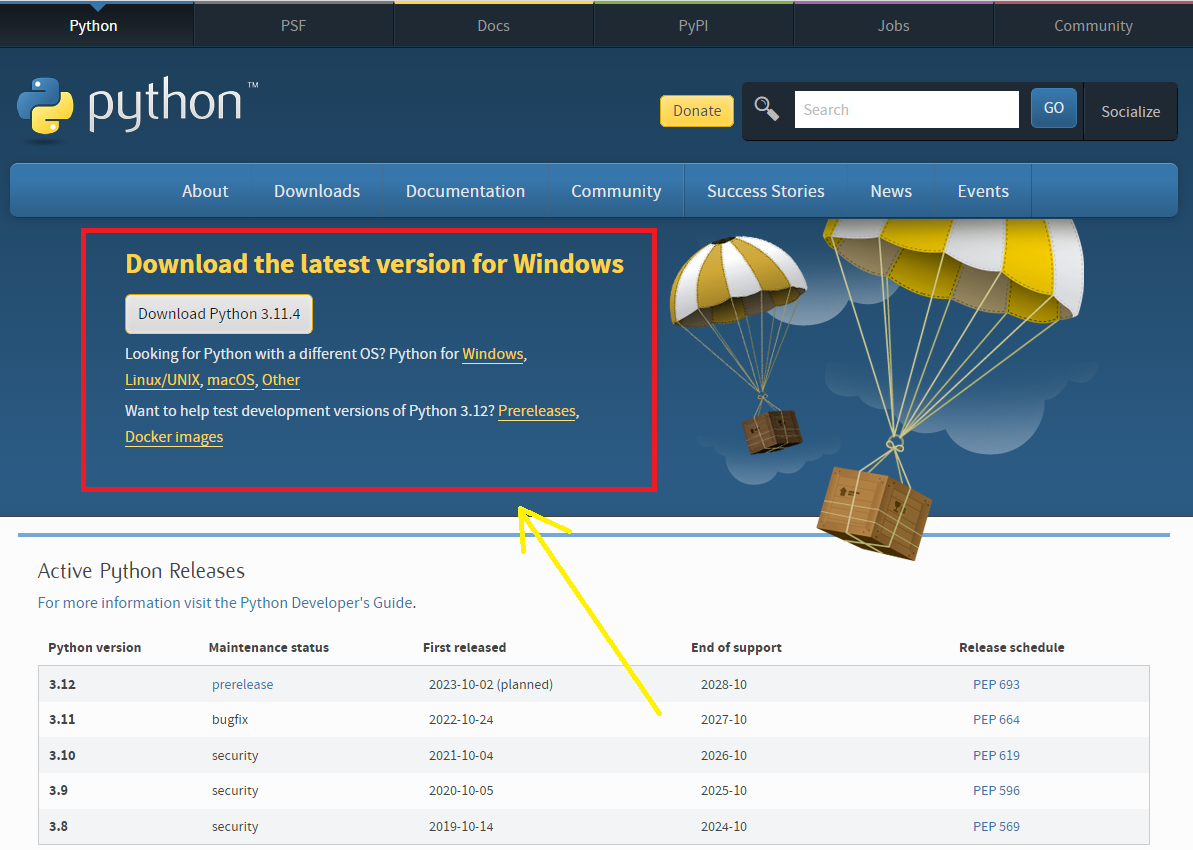
An important point: make sure to tick the box that says, “Add Python XX to PATH.” Replace “XX” with the version you are installing — remember, it must be 3.10 or above. This is like giving your system a map to Python, ensuring it knows exactly where to find it.
With that box checked, hit “Install Now.”
Step 2: Install Git
Next, you will download and install Git. Kick things off by navigating to the download section of the official Git website and downloading the Windows version of the software. You will see two options here, as shown in the image below — the standalone installer and the portable edition. For now, let’s stick to the standalone installer to keep things simple.
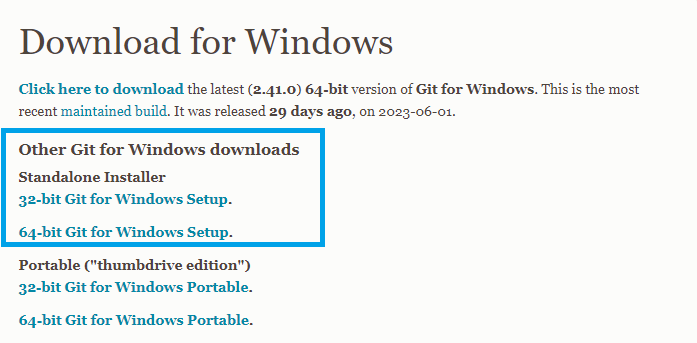
Once the Git installer is safely downloaded, open it and hit “Install.” From there, follow the breadcrumbs laid out by the installer to wrap up the installation process.
Step 3: Summon the command prompt interpreter
Start by finding the key on your keyboard that has the Windows logo. It’s usually nestled between the Ctrl and Alt keys. Now, press this Windows key and the ‘R’ key simultaneously. This will pop open a small window with a text field.
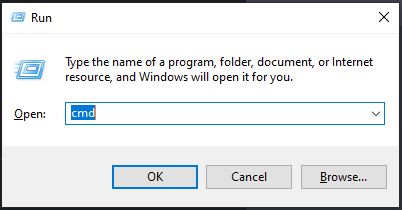
Type “cmd” here (without quotes) and hit Enter. You have summoned the command prompt app, and a new window looking something like this will appear (the default font color is white):
Sponsored Sponsored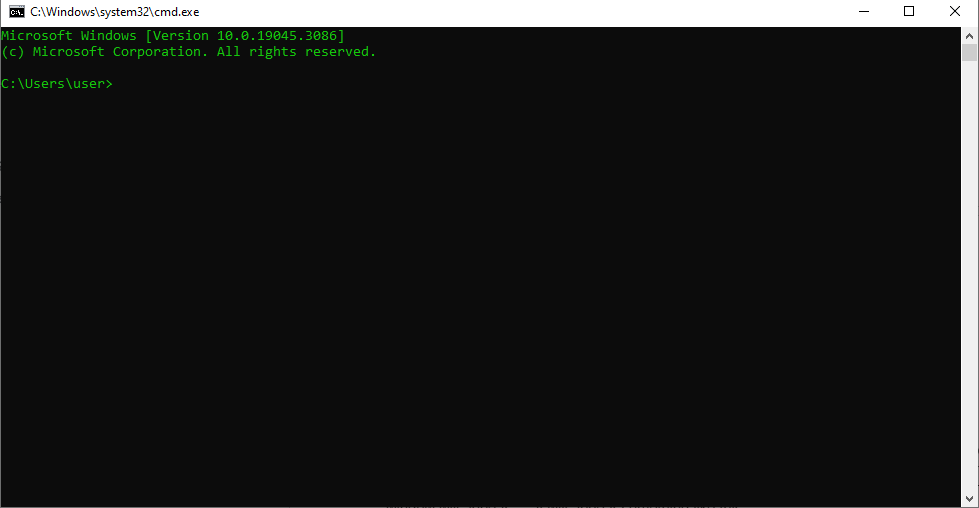
Step 4: Clone Web-UI
Now comes the (slightly) tricky part. You’ll need to flex your command prompt skills here. Don’t worry if you have never done this before; it’s relatively straightforward.
First up, let’s ensure you’re in your home folder. Type “cd %userprofile%” (without quotes) and hit Enter.
(Quick tip: You can just copy-paste the command from here into the command prompt window — no need to type it all out).
The command prompt should now display something like “C:\Users\YOUR_USER_NAME>”
Note that “YOUR_USER_NAME” is just a placeholder here. In reality, this will show the specific username for your computer account. For instance, if your username is “Maggie,” it will display as “C:\Users\Maggie>.” Now, in our case, we’ve gone with a username that’s a masterstroke of creativity — drumroll, please — “user.” So “C:\Users\user>” is all we got.
Next, it’s time to clone the AUTOMATIC1111 repository, where all the Stable Diffusion files are. Type “git clone https://github.com/AUTOMATIC1111/stable-diffusion-webui.git” and press Enter.
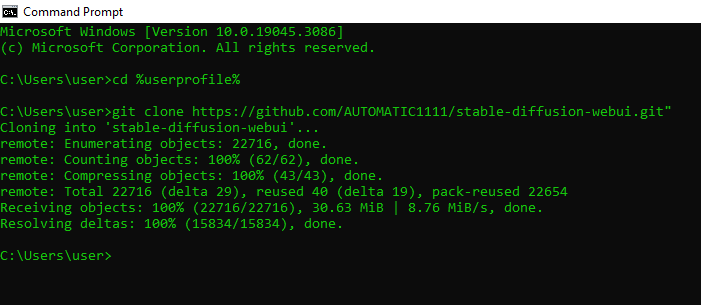
If everything is in place, a folder named “stable-diffusion-webui” should now be sitting pretty in your home directory.
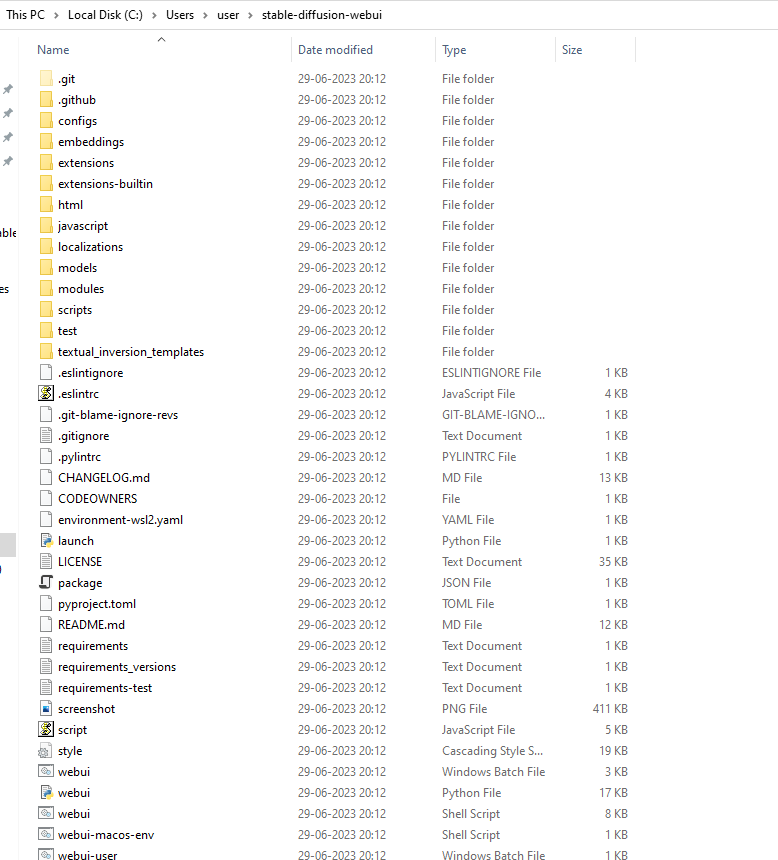
Don’t worry if you’ve cloned the repository in a different folder instead of %userprofile%. Just remember where you’ve parked the “stable-diffusion-webui” folder.
Step 5: Download models
Start by opening File Explorer and heading over to the newly minted directory. In the address bar, type “%userprofile%\stable-diffusion-webui” and hit Enter.
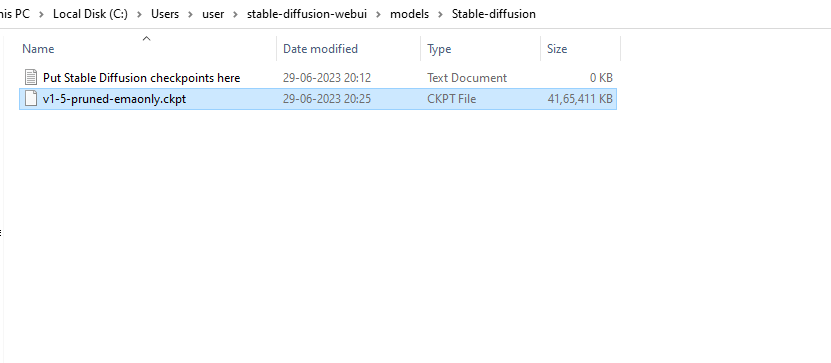
SponsoredOnce you’re in the right folder, find the “models” subfolder and make your way to “Stable-diffusion.” Here, you’ll spot a .txt file named “Put Stable Diffusion checkpoints here.”
Next on the agenda is downloading the Stable Diffusion checkpoint file, version 1.5. You can download it from the HuggingFace website.
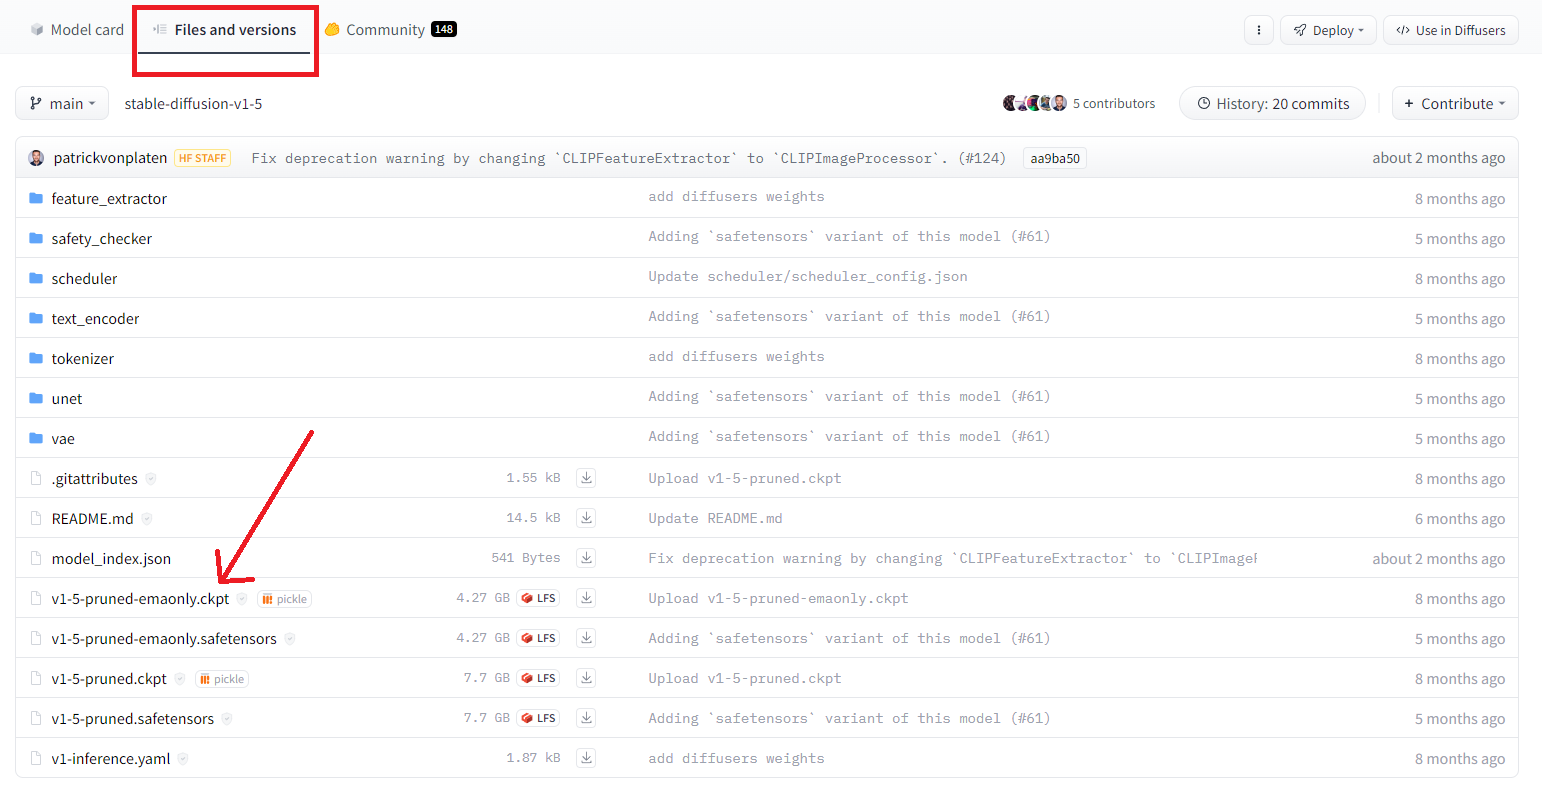
Once the file is safely downloaded, move it over to the previously mentioned folder.
Step#6: Run Stable Diffusion via Web-UI
Time to head back to the “stable-diffusion-webui” folder. Hit the back button or simply type %userprofile%\stable-diffusion-webui in the address bar to navigate to the parent folder.
Now, look for a file named webui-user.bat and double-click on it to kickstart the installation — give it a few minutes once the process starts.
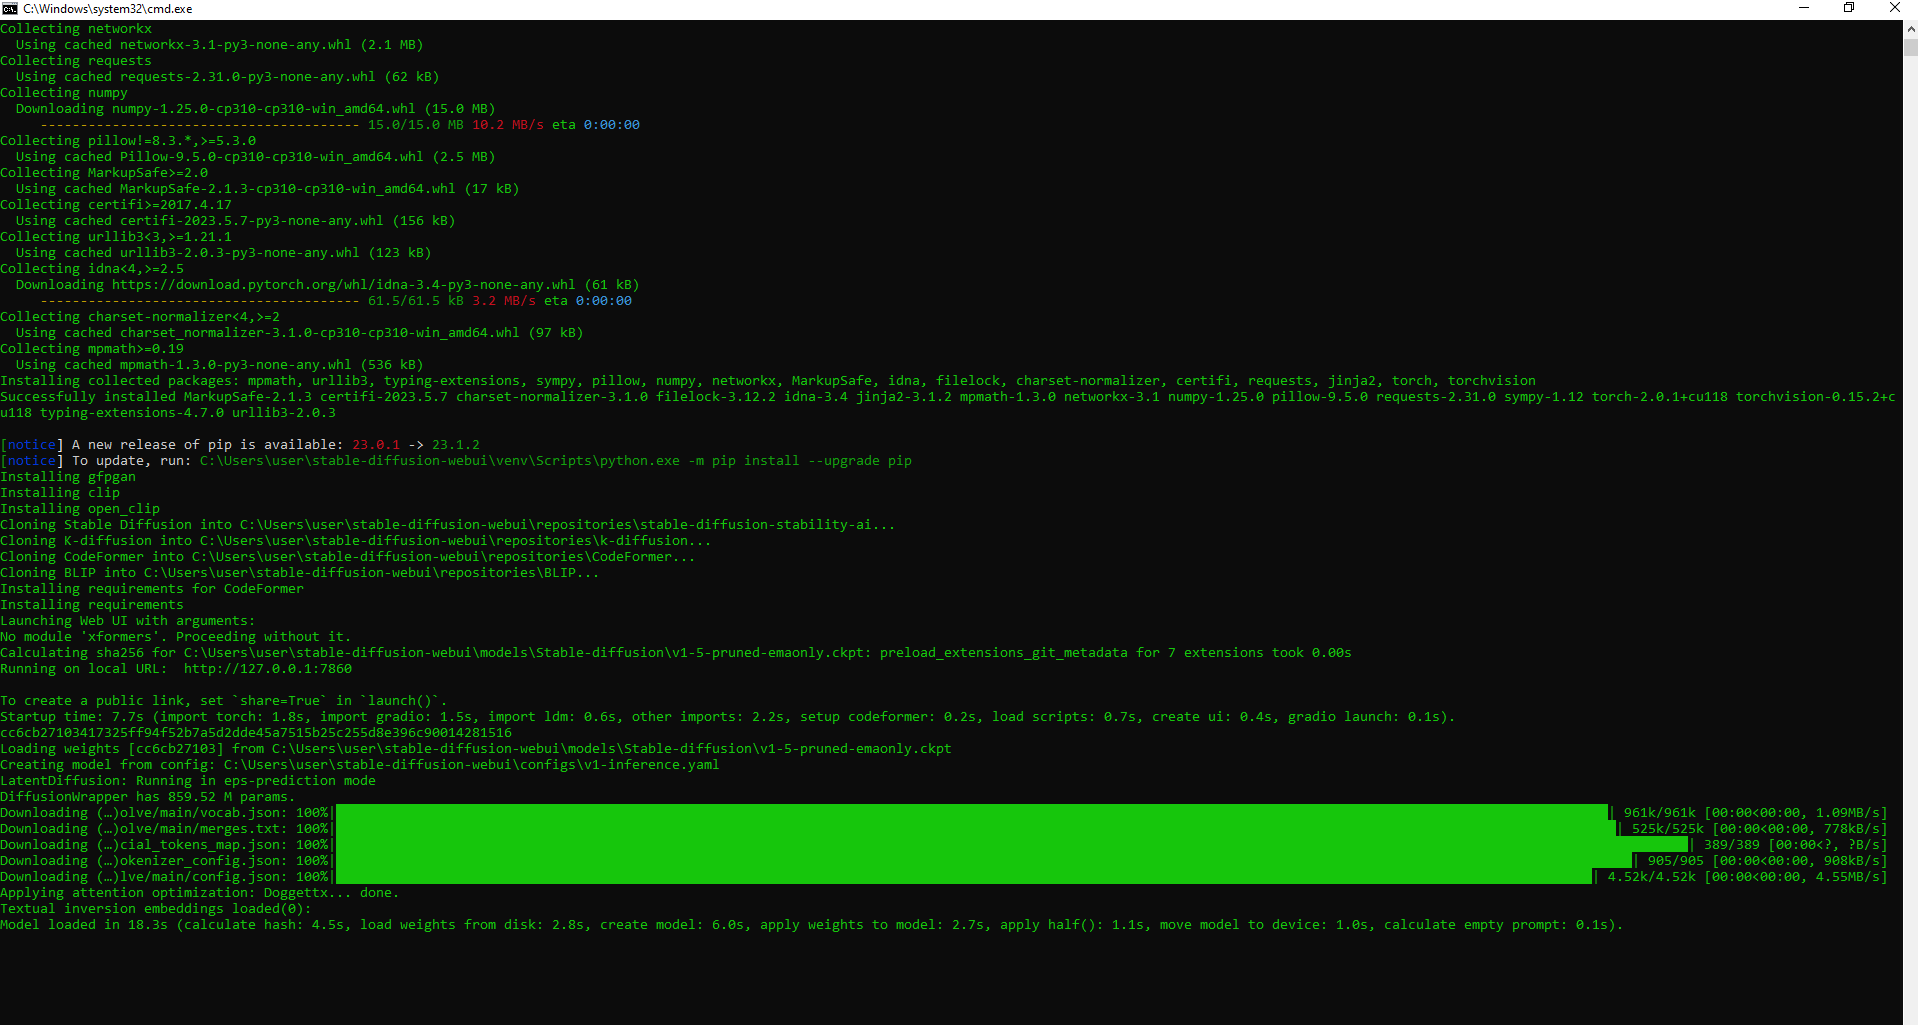
After the installation is complete, you will see a message pointing you to a local URL: http://127.0.0.1:7860.
Next, open any web browser, head over to the local URL http://127.0.0.1:7860, and voila! Stable Diffusion is now at your service.
Give it a whirl by typing in a prompt (like “a cat sitting on a bench”) and clicking “Generate.”
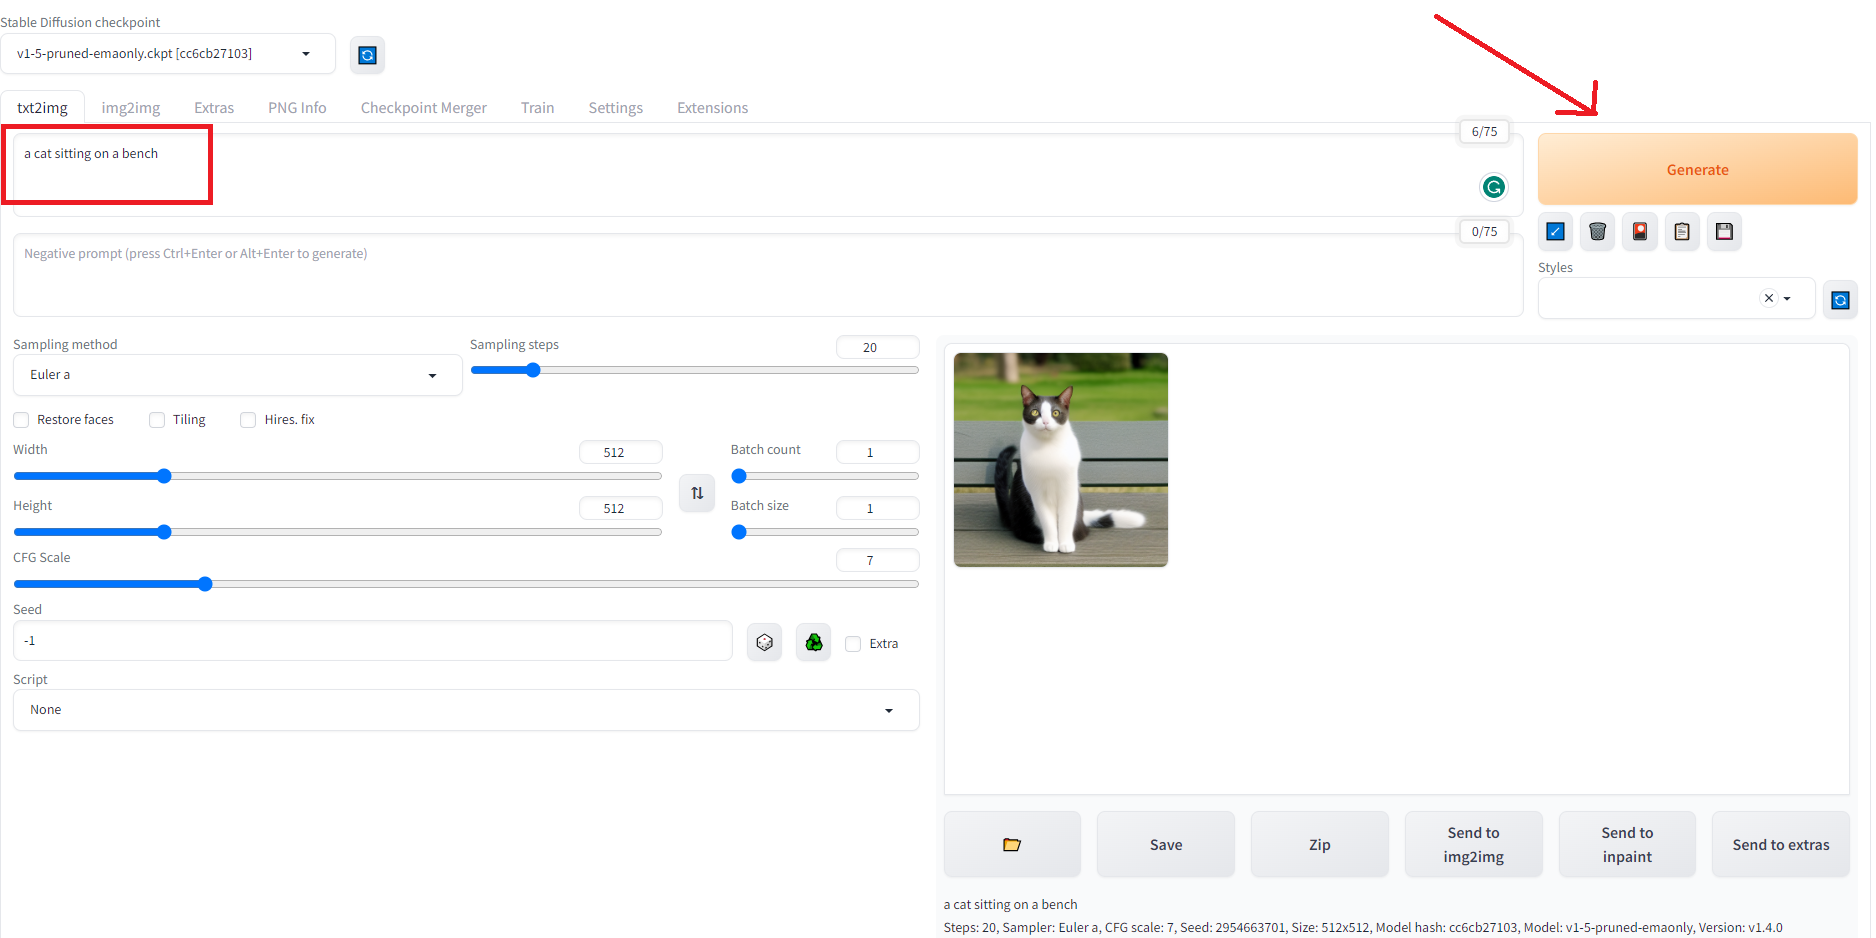
When you’re done, simply close the cmd window to turn off the program. If you want to use it again later, just double-click the webui-user.bat file and then head over to http://127.0.0.1:7860.
Sponsored SponsoredHow to install Stable Diffusion: additional tips
Error during installation
What if you hit a snag during the installation? If you’re seeing errors, it’s probably because an older Python is hogging the limelight. In that case, you’ll need to show it the exit. Head over to the Control Panel, select “Add or remove programs,” and remove the old Python version. Then, you’re all set to install Python without a hitch.
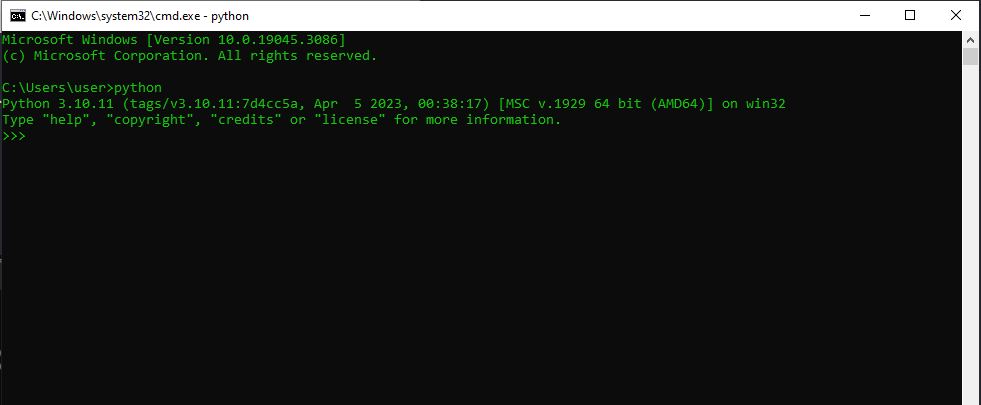
At any stage, if you are not sure which Python version is installed on your computer, you can check it using the command prompt. To access the command prompt, give that Windows key on your keyboard a tap and start typing “cmd.” Once the app launches, type “python” and hit Enter.
This will show which Python version is currently installed in your system. As you can see in the image below, I have Python 3.10.11 installed. You will get an error message if you do not have Python installed.
Improve performance
Looking to give Stable Diffusion a speed boost? The –xformers option is one way to do it. And if your GPU’s VRAM is less than 8 GB, consider flipping the –medvram switch. It’s a memory saver, letting you generate more images at once.
To enable these options, right-click on the batch file, webui-user.bat, and choose ‘Edit’ from the dropdown menu. (If you’re on Windows 11, you might need to click on ‘Show More Options’ first).
You’ll see a line that says:
set COMMANDLINE_ARGS=
You need to change it to:
set COMMANDLINE_ARGS=–xformers –medvram
Once you’ve made the change, save and exit. Double-click the webui-user.bat file to get Stable Diffusion up and running with its new speed and efficiency settings.
The last byte
And there you have it. Just like that, you’ve mastered how to install Stable Diffusion on your Windows computer. With Stable Diffusion now at your fingertips, you’re ready to explore the limitless possibilities of AI-generated artwork. But remember, the quality of your creations hinges on the quality of the prompts you feed the AI tool. So, mastering the art of prompting is as crucial as understanding the tool itself. Don’t hesitate to try out new approaches as you continue your journey with Stable Diffusion — the goal ultimately is to let your creativity flow and make your prompts precise.

