To actively participate in the Cardano ecosystem and safeguard your ADA and other cryptocurrencies, you must have a compatible wallet. Enter the Yoroi wallet — a storage solution developed by the company behind the Cardano blockchain.
This guide details what you need to know about the Cardano Yoroi wallet. We cover how to set it up, use it, drop in your first funds, trade tokens, and stake — basically, the whole shebang.
KEY TAKEAWAYS
► Yoroi Wallet is a lightweight, open-source browser extension designed specifically for managing Cardano (ADA) assets.
► Setting up and using Yoroi is straightforward, quick, and has essential features like ADA storage, staking, and transaction management.
► The wallet offers high security and privacy, including compatibility with hardware wallets like Trezor and Ledger.
► Though limited to Cardano assets, Yoroi provides a user-friendly interface, ideal for both beginner and experienced Cardano users.
What is Yoroi Wallet?
Yoroi wallet is an open-source, lightweight browser extension wallet designed to store, send, receive, and stake Cardano digital assets. It serves as a portal to Cardano’s web3 ecosystem, providing access to decentralized applications (DApps), decentralized finance (DeFi), and NFTs.
With it, you don’t need a complete copy of the blockchain state because it operates as a user-friendly extension on browsers like Chrome, Brave, Edge, and Firefox.
Running as an extension on Firefox or Chrome, Yoroi offers a hassle-free installation and setup process, requiring minimal system resources from users. The development and design of Yoroi emphasize providing users with a reliable and transparent means to manage their digital assets.
How to set up the Yoroi Wallet
Setting up a cryptocurrency wallet is nothing like organizing cash in your traditional billfold. Unlike physical currency, a cryptocurrency wallet is a digital tool designed to hold the private keys to your crypto assets. Setting up most crypto wallets, including Yoroi, is simple but requires attention to detail and a few key steps.
So, let’s guide you through setting up your Yoroi wallet.
Step 1
First, you must download and install the Yoroi wallet extension from the official website.
The good news is that the wallet is compatible with various browsers like Chrome, Brave, Microsoft Edge, and Firefox, not to mention it’s also a smooth operator on Android and iOS. However, we advise using your PC to maximize Yoroi’s full experience.
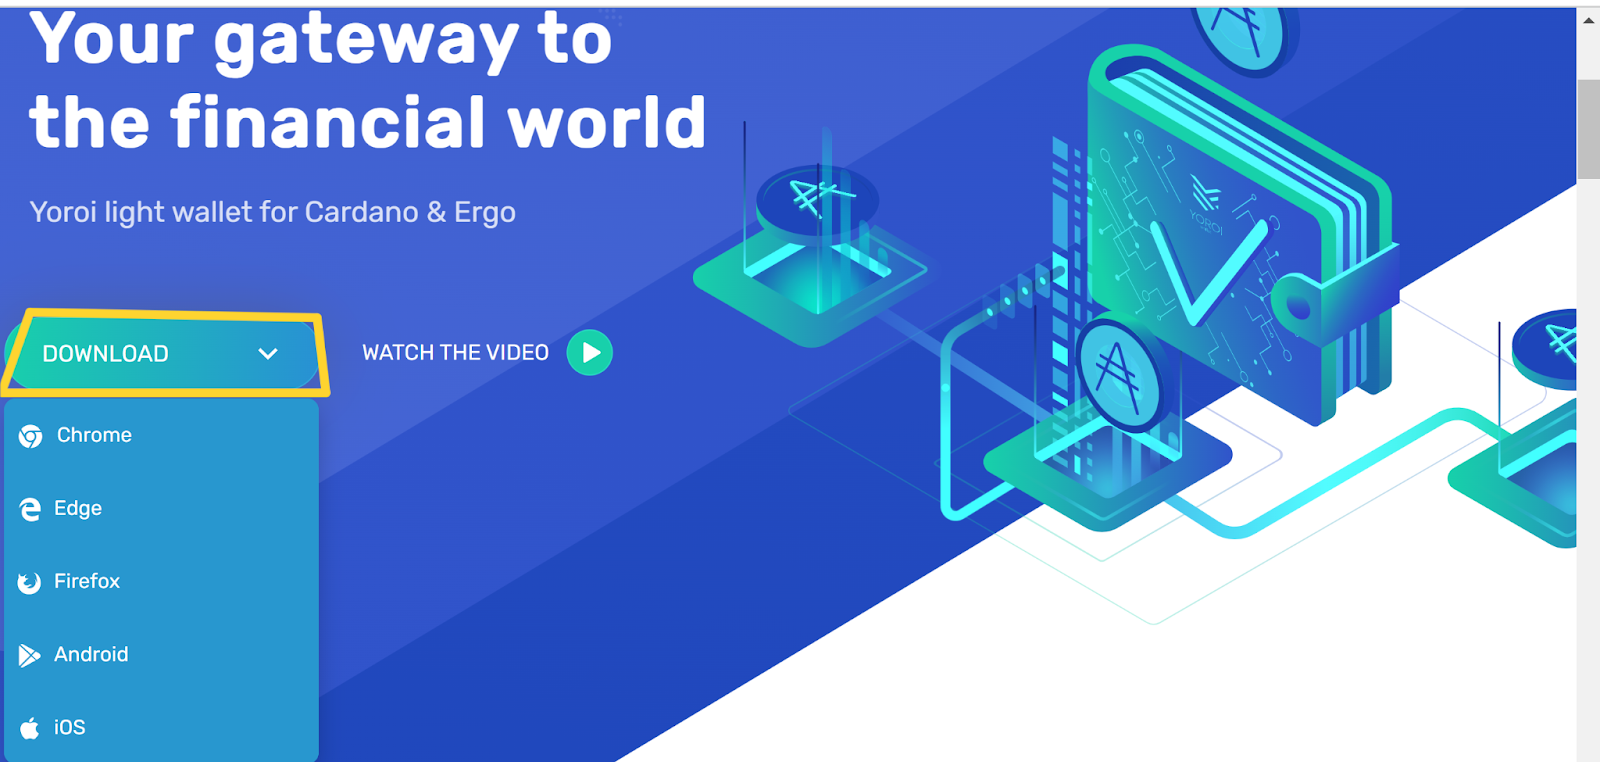
In this case, we’ll use Chrome to demonstrate the process. Not only does Chrome speed up our development pace with strong APIs, but it also promotes user security by confining the extension within its sandbox.
Beyond speed and security, Chrome simplifies the process of inspecting data packets. This feature is particularly valuable when ensuring the confidentiality of your private key. With the help of the Chrome developer tools, you gain visibility into the data transmitted to EMURGO/IOHK servers.
Step 2
Now, when you select Chrome, it’ll lead you to a page that looks like this:
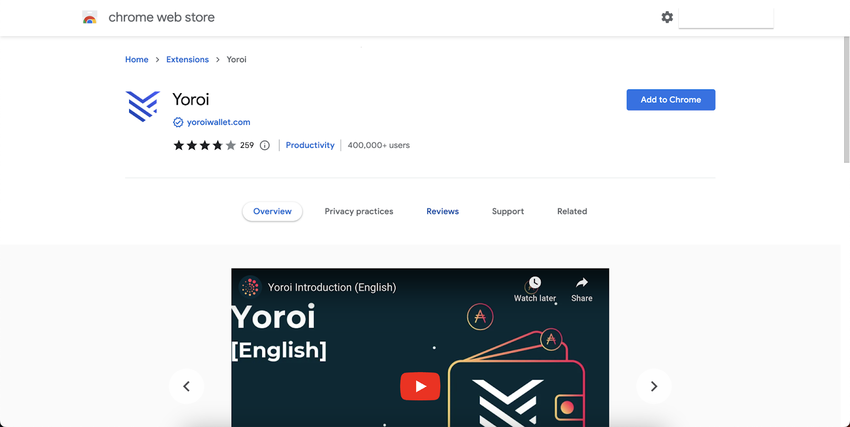
Once you download it, install it on your browser. Once installed, the Yoroi symbol will appear in the browser extension area;
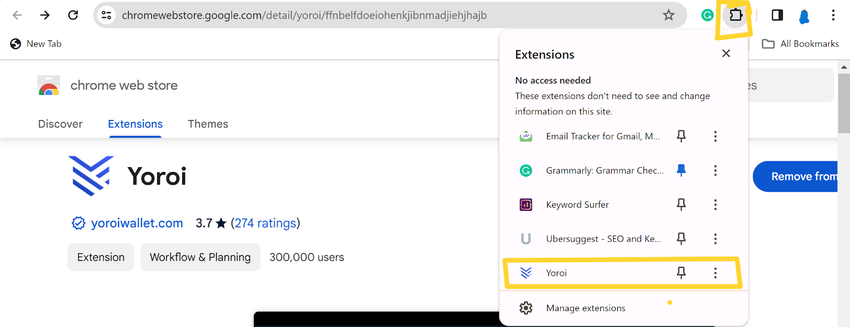
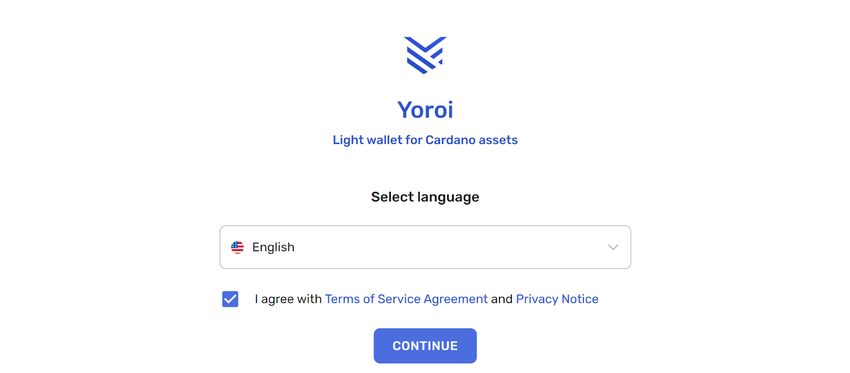
Click on Yoroi to start the wallet setup process. Your screen will transport you to the Yoroi site, where you can pick your preferred language. Take a moment to read and accept Yoroi’s terms and conditions.
Hit the “Continue” button after that.
Now, you can read the user insights or simply hit skip. Additionally, you can enable payment URLs at this stage; however, it’s entirely optional and won’t impact the outcome if you decide to skip. Feel free to activate this feature later in the Settings menu at your convenience.
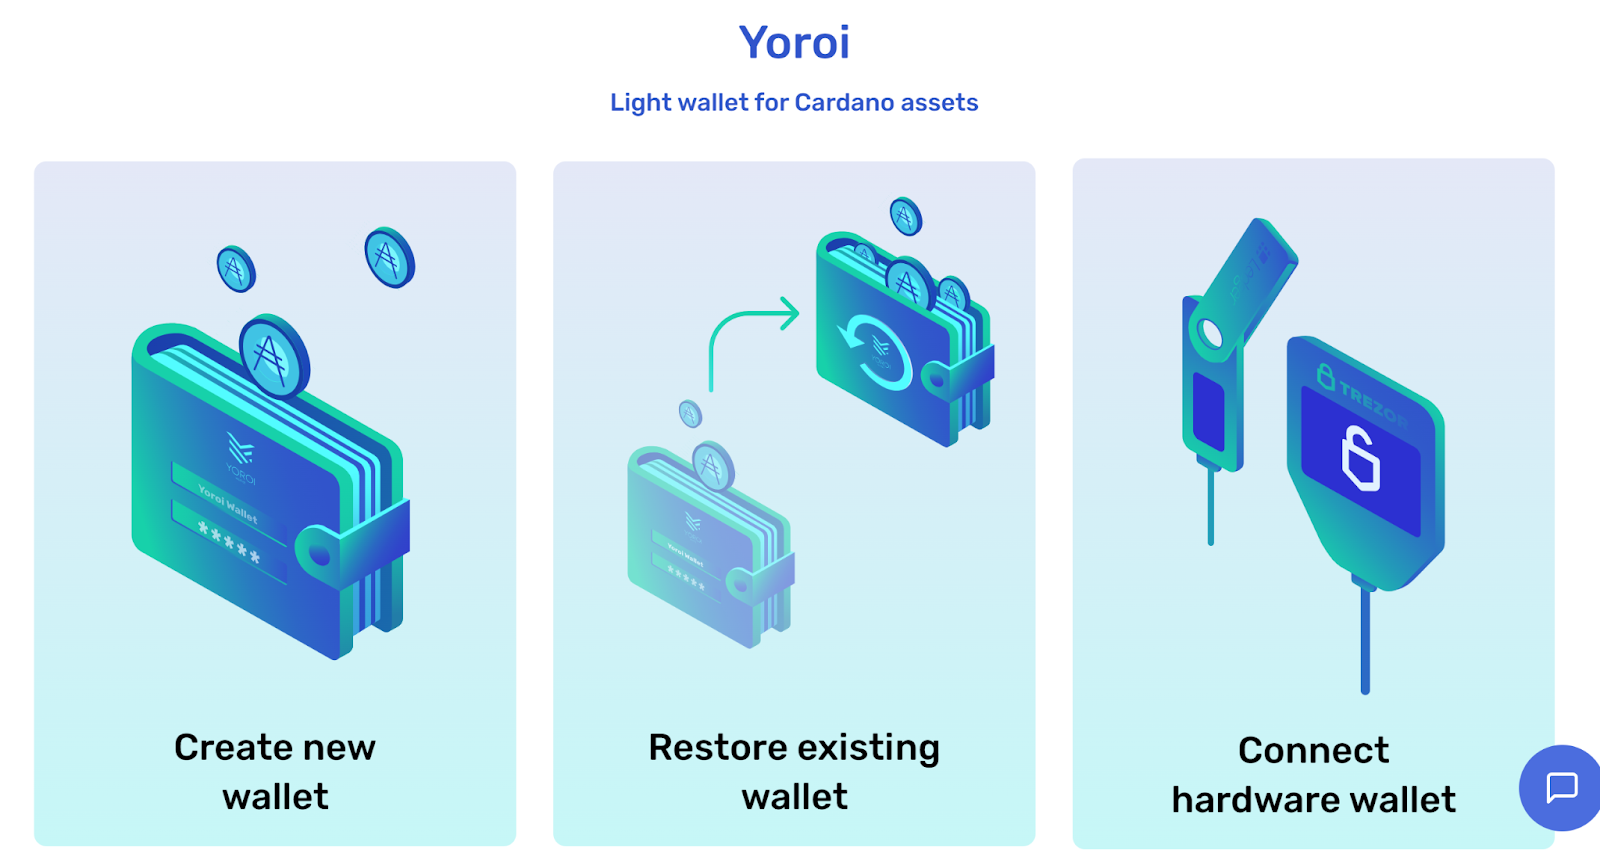
In the following screen, you’ll see options to connect a hardware wallet, create a new wallet, or restore an existing one.
Step 3
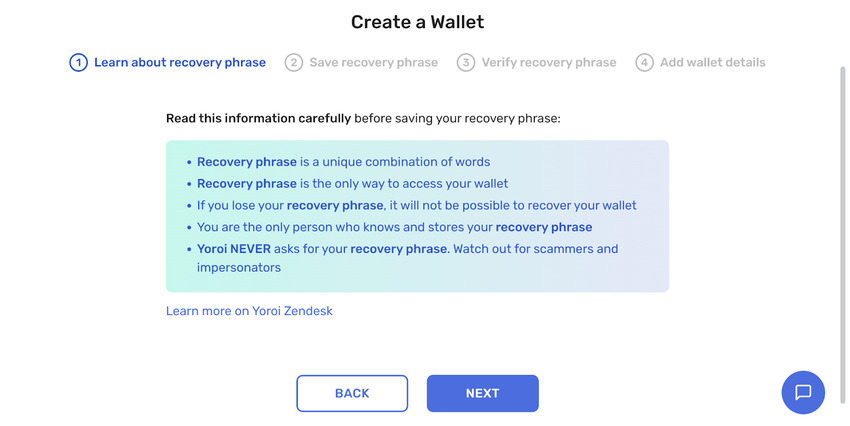
For the purpose of this article, we’ll be focusing on creating a brand-new wallet. The first step is all about the recovery phrase — a string of 15 words corresponding to specific numbers. Together, these numbers form a seed integer, which generates all the private keys within your wallet.
The private keys prove ownership of your funds and authorize transactions. In the unfortunate event of your wallet device getting lost, stolen, or facing a technical glitch — such as a crashed computer or misplaced phone — the only pathway to recover your funds is through your 15-word secret recovery phrase.
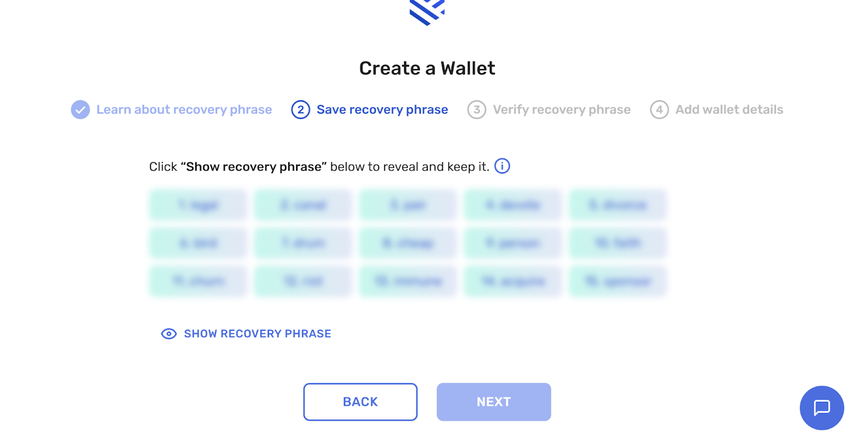
Your recovery phrase will be displayed on the second step, and it’s essential to write it down for safekeeping and verification.
For maximum security, we recommend writing the 15-word recovery phrase on at least three pieces of paper. Store these papers in different secret locations known exclusively to you and trusted individuals (if you choose). Avoid keeping these words online to mitigate the risk of potential access by hackers.
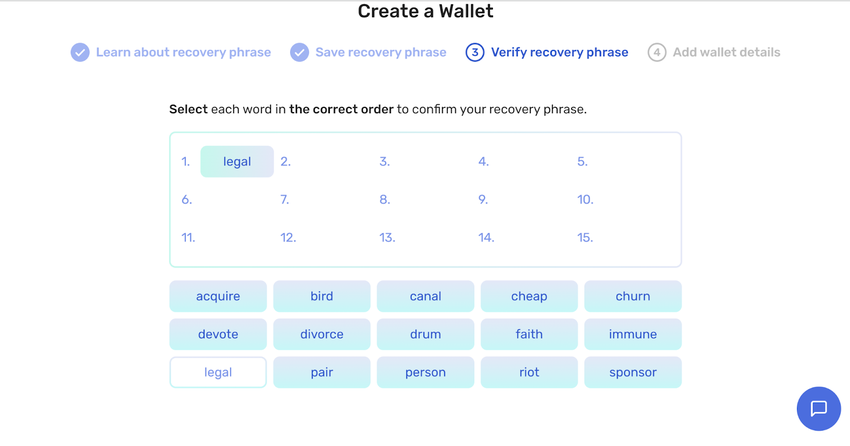
You can now verify the recovery phrase.
Please note that it is case-sensitive, so if you haven’t memorized it, ensure you’ve written it down accurately. Yoroi will prompt you to arrange your recovery phrase in the correct order.
A successful verification requires an exact match of the numbers and words.
Once you have verified the recovery phrase, you can proceed to the next stage: provide a name for your wallet and establish a password. Enter the same password on the last empty box.
The wallet name is simply for your identification purposes, while the password guards your wallet from unauthorized access from your device.
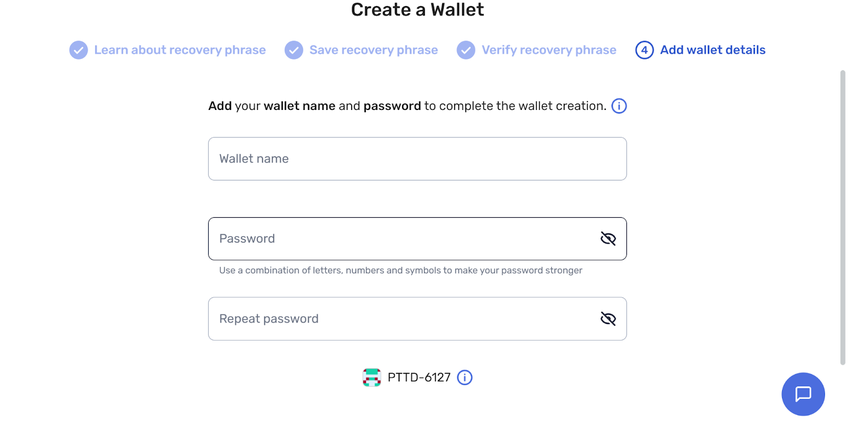
It’s important to note that you’ll always require this password whenever you initiate a transaction. Therefore, select a secure and memorable password to ensure smooth and protected access to your wallet.
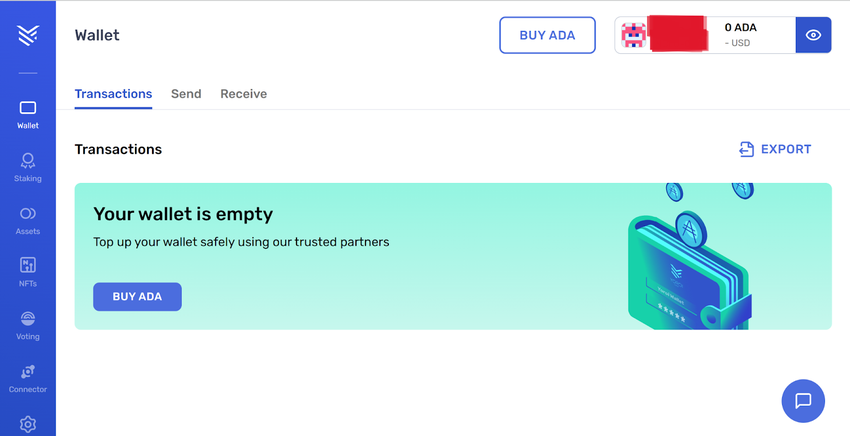
Once you finish the process, you’ll gain access to the wallet, and it will appear like this:
How to start using Yoroi Wallet
Before using your Yoroi wallet, you’ll require a small amount of ADA for each transaction made on the Cardano blockchain.
ADA is the cryptocurrency coin that powers the Cardano network. It’s used as:
- Transaction fees for using the platform
- A reward to validators for their role in operating the proof-of-stake system.
So, how do we proceed to ensure your Yoroi wallet is ready for action?
- Go to All Wallets
Visit “All Wallets” to view how much ADA is in your wallet. This is accessible through the upper-right drop-down icon (🔽).
In our case here, it’s still empty. But you’ll click on “Buy ADA” to start the process.

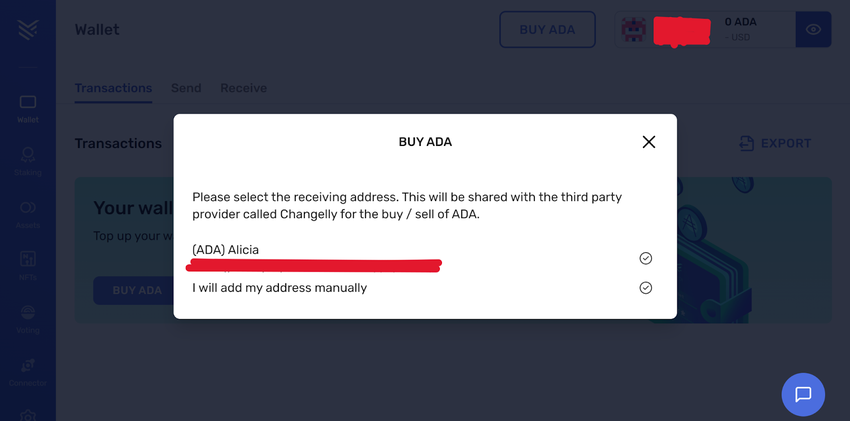
On your screen, you’ll encounter two options for the receiving address. You can select your current wallet address, but if you plan to send it to a different receiver, choose “I will add my address manually.”
- Complete the Details
Your screen will guide you to the next step, prompting you to input the desired amount of ADA you wish to purchase. The corresponding value in your chosen currency will automatically reflect. Consent to the terms and tap “Buy” to proceed with the transaction.
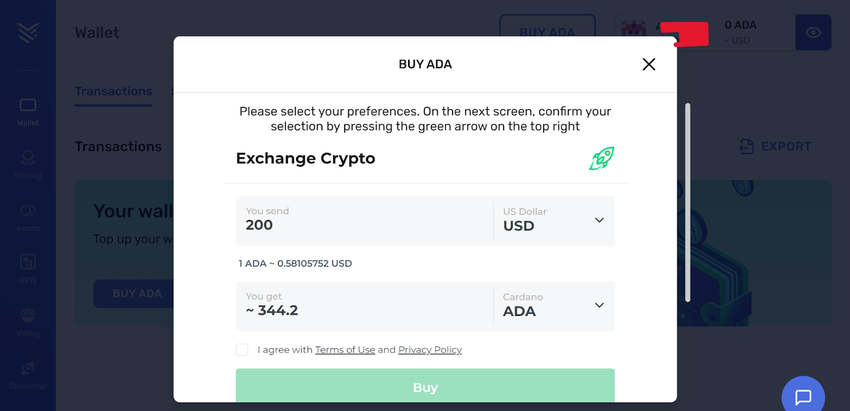
In the following screen, validate your choice by selecting the green arrow in the top-right corner. Then click on “Exchange” to proceed.
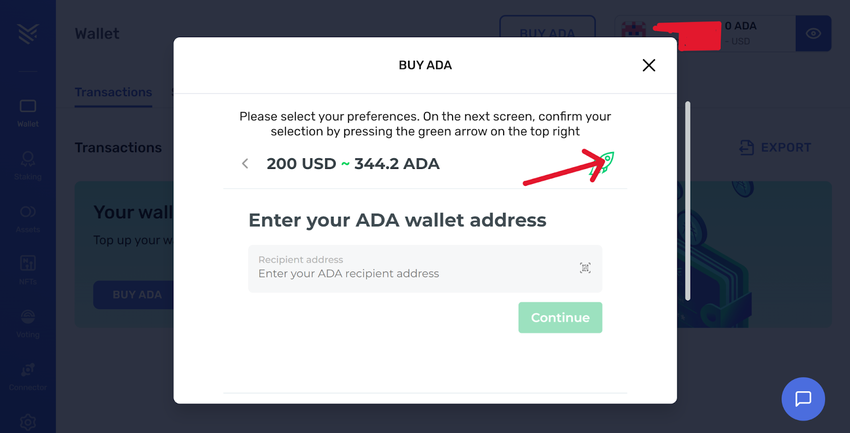
- Verify the transaction
The platform’s interface will guide you to a page displaying your transaction summary. Select “Continue” to proceed to the billing address area and fill in the required information.
Note that there will be a processing fee for this transaction.
Confirm that you accept the terms, then click “Buy Now.” Allow some time for the transaction to complete, and soon, your ADA will be deposited into your wallet address.
How to send ADA
Sending ADA only requires the receiver’s public address. But ensure your account maintains a small ADA balance to cover network fees.
Click the “Send” tab and enter the necessary information, which includes the recipient’s wallet address and the amount you want to send. Now hit “Confirm transaction” by entering your spending password, and voila!
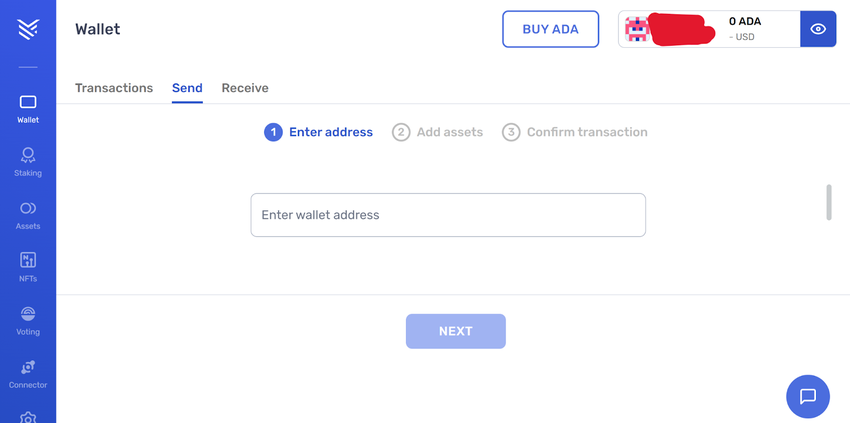
Note that the number of tokens you send will determine the processing fee (it usually ranges from 0.17 to 0.19 ADA.)
Yoroi offers the flexibility to generate a new address every time you make a transaction, ensuring your privacy remains safe. You can review the transaction tab to monitor the progress of your transaction.
How to stake Cardano using Yoroi
Cardano is one of the market’s largest proof-of-stake blockchains, recognized for its eco-friendly and open-source nature.
And being a proof-of-stake blockchain, staking your ADA is crucial for:
- The platform’s maintenance
- Security
- Rewarding participants
Cardano’s staking is inherently liquid by default, providing users complete control to stake and un-stake their ADA. Using a self-custodial or non-custodial wallet such as the Yoroi wallet highlights this freedom even further.
This sets Cardano apart from other proof-of-stake (POS) blockchains, where users are limited to withdrawing their tokens once they lock them.
So, how do you stake Cardano using the Yoroi wallet? Within the Yoroi wallet, all staking features are neatly organized into a single menu conveniently positioned in the left-hand column of the main dashboard window. You can access all the features associated with Cardano staking from this menu.
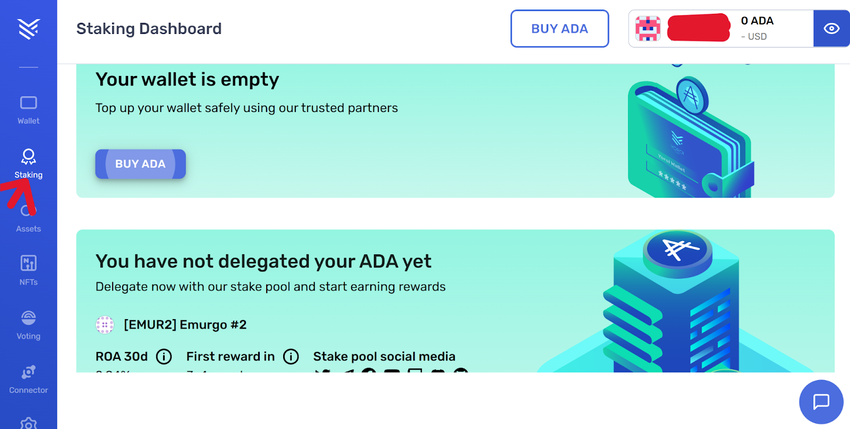
Delegating your stake
To delegate your stake, you’ll need a staking pool. Staking pools come in two types: public and private. A public staking pool is a Cardano network node with a public address that other users can delegate to, earning rewards in return. On the other hand, private stake pools distribute rewards exclusively to their owners.
There are hundreds of staking pools on the Yoroi platform, so all you have to do is search for the one that best suits your staking criteria. But we recommend a pool with good growth and low saturation.

These staking pools are administered by reliable operators — individuals or businesses with the expertise and resources to run the node consistently.
Once you identify a staking pool for delegation, click the Delegation button. Enter your spending password and confirm the process. You’re now set to stake and ready to roll.
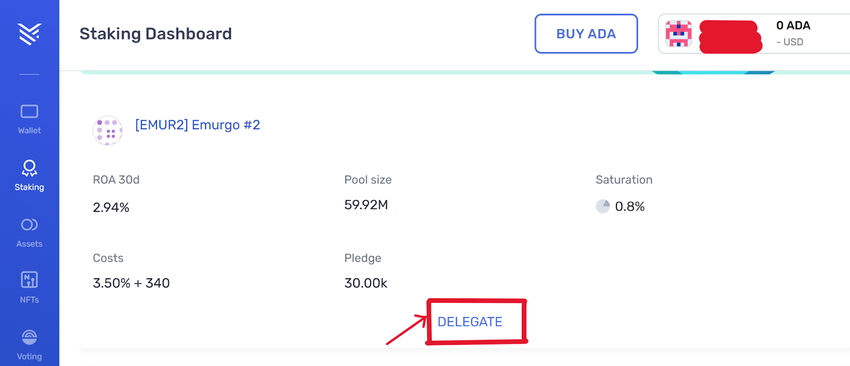
You can review your deposited ADA directly from the dashboard if the transaction is successful. And here’s a feature you’ll appreciate: you can effortlessly switch from one pool to another at any time without the hassle of withdrawing rewards.
Users do not need to withdraw rewards manually; the process is automatic, allowing rewards to compound.
Yoroi Wallet features
Yoroi boasts various features that cater to users’ simplicity, security, and functionality needs. Let’s take a look at its standout characteristics:
- User-friendly interface: Yoroi prioritizes ease of use without compromising on essential features (installation and set-up).
- Lightweight and fast: As a browser-based wallet, it doesn’t require users to download the entire Cardano blockchain, making it quick to set up and easy on system resources.
- HD Wallet: You can generate multiple addresses from a single seed phrase since Yoroi operates as an HD wallet.
- Privacy: Yoroi can generate new external addresses for every transaction, hence more confidentiality.
- Security: Due to the wallet’s open-source nature, the Cardano community can identify and address potential vulnerabilities together, enhancing transparency and security. Yoroi goes the extra mile to provide Trezor and Ledger support to allow a smooth integration with your hardware crypto wallets.
- Cross-browser compatibility: Yoroi is available on mobile and desktop browsers like Microsoft Edge, Firefox, Brave, and Chrome. Moreover, Yoroi extends its reach to several operating systems, such as Linux, Mac, and Windows. For mobile users, Yoroi is available on iOS and Android systems.
Which cryptocurrencies does Yoroi support?
Yoroi primarily supports Cardano (ADA) and Ergo (ERG). However, in early 2023, the Yoroi team communicated via Twitter that it would discontinue its support for the ERG token.
Yoroi is now solely an ADA wallet. However, you can safely store native tokens — those created on the Cardano blockchain. These native tokens include CLAP, FIRE, ADAX, DANA, and DRIP.
Pros and cons of Yoroi Wallet
So far, we have demonstrated how to set up and use the Yoroi Wallet and laid out some of its features. But what are its strengths and weaknesses?
| Pros | Cons |
|---|---|
| Quick install and easy use | Limited support for crypto |
| Open-source and transparent | Few features |
| Good security | |
| Lightweight hot wallet |
Pros of Yoroi Wallet
- Easy-to-use interface
- Quick installation and set-up
- Open-source
- Lightweight
- Solid security measures in place
- Transparent
- Browser-extension
- HD wallet
Yoroi operates as a light wallet because it doesn’t require downloading the entire blockchain. It can also be classed as a hot wallet, as it requires an online connection for access. But then, Yoroi provides the option to link with cold wallets like Ledger or Trezor, allowing for the secure transfer of ADA to cold storage.
oroi is a light, open-source wallet functioning as a Hierarchical Deterministic (HD) wallet. HD wallets use a seed to develop private and public keys that allow the user to access the wallet. The Yoroi wallet operates either on a mobile app or a browser extension. In both instances, the wallet connects to a full Cardano node hosted by the Emurgo team.
As demonstrated in this guide, setting up Yoroi is a breeze, taking less than ten minutes. The wallet’s minimal resource consumption ensures it won’t slow down your browser or computer.
Cons of Yoroi Wallet
- Limited cryptocurrency support–only supports Cardano (ADA)
- Fewer features on the mobile
Yoroi Wallet is a highly safe wallet and is one of the best Cardano wallets. Due to the lack of development within the Cardano ecosystem, there is not much support for any activity outside of buying, sending, and staking in the Yoroi wallet.
Why choose the Cardano Yoroi Wallet?
It’s safe to say that Yoroi Wallet is easy to use, fast, secure, and tailored to meet the needs of the Cardano community. The user-friendly design, low resource consumption, and commitment to continuous improvement make Yoroi a go-to choice for novice and seasoned Cardano enthusiasts.

