


Building your own AI chatbot may sound intimidating if your coding game isn’t quite on point. But fear not; OpenAI’s ChatGPT API offers a handy shortcut.
OpenAI’s API gives you access to its language model. So, you can create a chatbot that doesn’t just spit out robotic answers but gives the vibe of a real conversation. In this guide, we will explore one of the easiest ways to build your own ChatGPT chatbot using OpenAI API.
Before you build your AI chatbot with ChatGPT
Before you build your AI chatbot, here are a few things to take note of. Whether you’re on Windows, macOS, Linux, or ChromeOS, the procedure of building an AI chatbot is more or less the same.
We will demonstrate the process on a Windows machine, breaking down each step with clear instructions and illustrative examples. So, even if your computer knowledge is just above the “turn it off and on again” level, you’ll find it relatively straightforward to develop your own AI chatbot.
And finally, don’t sweat about hardware requirements; there’s no need for a high-end CPU or GPU. OpenAI’s cloud-based API handles all the intensive computations.
How to build your own chatbot with ChatGPT API
Before diving into creating a ChatGPT-powered AI chatbot, there are some essential tools you’ll need to get your environment up and running. At a glance, the list includes Python, Pip, the OpenAI and Gradio libraries, an OpenAI API key, and a code editor, perhaps something like Notepad++. Let’s get started.
Install Python
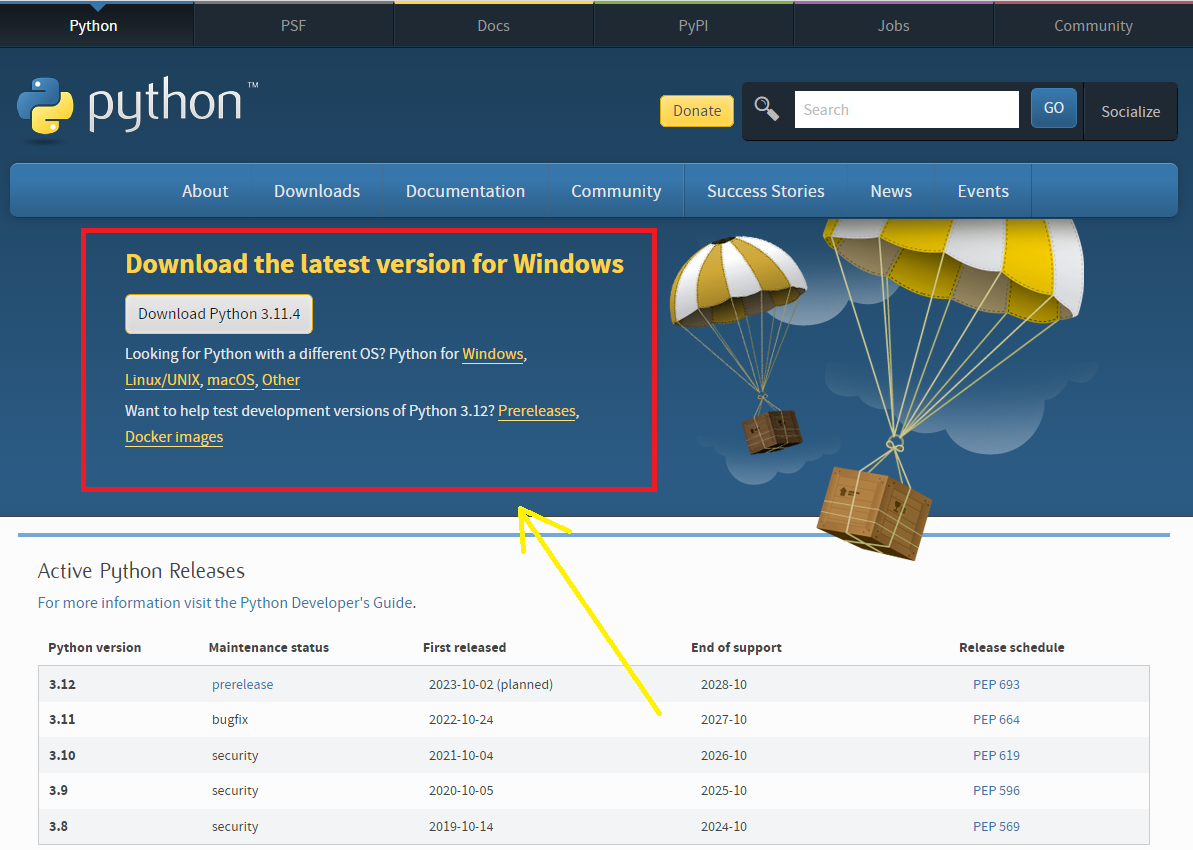
To start, you’ll want to set up Python on your computer, ideally opting for one of its recent versions. Head to the official Python website’s download section to grab the 32- or 64-bit Windows installer, depending on the Windows version installed on your computer.
Once you’ve downloaded the installer, launch it to initiate the setup. A quick tip: during the installation, select the option “Add Python XX to PATH,” where “XX” stands for the version you’re setting up. This will help your system locate Python effortlessly. With that done, click on “Install Now.”
To verify that Python is up and running in your system, do the following:
- Open the Start menu and look for “Command Prompt” or “CMD”.
- When the terminal pops up, input “python –version” and press Enter.
If Python was installed correctly, the terminal will display the Python version you’ve installed, as illustrated in the screenshot below.

Upgrade Pip
Pip is Python’s package manager, essential for installing and managing Python libraries and dependencies. Keeping it updated ensures you benefit from the latest features and fixes, which is crucial when setting up libraries for your AI chatbot.
To check your current Pip version:
- Launch a command prompt (for Windows) or terminal (for macOS/Linux).
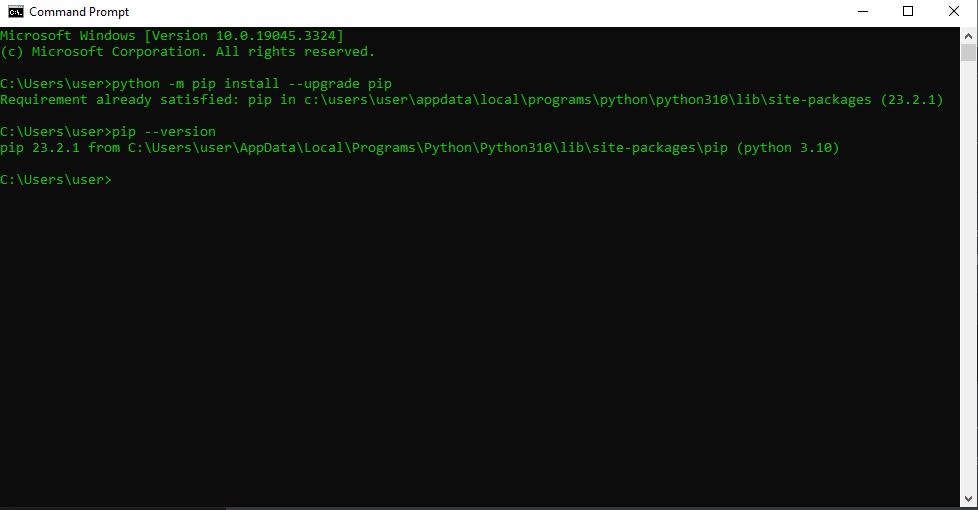
- Input the command: pip –version to see the current version.
To get the latest Pip version, execute the command: python -m pip install –upgrade pip.
We already have the latest pip version installed on the computer we are using, which is why we got the following notification: “Requirement already satisfied.”
However, if an update is available, pip will automatically handle the download and installation. Once the process is over, double-check the Pip version with the pip –version command to ensure the update was successful.
Set Up a Virtual Environment
Setting up a virtual environment is a smart move before diving into library installations. It ensures your project’s dependencies don’t clash with your main Python setup. It is an optional step, but highly recommended.
To get started with virtualenv:
- Install it using the command: pip install virtualenv
- Next, head over to your project directory and initiate a virtual environment with: virtualenv venv
- Activate the virtual environment using the following command: .\venv\Scripts\activate
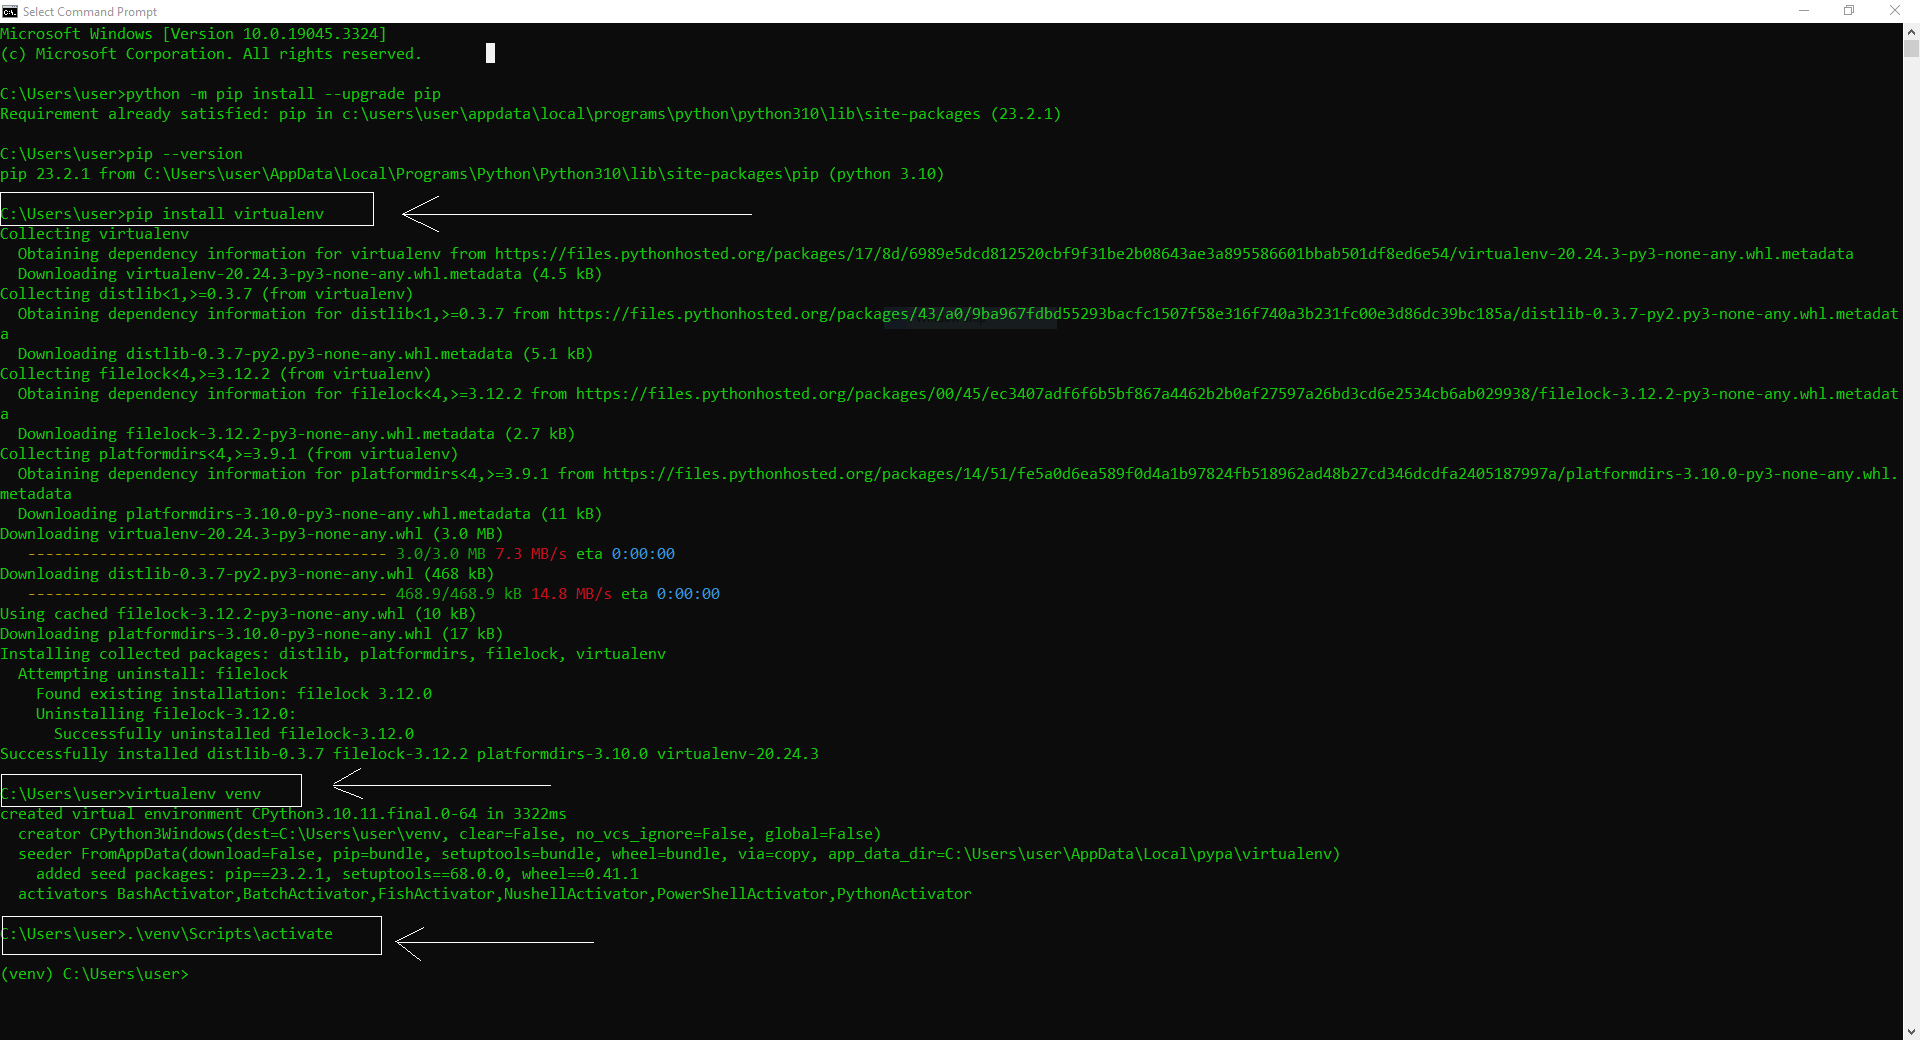
After activating the virtual environment, you’ll notice a small change. Your command prompt or terminal will now display the name of the virtual environment (in this case, “venv”) as a prefix. This indicates that you’re now operating in the special “venv” zone.
With these steps, you’ve successfully isolated your project, ensuring a smoother development experience.
Install Gradio and OpenAI libraries
Getting the OpenAI and Gradio libraries onboard is your next move. OpenAI is your gateway to the large language model you will be using to power your chatbot. Meanwhile, Gradio is a nifty open-source Python library that’s perfect for creating machine-learning interfaces. Here’s how you can get them using pip:
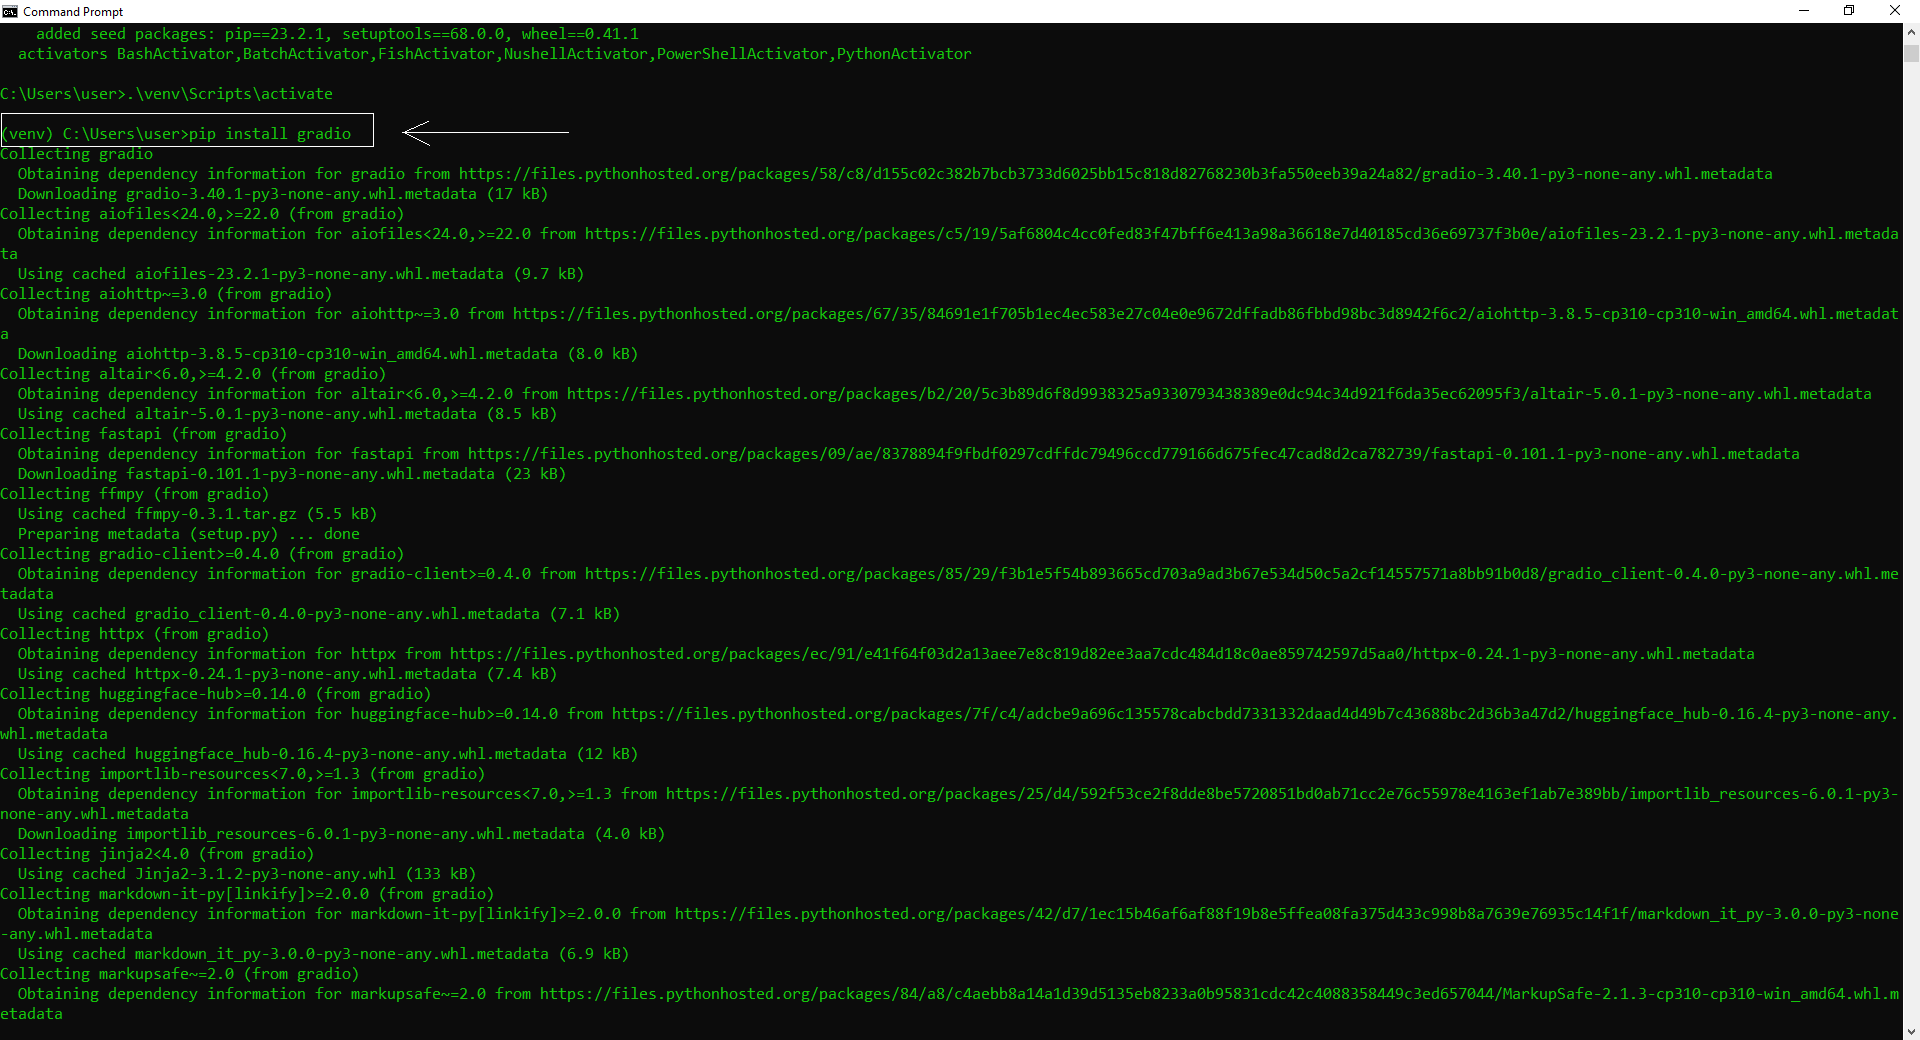
- Install the Gradio library with the following command: pip install gradio
- Install the OpenAI library using the following command: pip install openai
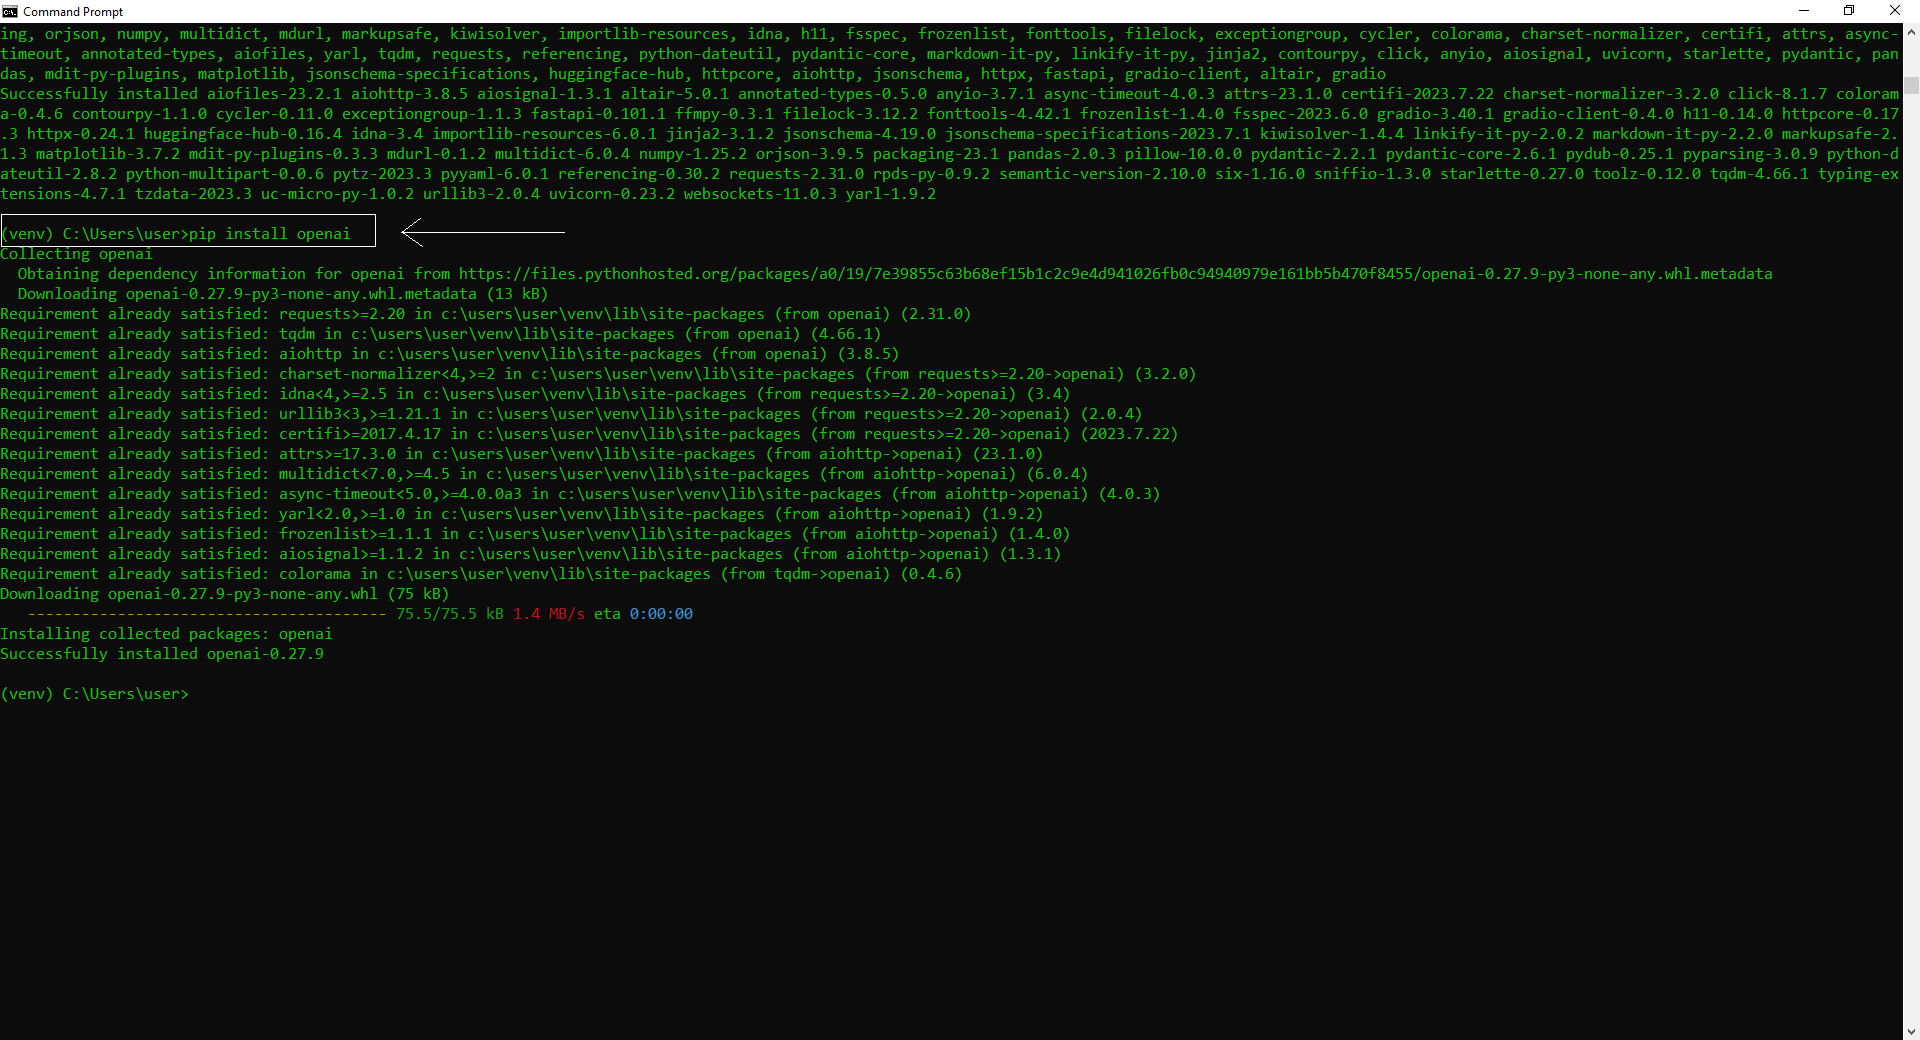
Once you run these commands, Pip will fetch the required libraries from the Python Package Index (PyPI) and neatly set them up in your Python environment. You’re now just a couple of steps away from creating your own AI chatbot.
Install a code editor
Now that you have set up the backstage with the required software environment, it is time to get yourself a code editor. There are tons of options, but it’s essential to pick one that aligns with your needs and the languages you’re coding in.
Visual Studio Code (VS Code) is a good option that meets all your requirements here. It is a free, feature-packed code editor, and you can download it from the official Visual Studio portal.
Once it’s downloaded, launch the installer and let it guide you through the setup process. And just in case you do not like VS Code, other options worth considering include Notepad++, Sublime Text, PyCharm, and Atom, among others.
Grab your OpenAI API key
Now, you’re going to need an API key from OpenAI. For those out of the loop, consider this key as your backstage pass, unlocking ChatGPT’s prowess directly in your chatbot interface.
- Kick things off by heading to the OpenAI website: https://www.OpenAI.com/. Got an OpenAI account? Great, sign in. If not, no worries! Just sign up by filling in the necessary details.
- Once you’re in, glance at the top-right corner and spot your profile icon. Give it a click. From the drop-down, select “View API keys”.
- Here, tap on “Create new secret key”. When it’s generated, be quick to copy that API key. A heads-up: this is a one-time viewing opportunity. It’s a smart move to save it immediately.
Your OpenAI API Key is now ready and waiting. Guard it like it’s top-tier intel. It’s your private key, meant solely for you, and it’s not for public eyes. If you ever feel the need, you can ditch old keys and roll out fresh ones (you’re allowed up to a quintet of these).
Build your ChatGPT chatbot with this code
The moment of truth has arrived! We’re going to use OpenAI’s crème de la crème, the GPT 3.5 turbo model, which is the engine behind ChatGPT-3.5.
GPT-3.5 turbo is a step up from Davinci and boasts training data up until September 2021. Not only does it give more bang for your buck, but it’s also snappier than its predecessors and has a wider context window.
To keep things simple, we’re using Gradio to generate a sleek web interface that you can access both from your local machine as well as over the internet. Here’s what to do:
Launch VS Code (or your go-to code editor) and copy-paste the code below.
The code:
import openai
import gradio as gr
import os
from datetime import datetime
from collections import defaultdict
# Use environment variable for API key
openai.api_key = os.getenv(“OPENAI_API_KEY”)
# Basic rate limiter
class RateLimiter:
def __init__(self, max_requests, time_window):
self.max_requests = max_requests
self.time_window = time_window
self.timestamps = defaultdict(list)
def is_allowed(self, session_id):
now = datetime.now()
if session_id not in self.timestamps:
self.timestamps[session_id].append(now)
return True
timestamps = self.timestamps[session_id]
# Remove old timestamps
self.timestamps[session_id] = [t for t in timestamps if (now – t).seconds <= self.time_window]
if len(self.timestamps[session_id]) < self.max_requests:
self.timestamps[session_id].append(now)
return True
return False
rate_limiter = RateLimiter(max_requests=5, time_window=60) # Allow 5 requests per minute
# Store separate conversations for different user sessions
chat_sessions = {}
def chatbot(input, session_id):
if not input:
return “Please enter a message.”
if not rate_limiter.is_allowed(session_id):
return “Rate limit exceeded. Please wait for a while.”
# Initialize session if not present
if session_id not in chat_sessions:
chat_sessions[session_id] = [
{“role”: “system”, “content”: “You are a helpful and kind AI Assistant.”}
]
session_messages = chat_sessions[session_id]
session_messages.append({“role”: “user”, “content”: input})
try:
chat = openai.ChatCompletion.create(
model=”gpt-3.5-turbo”, messages=session_messages
)
reply = chat.choices[0].message.content
session_messages.append({“role”: “assistant”, “content”: reply})
except Exception as e:
reply = f”Error: {e}”
print(f”Error for session {session_id}: {e}”) # Basic logging
return reply
inputs = gr.inputs.Textbox(lines=7, label=”Chat with AI”)
outputs = gr.outputs.Textbox(label=”Reply”)
gr.Interface(fn=chatbot, inputs=inputs, outputs=outputs, title=”AI Chatbot”,
description=”Ask anything you want”,
theme=”compact”, live=False, session=True).launch(share=True)
Alright, now let’s save the code for later use. Head to the “File” option in the top menu and give “Save As…” a click. Now, christen your file “chatbot.py” and for the “Save as type,” pick “All types.” Choose a convenient location in your hard drive to save the file (e.g., the Desktop).
Securely connecting the code to your API key
Notice that “OPENAI_API_KEY” in the code above? That’s where your OpenAI key needs to be.
For security reasons, it’s crucial not to hardcode sensitive information like API keys directly into your code. Hardcoding them makes your applications vulnerable and can lead to unintentional exposure if the code ever gets shared or published.
A safer approach is to use environment variables. These are external variables that your code can access but remain outside of the codebase. Here’s how you can implement this:
Set the environment variable:
Before diving into the script, you must first set the environment variable containing your API key.
This typically happens outside of your Python script. For Windows users, go to Command Prompt and execute the following command. Note that if you close the previous Command Prompt window, make sure first to create and activate the virtual environment again using the steps described above.
setx OPENAI_API_KEY “YOUR_ACTUAL_API_KEY_HERE”
Replace YOUR_ACTUAL_API_KEY_HERE with your actual OpenAI API key.
By using the os.getenv() function, you can access the value of the environment variable you set earlier. Ensure the environment variable is correctly set before running your Python script.
Your AI chatbot is now ready to roll
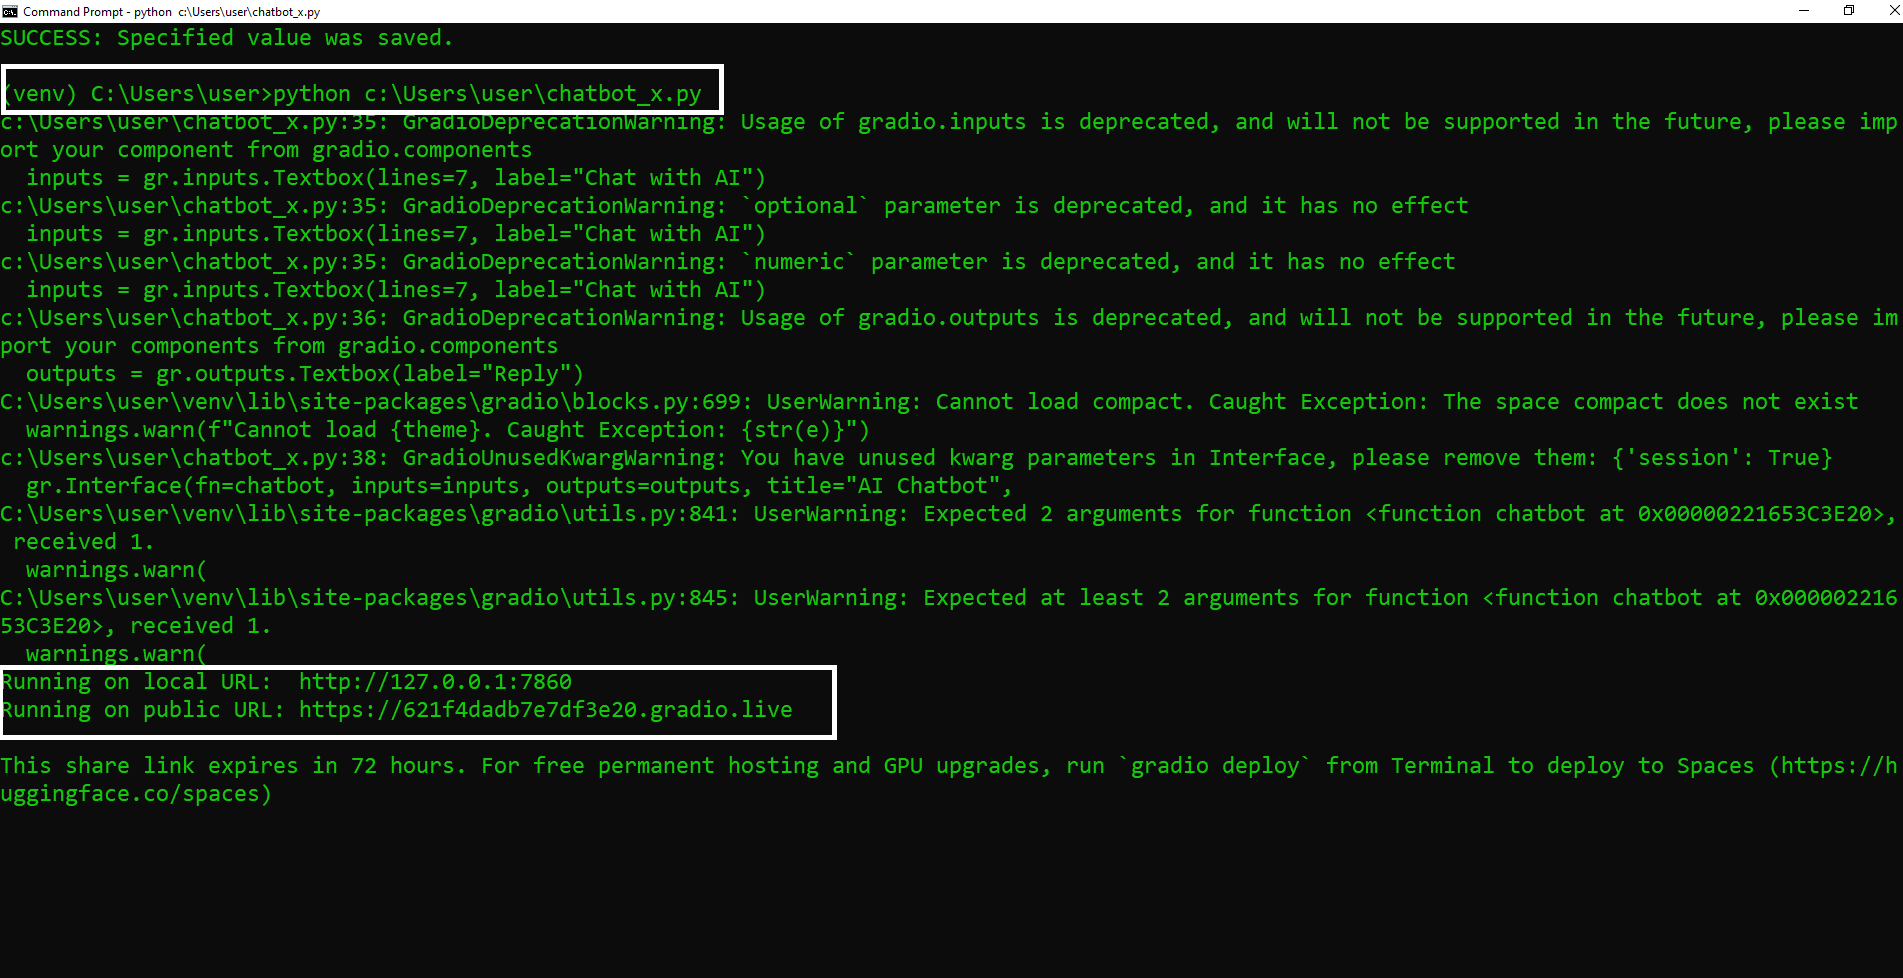
In the final step, type in ‘python’ in Command Prompt, slap a space after it, then drop in your file path before hitting enter. In my case, the path is C:\Users\user\chatbot_x.py. Yours might be different depending on the directory you saved the code in.
python c:\Users\user\chatbot_x.py
A couple of warnings might pop up but don’t worry. Just scroll down, and there it is — you’ll spot both a local and public URL. Grab that local URL, toss it into your browser, and prepare to be amazed. If you want to show off your achievement with your friends, do it by sharing the public URL. Note that these URLs are valid for only a limited period. Besides, you may have to keep your computer (and the command prompt window) up and running for the URLs to remain valid.
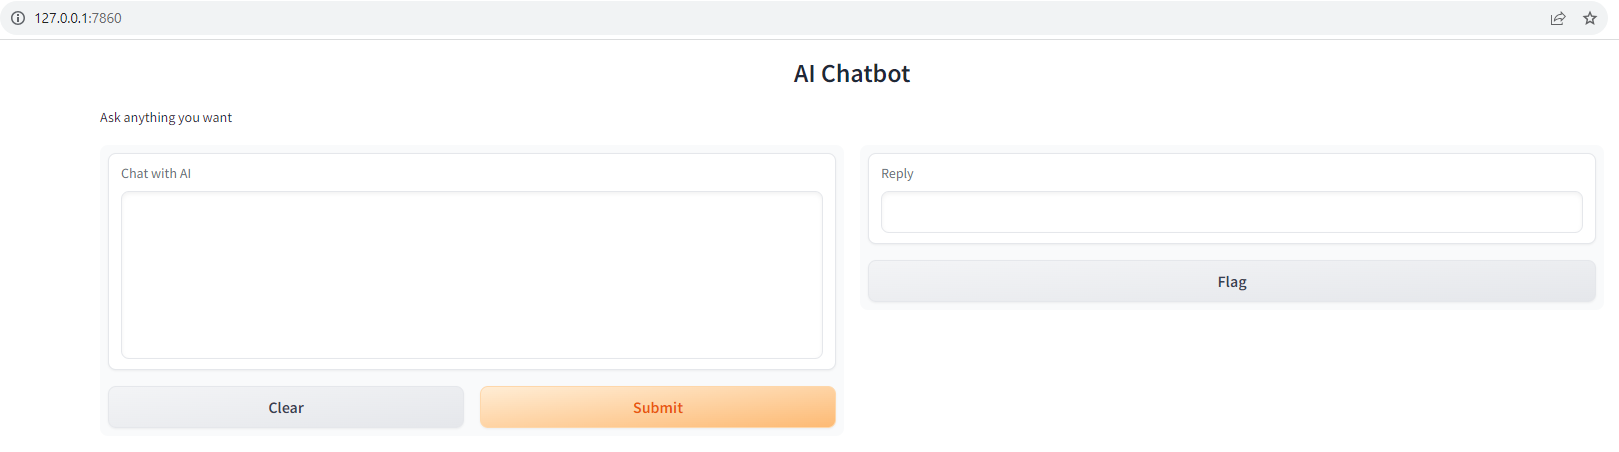
Copy-paste either of the URLs on your favorite browser, and voilà! Your AI chatbot is now up and running. It is admittedly not a fancy interface, but it gets the job done. Go on, fire away your questions to your very own homemade AI chatbot.
AI is not just for the technically advanced
The world of AI is no longer reserved for just the tech-savvy. Just being able to demonstrate how to build a chatbot with ChatGPT’s API is a testament to how accessible the AI space has become. With platforms like OpenAI and user-friendly tools at our fingertips, the boundaries of innovation are expanding for everyone. As you continue to explore and experiment, remember that this still-nascent but thriving industry is evolving every day, offering new opportunities and challenges alike.


