Becoming a member of the BeInCrypto Premium Signals Channel is both easy, free, and offers you access to exclusive content from our top traders! Follow this handy, step-by-step guide and you’ll be a Premium Member in no time.
Our Premium Signals Channel is a Telegram group dedicated to delivering the best tutorials, technical analysis and trading setups available from our top traders. All it takes is signing up to the StormGain cryptocurrency exchange, depositing $100 worth of Bitcoin, and confirming your deposit with the Premium Signals Channel. We’ll walk through each of these steps in detail, right now.
1. Requesting Access to the Premium Signals Channel
- The first thing you will need to do if you haven’t already is sign up for a Telegram account. This is easy and should only take a couple of minutes.
- Send a Direct Message (DM) to the @BeInCryptoPremium account, saying something like, “Hey, I would like to join the BeInCrypto Premium Signals Group!”
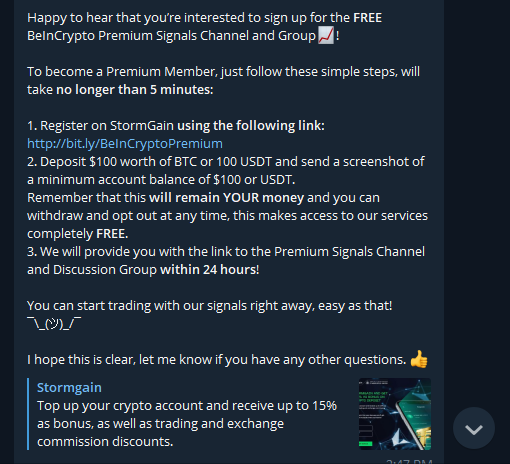
- Before long you will receive a link to the Stormgain sign up page.
2. Sign Up for a StormGain Account
- Follow the link and fill out your basic information to create an account.
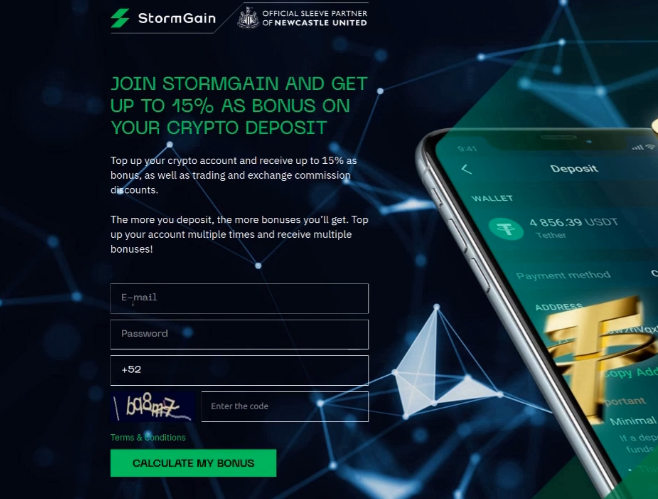
After getting signed in, you will be taken to the main interface of the platform, to the right are all of your available wallets, which is where we will turn our attention next.
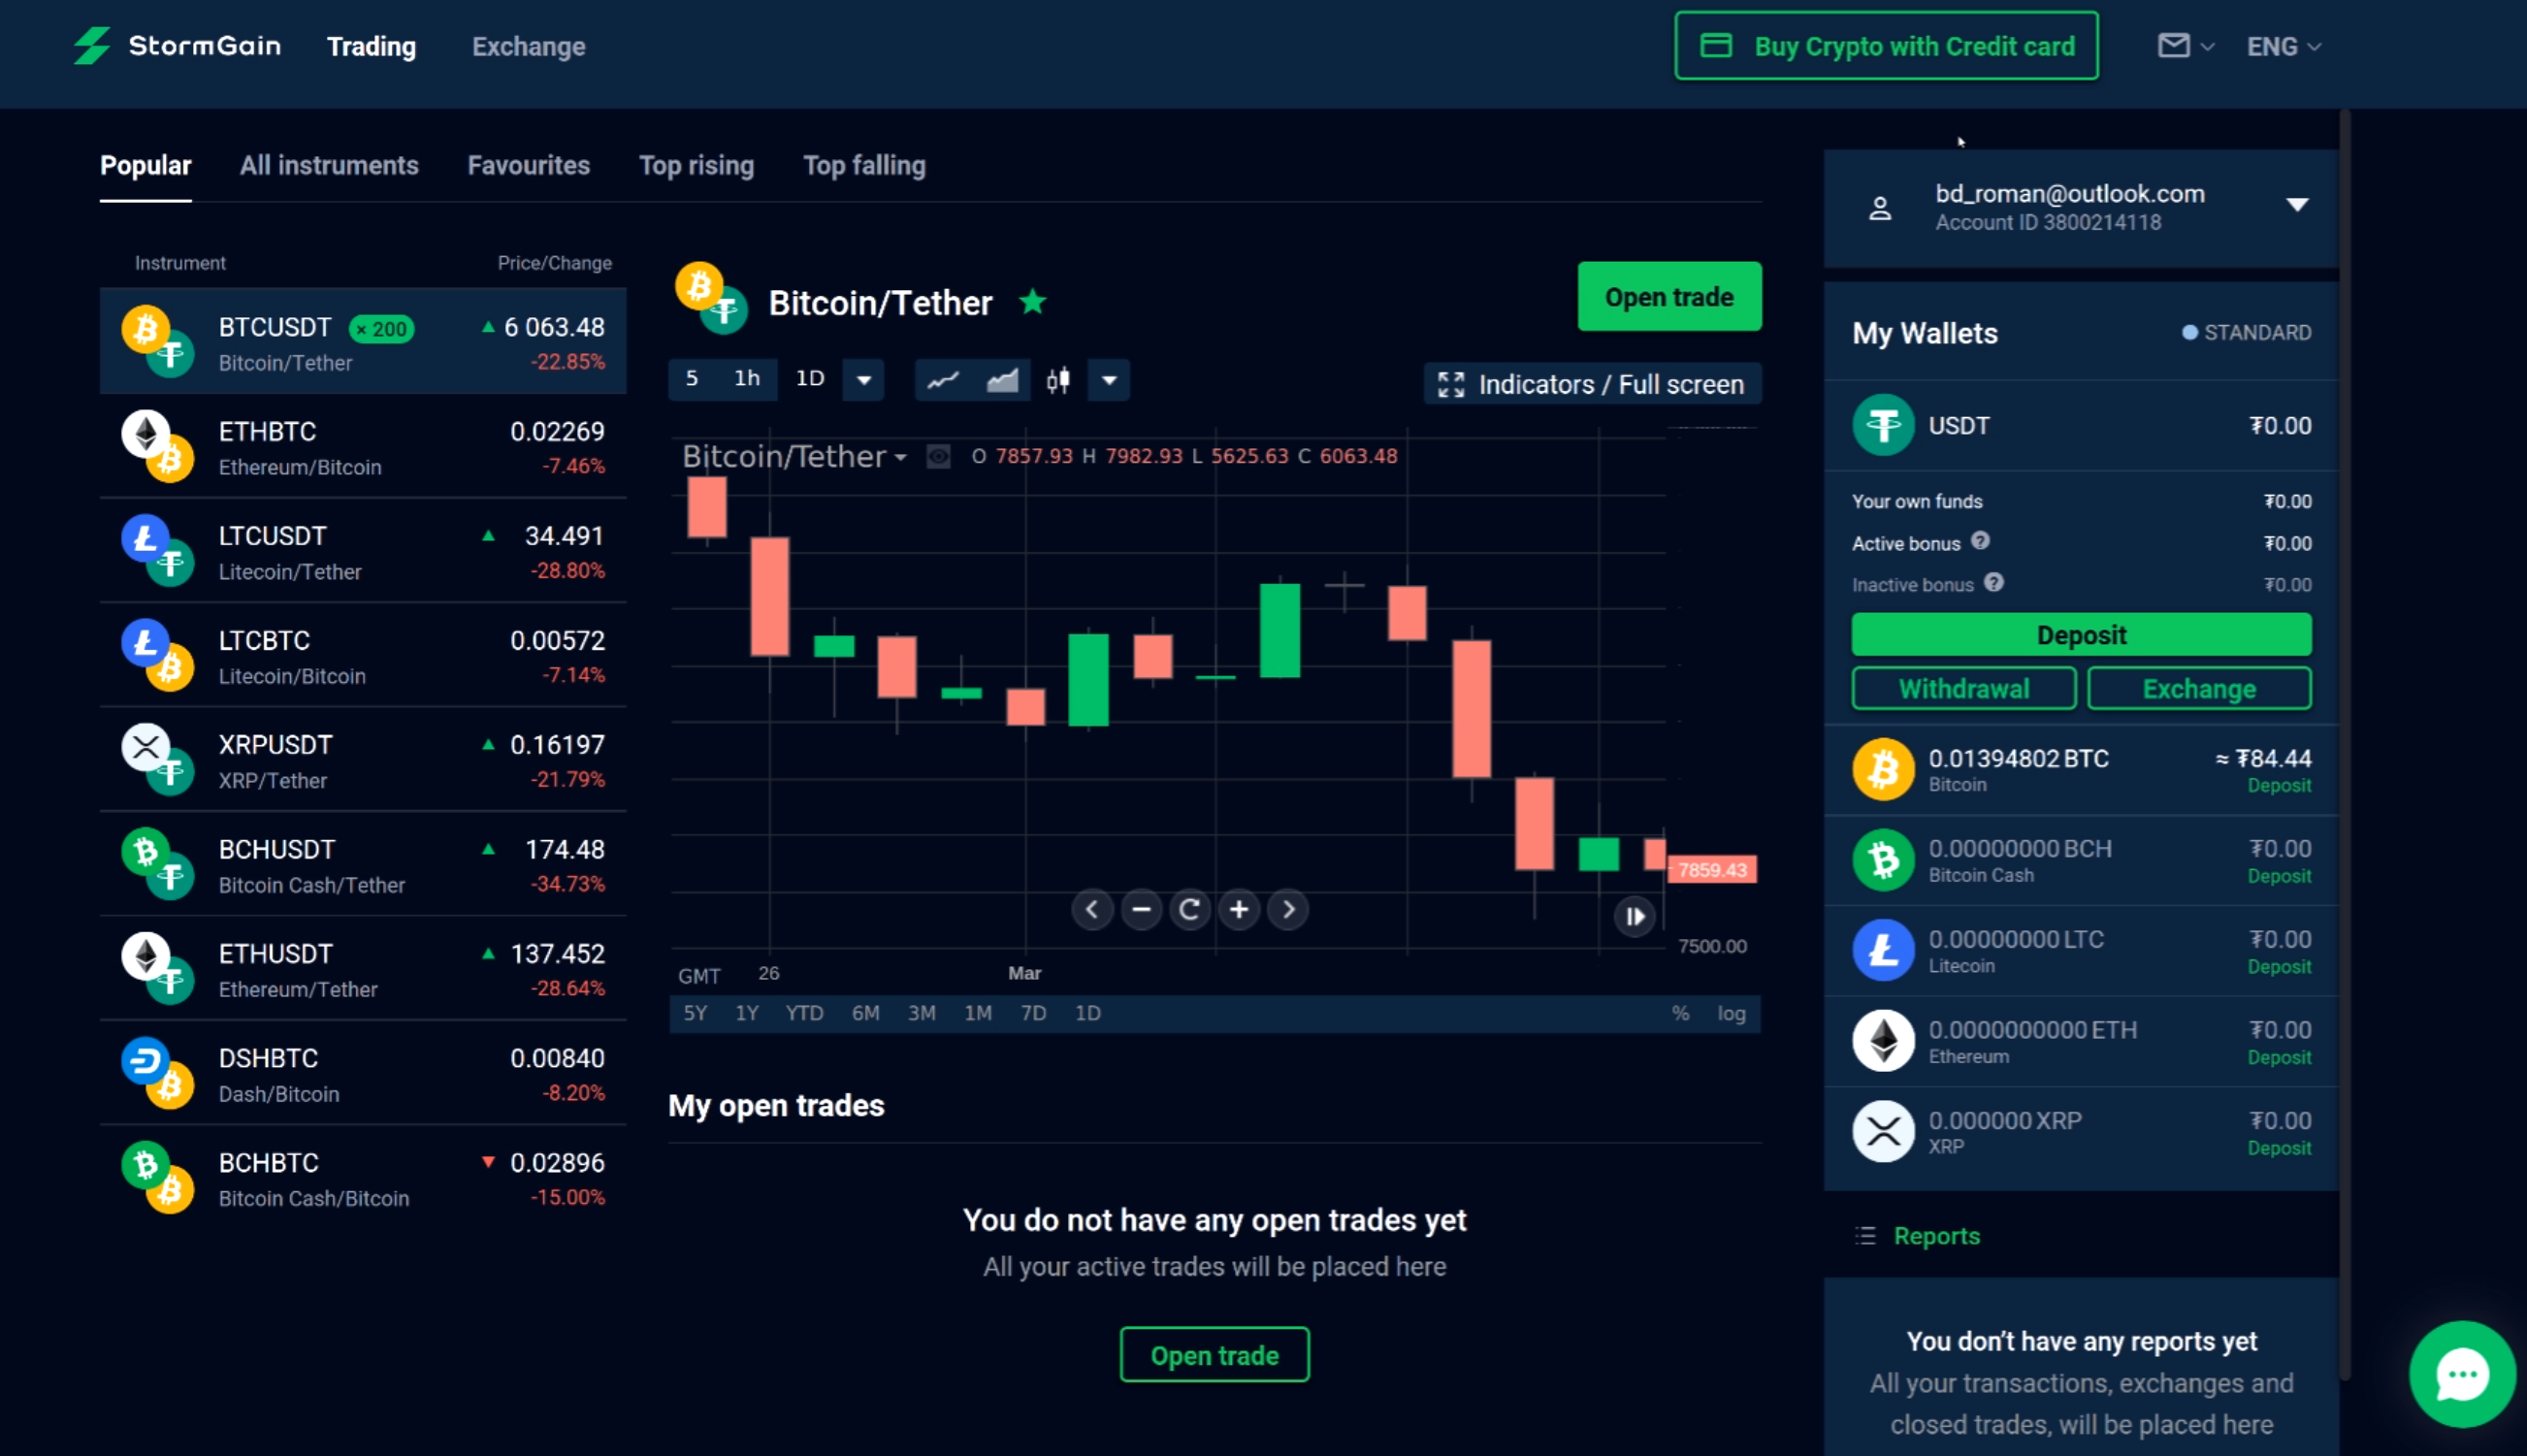
As mentioned, in order to gain access to the Premium Signals Channel you will need to fund your Bitcoin wallet with at least $100 worth of crypto. Of course, you don’t need to purchase crypto through the exchange, you can simply deposit some that you already have.
There are two ways to deposit:
- Buy crypto with a credit card
- Deposit crypto from another wallet or exchange (if you want to do this, skip step 3 and go straight to step 4) – depositing crypto directly into your wallet.
3. Buy Crypto with a Credit Card
- In order to begin a credit card transaction, simply click on the “Buy Crypto with Credit Card” button you see on the top right of the screen.

- This will bring up a basic order form. For this tutorial make sure Bitcoin is selected, but note that you can switch to other assets that you can also purchase if you choose to later. Just below this, make sure the payment option says credit card and make sure its at least $100 for our purposes, and if everything looks correct to you then click on “Deposit.”
- After processing for a moment you should see the payment screen. This will show you how much Bitcoin you are getting as well as how much USD you are spending (Protip: If you ever need to know how much Bitcoin equals how much USD or vice versa, head over to our handy Currency Converter where you can easily convert between a variety of cryptocurrencies and fiat).
- You will now come to the Verification screen, where you will need to provide some identity documentation. This is generally considered the “Know-Your-Customer” policy and you will pretty much find this on any exchange or website that allows for credit card purchases of cryptocurrency. You may even want to be a bit wary of a service if they don’t ask you for this step, even though it may seem more private. You will be asked to provide a valid ID such as a Passport or Drivers License, as well as provide your residential address. If all the information checks out then you should be approved for your purchase in no time!
4. Depositing Crypto Directly Into Your Wallet
If you don’t want to make a crypto purchase at this time, don’t worry. As mentioned you can also deposit crypto directly from another wallet or exchange, so if you already have at least $100 worth, you’re all set. Start by simply clicking on your Bitcoin wallet that is displayed on the right side of the screen.
This will bring up information about your wallet as well as the current chart. For this tutorial, we will be using bitcoin and we used an account that already had a small amount of coin in it, but you can ignore that as your wallet will be empty at this point, so go ahead and click on “Deposit” right now.
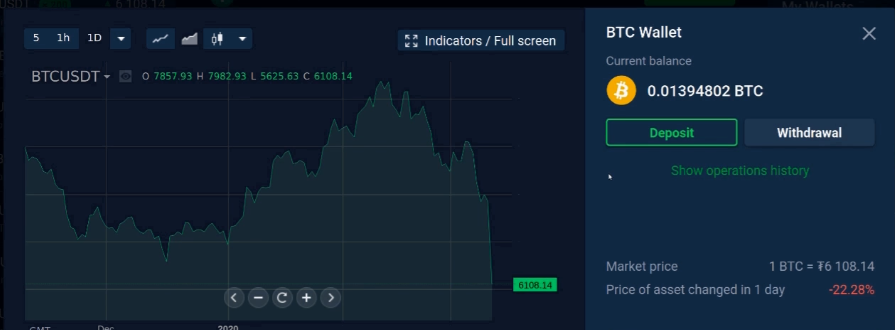
This will bring up the basic deposit form, which is similar to the purchase form we recently discussed. Make sure you have Bitcoin selected (you never want to send coin to an incompatible wallet), and note the Bitcoin address given to you below.
Bitcoin addresses are basically just what they sound like, they are the specific keys to deposit funds on the Bitcoin blockchain. They are long, complex, and hard to remember, so it isn’t recommended you try to write them down or copy them by hand. In this case click the “Copy Address” button on the bottom left, which should put the code into your clipboard.
You could save this copied address in a text file for easy retrieval later, as there is no risk of this number falling into the wrong hands. A Bitcoin public address can only be used to receive funds, not send them, so this key is not something that needs to be secured. In any case, you’re then going to want to go to whatever other wallet or exchange you have your Bitcoin on, which for this tutorial will be Bittrex, so we will head there now.

Whatever wallet you are using, there should be an obvious option for Deposits and Withdrawals. You’ll want to click on Withdraw, which is sometimes labelled “Send” or something similar. It doesn’t hurt to confirm where these options are before sending coin to a given service, but they should never really be hard to spot.

- After clicking you will be prompted to enter what address you want to send to, so go ahead and paste the Bitcoin address we just copied from StormGain.
- The next step will be to fill in the withdraw amount. Since you will be needing at least $100 worth, make sure that you are sending enough based on current market values. Again, this could be a good time to check the market converter if you are having any doubts. If you do send too little it isn’t a major issue, since you can always just send more subsequently. In fact sending a small, “test” amount first can be ideal if you are new to these steps and don’t want to risk a more costly mistake.
- Once you have successfully entered your 2FA code, click “Withdraw Bitcoin” and you should see a confirmation that the transaction has been sent to the blockchain. Now you will have to wait a little while for it to be confirmed, and time may vary based upon network conditions, but usually, within the hour you should see the transfer reflected in your StormGain wallet.

If it takes a little longer than expected, be patient. You can check on the status of the transaction using any Bitcoin block explorer by simply entering in the receiving address that you got from StormGain. This should bring up all of the info, including how many confirmations have occurred. As long as you see the transfer reflected on the blockchain, then you know the money is on its way.
5. Confirm Your Deposit With the BeInCrypto Premium Signals Channel
Now you’ve pretty much done everything necessary to join the Premium Signals Channel, so you just need to be able to prove it. For this, simply take a screenshot that shows your profile and the value of your Bitcoin wallet. You’ll then want to go back to your Telegram DM with @BeInCryptoPremium, and send that image along to them.
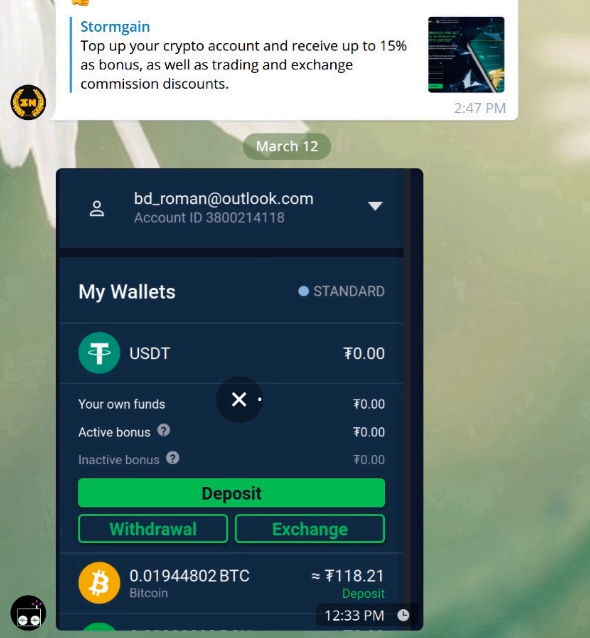
Assuming everything checks out, then within 24 hours, you should receive an invitation to the BeInCrypto Premium Signals Channel. Congratulations, now you are not only a part of one of the best crypto trading channels around, but you also can begin applying what you learn immediately on StormGain, or in fact any exchange of your choosing.
6. What’s Comes Next?
Now that you’re all set up, we might recommend digging into our trading tutorials series. If you would like to try and make your first trades or generally just play with the StormGain interface, note that you can activate a “Demo” account under your profile. What this will do is put you into Demo mode, which gives you $50,000 of fake Tether that you can begin trading with, completely risk-free. Make sure you are definitely in the demo account before submitting any trades, but if you see the $50,000 and didn’t put it there yourself, you should be in the correct place.
That should do it for the scope of this article, but there is a lot more to learn about in the world of cryptocurrency! Now that you are a premium member, you can count on a lot of solid information on market moves and how you can make the most of them, so get out there and have some fun.

