MetaMask is one of the most widely used wallets in all of crypto, allowing you to access Ethereum’s vast ecosystem. Some of the benefits of using it are its vast support and DApp integrations, software development kit (SDK), and multiple features. This guide to using MetaMask will teach you everything you need to know about using the MetaMask wallet.
KEY TAKEAWAYS
► MetaMask is a widely used Ethereum-compatible wallet that enables users to interact with decentralized applications (DApps) and manage cryptocurrency.
► The wallet simplifies blockchain interactions by allowing users to connect to DApps, manage transactions, and perform activities like token swaps and staking directly from the app.
► MetaMask provides security features such as transaction simulations to detect malicious contracts, MEV protection, and multi-account support for better wallet management.
► Developers can use MetaMask’s SDK to integrate its features into apps, offering support for popular frameworks and mobile platforms.
What is MetaMask?

MetaMask is a crypto wallet that supports the Ethereum blockchain and ecosystem. Moreover, you will see in this guide to MetaMask that it seamlessly connects to any Ethereum-based dApp or EVM blockchain.
Therefore, when you visit any dApp, such as NFT marketplaces or yield farming protocols, you will be able to connect your MetaMask wallet to it and create and sign transactions.
Metamask is a browser extension that you can use with Safari, Firefox, Opera, and any Chromium-based browsers (e.g., Edge, Chrome, or Brave) — which makes it extremely convenient and popular. It is also a mobile wallet that allows users to manage their crypto on the go.
Consenys, founded by Joseph Lubin, maintains and owns MetaMask. Dan Finlay and Aaron Davis created MetaMask in 2016 while working for Consensys.
Behind the scenes — why would you need MetaMask?
Before we begin with a guide to MetaMask, it is important to understand what you are accessing with it. When blockchain technology was first birthed, it was narrowly focused, with the goal being a peer-to-peer payment system. Over time, blockchain development diverged into specializations, creating a vast ecosystem.
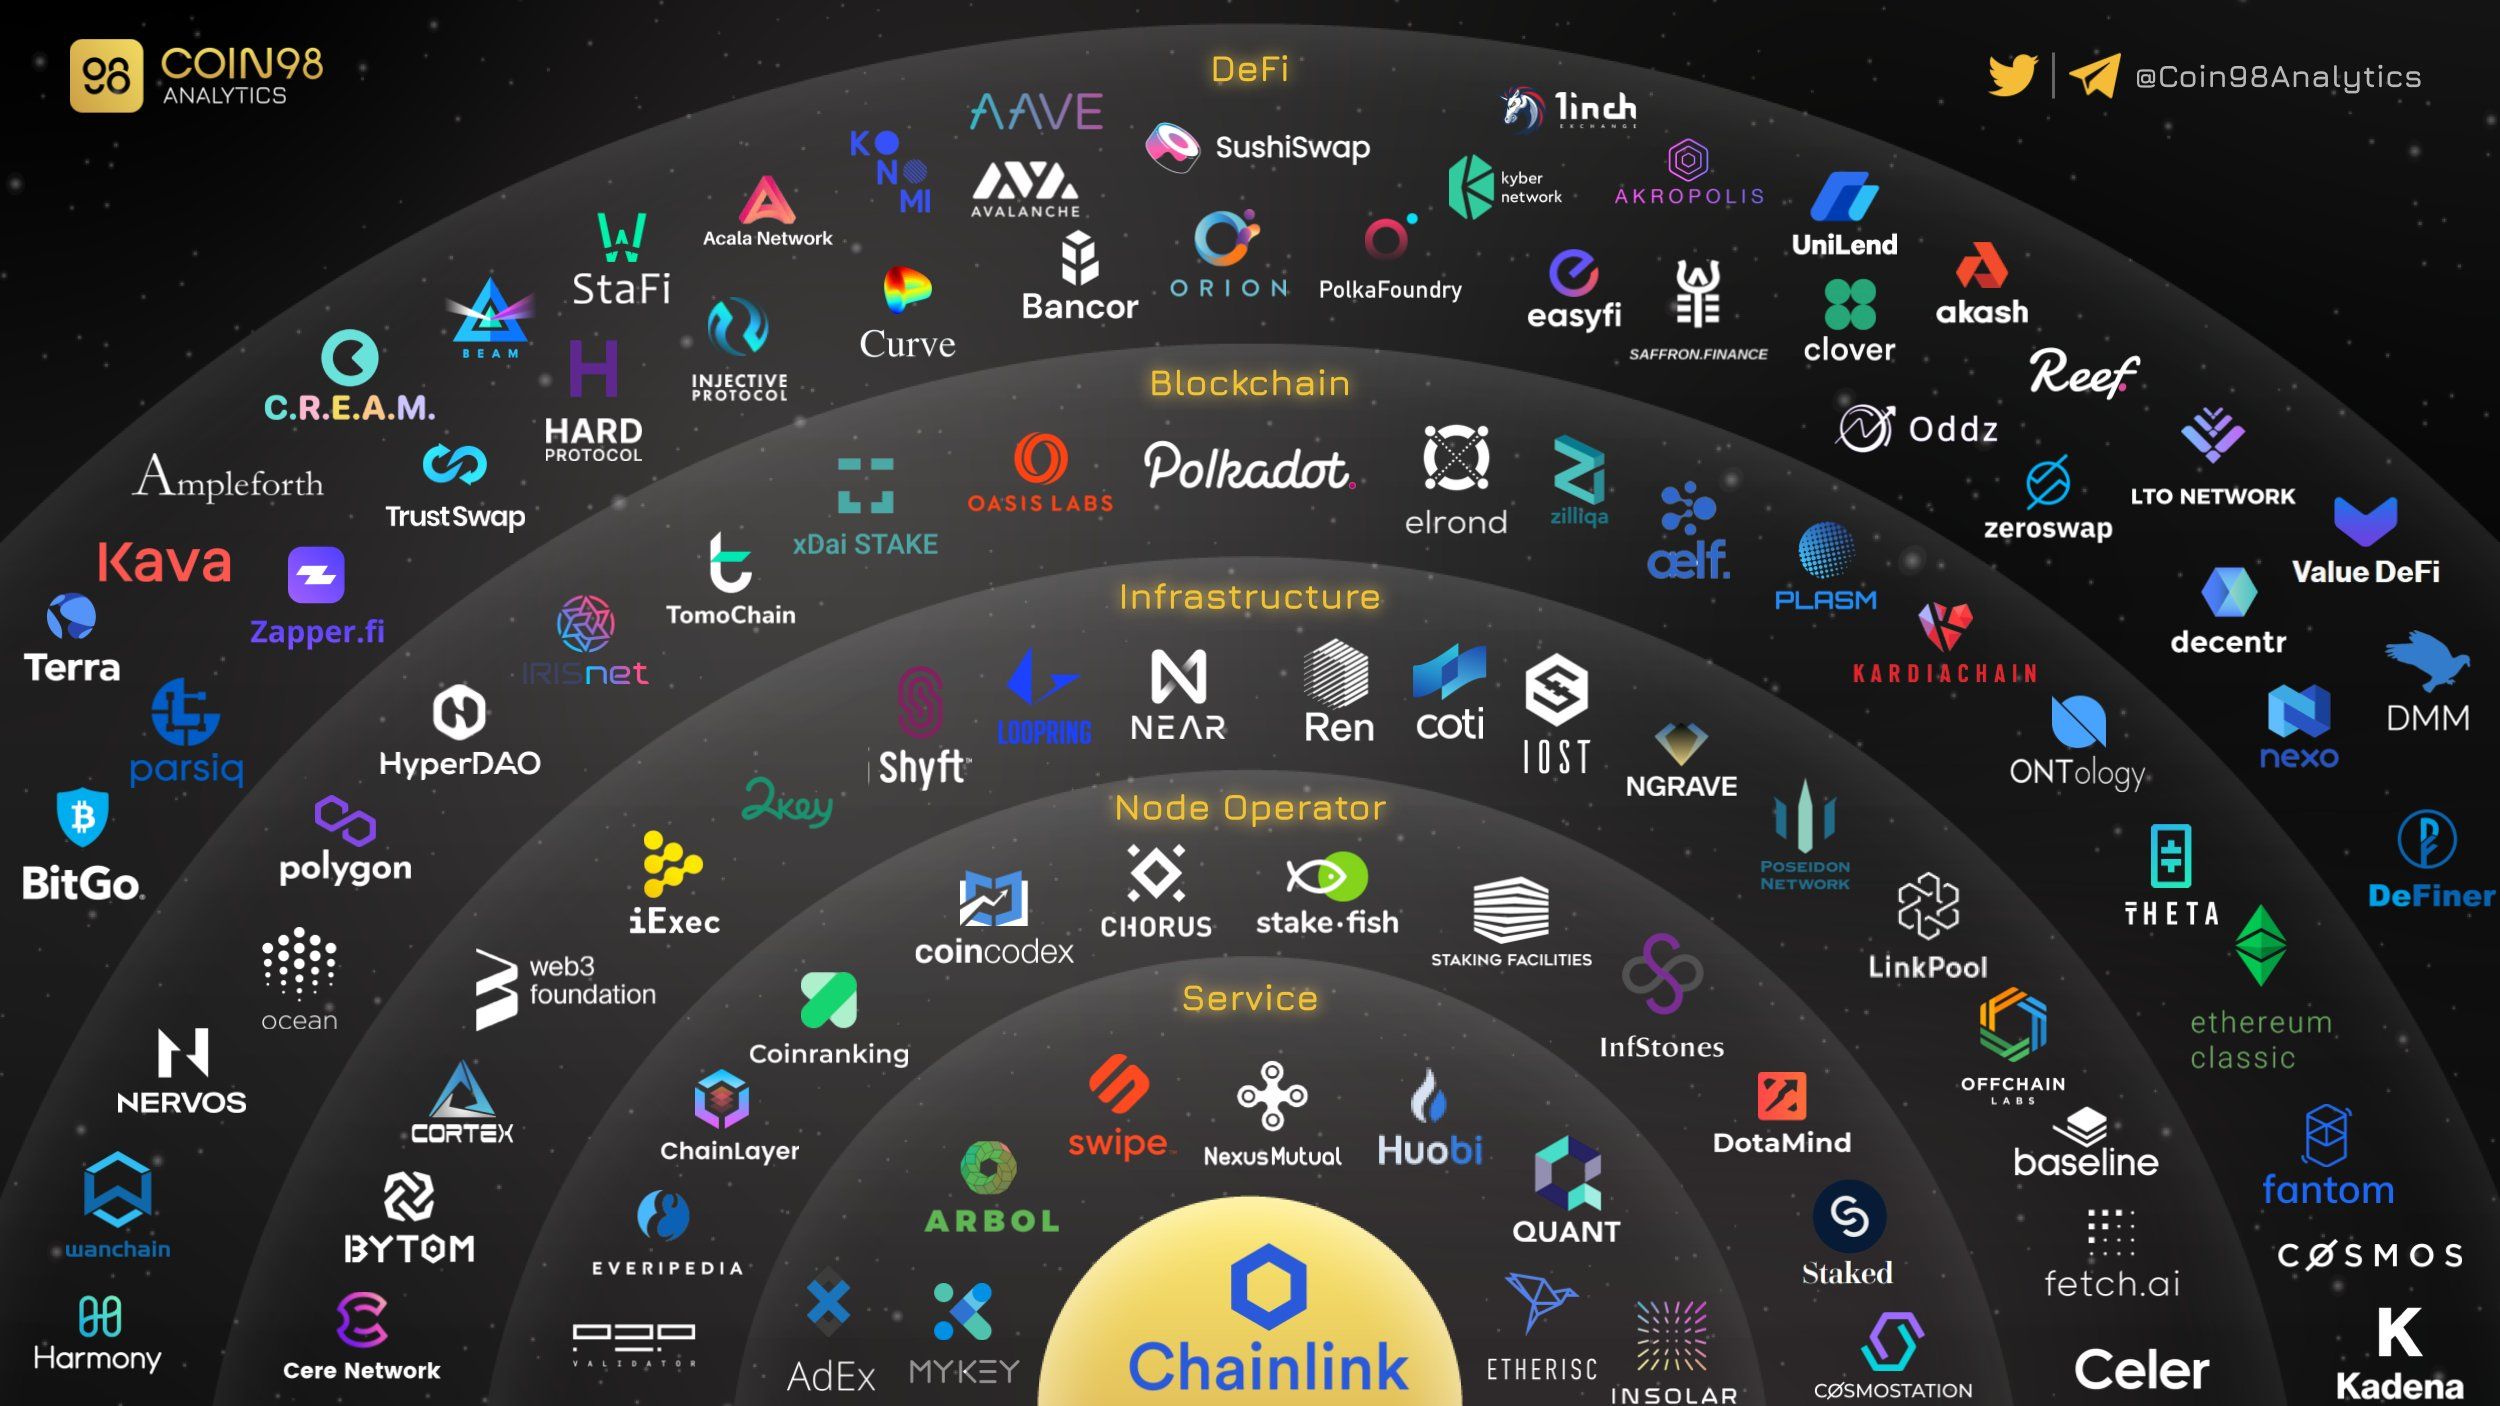
The Ethereum blockchain had a general-purpose use case in mind at the time of conception instead of just facilitating cryptocurrency. By having smart contracts running within its data blocks, it extended its flexibility far beyond a simple payment system.
This allows digital and automated forms of legal or financial contracts with decentralized and security features from blockchain technology.
In essence, Ethereum created Decentralized Finance or DeFi. It primarily involves a series of smart contracts that collectively form a decentralized application or dApp.
These DApps make it possible to digitize every banking service you could think of — lending, borrowing — without the banking system itself. Not only that but marketplaces and games can also run on Ethereum’s back.
To use these applications, you need a wallet. And not only do you need a wallet but you need an Ethereum-compatible wallet that supports all the relevant token standards, EVM-compatible networks (including testnets), and can sign transactions and act as a light client to the Ethereum blockchain. This is where MetaMask comes in.
How to install MetaMask — a step-by-step guide
Step 1: Download MetaMask
1. The first step to gaining access to Ethereum’s rich ecosystem of DApps is to download the MetaMask extension from the official website. You will see support for popular platforms — Windows, iOS, and Android. Correspondingly, depending on your platform, MetaMask can either be a browser extension or a mobile app.
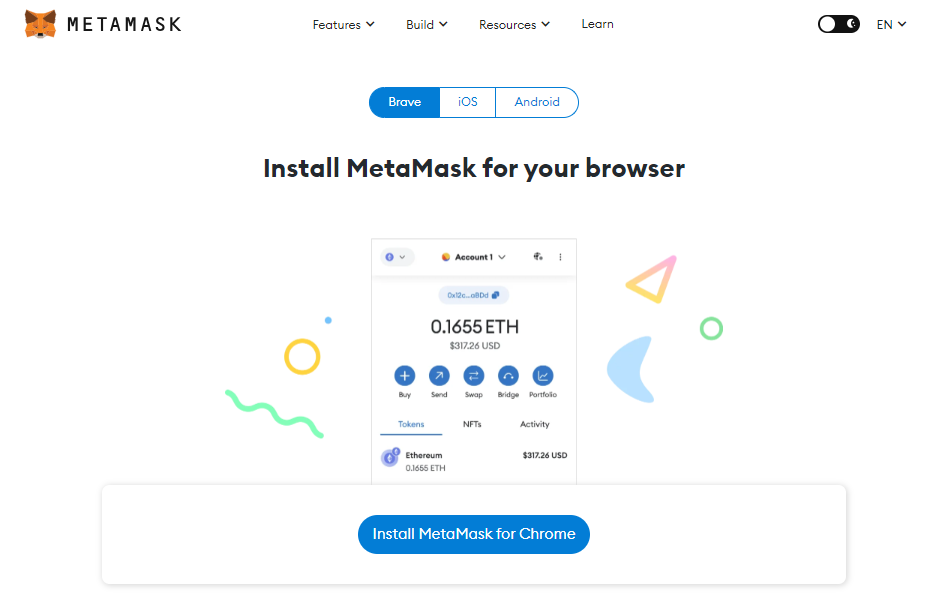
2. Once you have installed MetaMask into your favorite browser, click on the “get started” prompt to “Create a Wallet.”
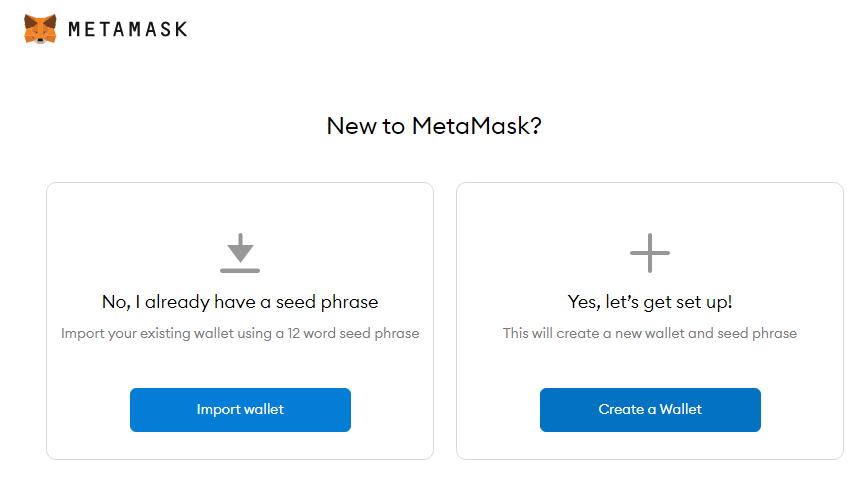
This is the critical part of the installation, in which you will create a private key to access your funds. After all, crypto wallets do not hold actual funds; they only hold private keys, which grants access to blockchains.
Step 2: Secure your wallet
After clicking on the “Create a Wallet,” you will be asked to create a password for the MetaMask app itself. The most important part comes after when you are asked to create a backup phrase. Also called a seed phrase, this 12-word safety phrase allows you to recover your wallet even if your device is lost.
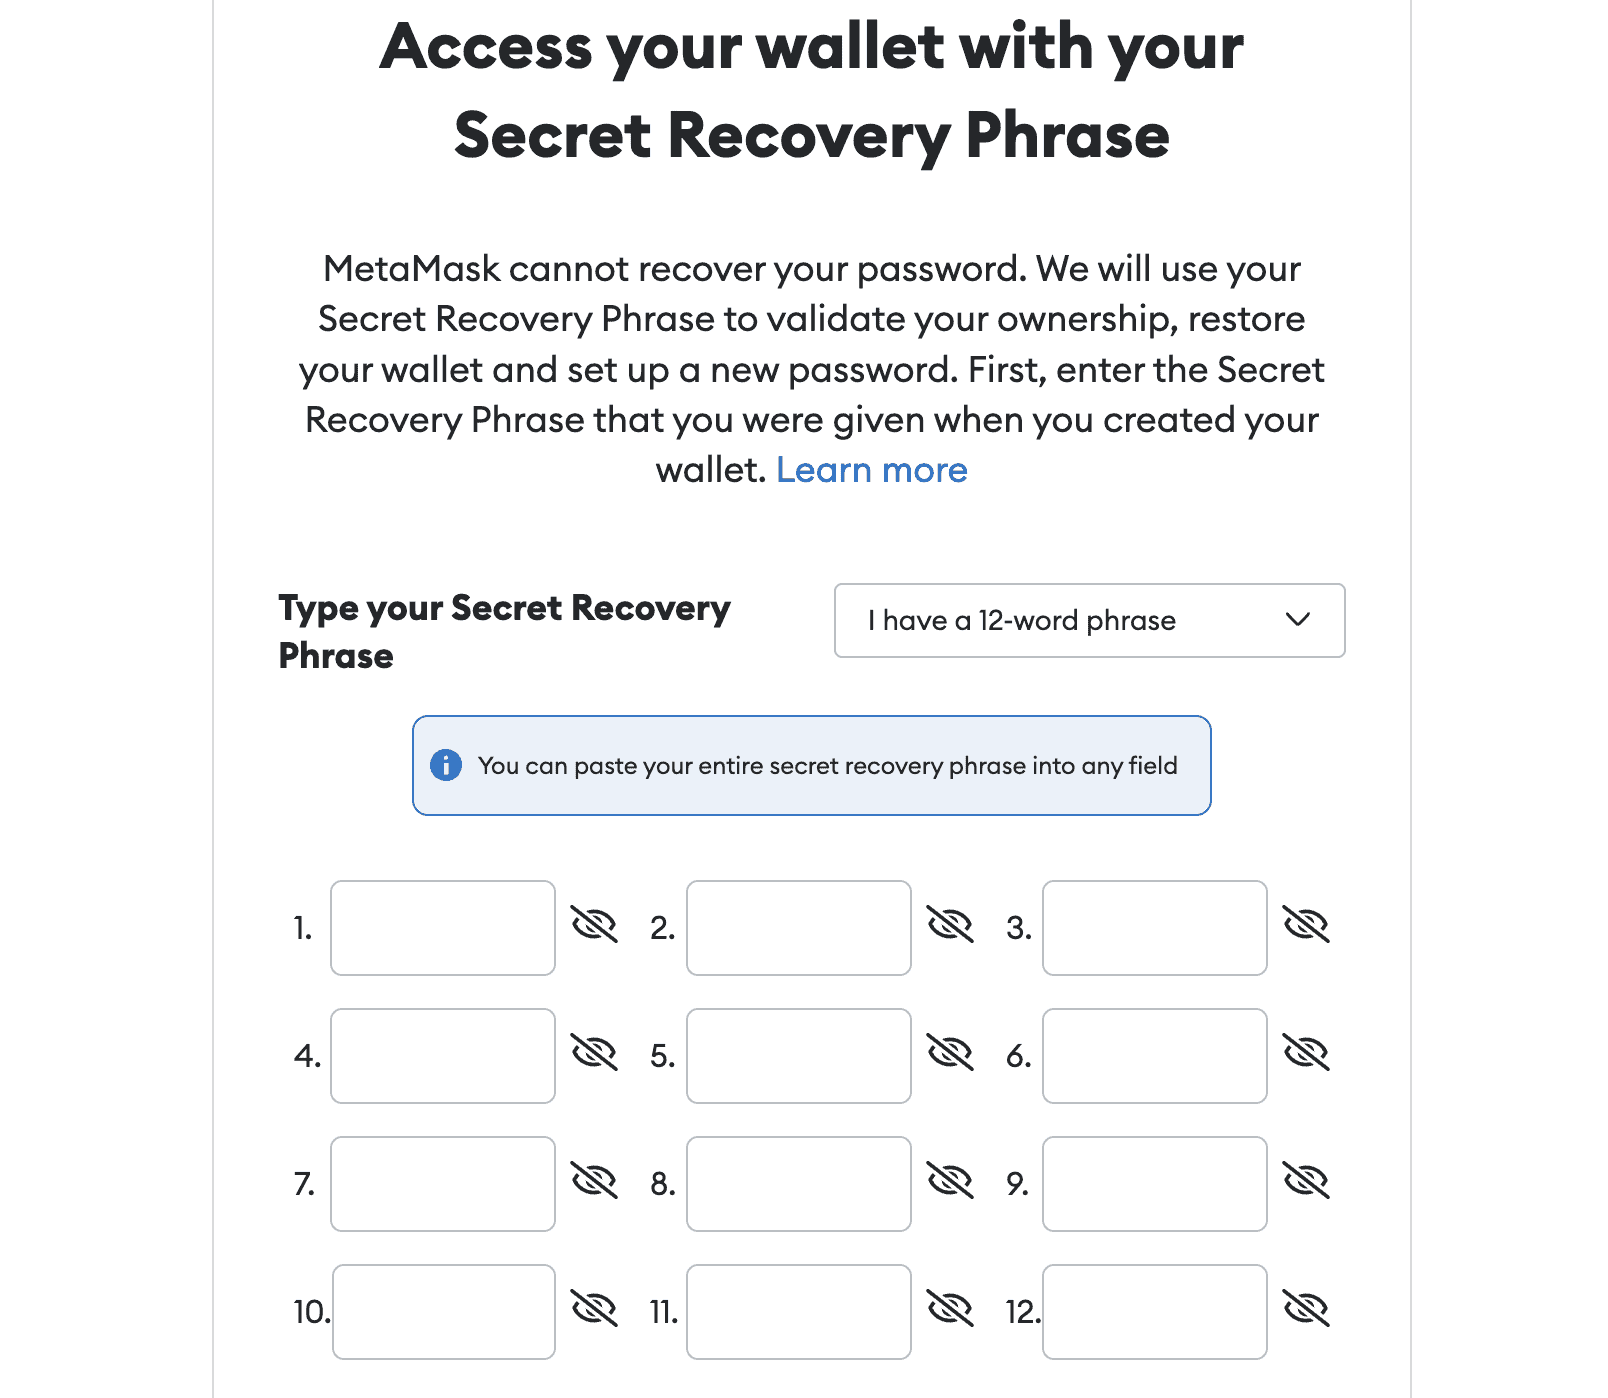
If you lost your device and all data on it, you would then recover your crypto assets by selecting the “Import wallet” with your seed phrase. Enter the seed phrase in the exact sequence that you recorded it.
Accordingly, try to keep the 12-word seed phrase as a separate item, safely stored on a piece of paper or a password manager. Do not share your seed phrase with anyone. If you are new to the crypto world, read up on these top 10 cryptocurrency security tips first!
As mentioned previously, MetaMask allows you to exchange between ETH and thousands of DeFi tokens. You can see ETH as the master cryptocurrency for the whole DeFi ecosystem. Protocols like Uniswap or 1inch are mini-ecosystems, each one having a token for governance and network fees.
Step 3: Add funds to your MetaMask wallet
However, before you can start token swapping or anything else with the MetaMask wallet, you have to have funds. This means that you must convert fiat currency to ETH first. MetaMask wallet gives you a few options — debit/credit, PayPal, bank transfer, and more. On-ramps vary by region, so it is best to check for your local area.
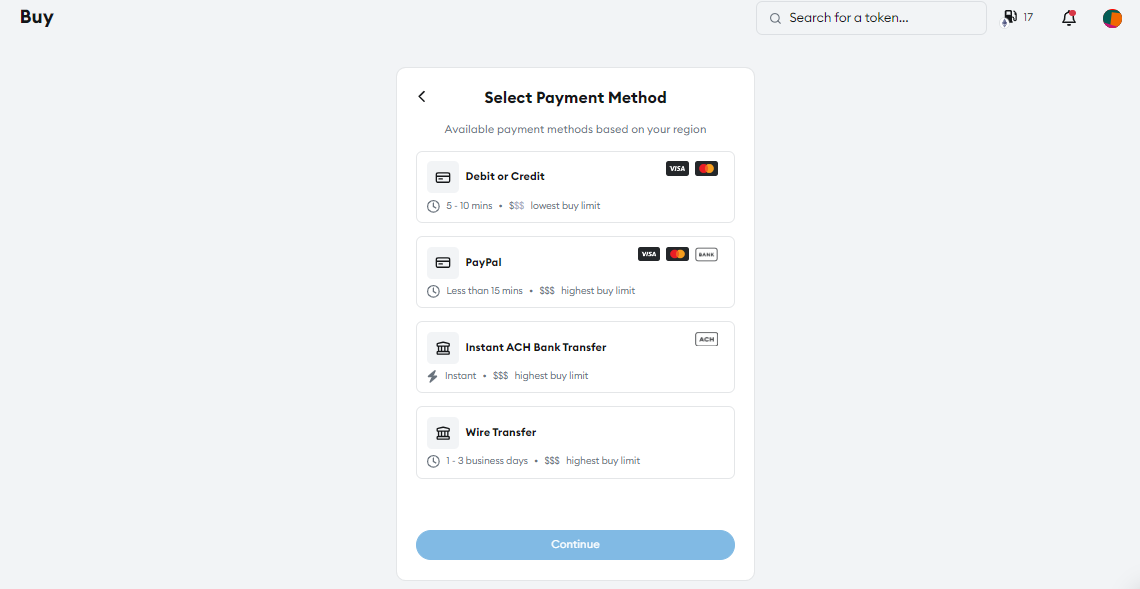
If you already have an account with some ETH, deposit it into MetaMask in the Send/Receive section. You will see the section when you click on Wallet:
- Copy the receiving address of your MetaMask wallet
- Paste the receiving address into your send textbox
- Execute the transfer of ETH from your crypto exchange (send) to the MetaMask wallet (receive)
How to connect your MetaMask wallet to DApps
Remember, DApps themselves are smart contracts running on Ethereum. The surface level of DApps is their web interface. This is what you see when you connect to Uniswap — one of the most popular decentralized exchanges used for yield farming.
1. When you go to Uniswap, you will see the “Connect” button in the top-right corner.
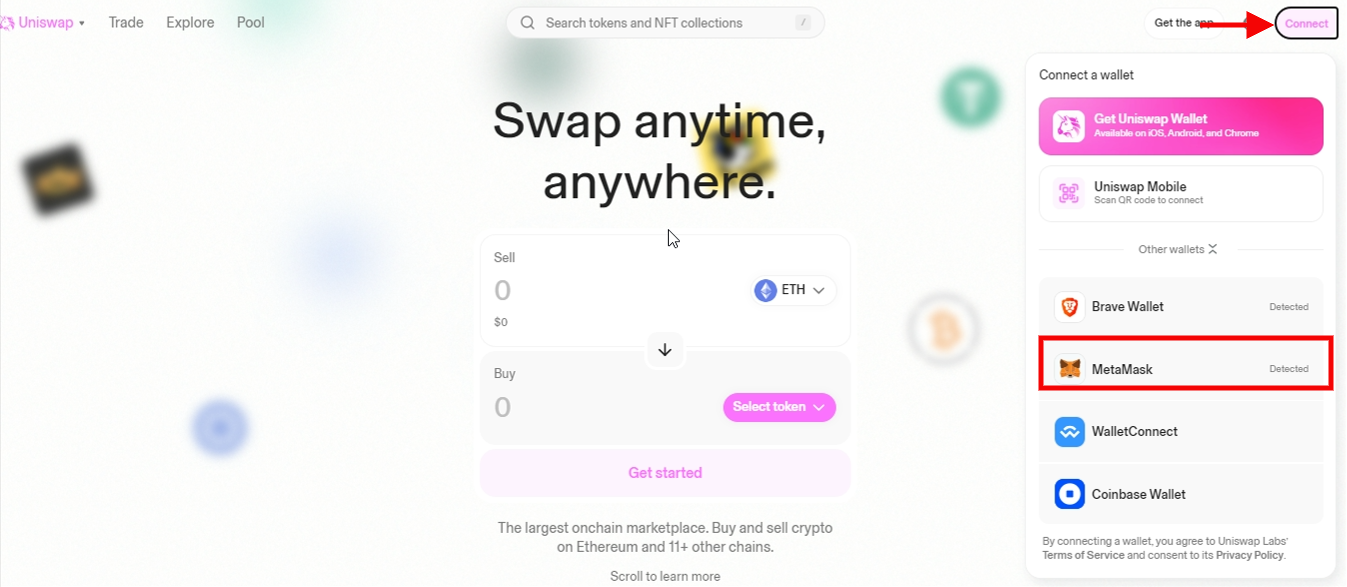
2. With MetaMask installed, a confirmation notification will appear asking to connect your account and the corresponding DApp.
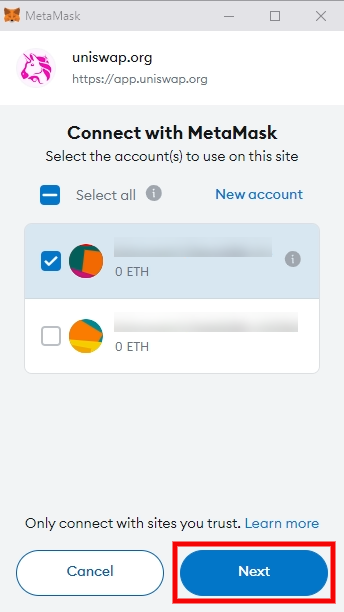
3. Once you click on “Next,” the dApp will have access to your wallet’s funds. You can then use them to stake in a liquidity pool or swap tokens.
How to send a transaction
Sending transactions is the most basic part of interacting with a blockchain. MetaMask obfuscates the complexities of sending a transaction, making it easy for even the newest of users.
The video above highlights the simplicity of sending a transaction with MetaMask, as it takes less than a minute to complete the transaction from start to finish. Here is how you send a transaction on MetaMask:
- Sign in to your MetaMask wallet.
- Select “Send” and paste the receiving address in the “To” box.
- Enter the amount of crypto you would like to send.
- Select “Confirm” to complete your transaction.
- Wait for the transaction to switch from “Pending” to “Confirmed.”
In our example, we used a testnet to send Ethereum (ETH). This simply means that no real funds were utilized; however, the process is the same. You can also select which tokens you would like to send and which network you would like to send the crypto on.
What else can MetaMask do?
As stated previously, MetaMask has been around for a while. As a result, it is packed with features, and the number is still growing. Some of them you can immediately recognize, others are built under the hood.
This guide teaches you the most basic processes that you will need to get started. Once you become longer in the tooth, you can utilize other features, such as:
- Ethereum staking
- Bridging
- NFTs
- MetaMask Snaps
- MEV protection
MetaMask also gives security alerts for malicious contracts. Together with Blockchain, MetaMask has created a nifty feature that simulates transactions and gives an alert if it results in any malicious actions.
It is best practice to disconnect your wallet from all accounts from time to time. In this way, you prevent any malicious contracts from compromising your wallet. You can also create multiple accounts within a single wallet application. This means that you can have multiple addresses in the same wallet. It is also best practice to create new wallets from time to time.
Lastly, if you are a developer, you may want to take advantage of the MetaMask SDK. This allows you to connect your apps to MetaMask features with support for Javascript libraries and frameworks, such as React.JS and Node.JS, mobile platforms like Android and iOS, and gaming engines like Unity.
How else can you take advantage of MetaMask?
MetaMask is comprehensive, so how you use it is ultimately up to you. Whether you use it as a hot wallet for yield farming, a tool for developing and testing, or simply to send transactions and store crypto, it is sufficient for all activities. Now that you know how to download, connect to DApps, and send transactions with MetaMask, you are prepared for whatever purpose you choose.

