If you’ve been paying any attention to Bitcoin in the last few years, you have undoubtedly heard the term “Lightning Network” thrown around. Perhaps you’re aware of the claims that this technology could lead to faster, cheaper Bitcoin transactions and may pave the way for main stream adoption, or perhaps you’ve heard complaints that this isn’t the way Bitcoin should scale. In either event, you may be wondering, what is the Lightning Network really, and what does it take to start using it? To answer this, BeInCrypto has created a nice beginner’s guide to give an overview of the protocol and offer users as some easy steps to begin making Lightning payments today.
How Does the Lightning Network Work?
The Lightning Network (LN) is known as a “second-layer solution.” This means it is effectively a network that sits on top of the Bitcoin blockchain. Lightning nodes can send and receive from the blockchain, but can also open off-chain “channels” between each other that can transmit value almost instantly and for a fraction of the cost. This is possible because these channels generally only record transactions to the blockchain when they open and close, but while open can facilitate unlimited transactions so long as the channel holds sufficient funds.
The exact way this works is a bit technical, but basically each node opens one or more channels, and these channels can link between multiple nodes. Channels can be opened directly between parties who wish to transact, or can become part of a global “mesh” of nodes. Therefore if there are enough participants in the network then sending transactions worldwide becomes faster and easier than using the blockchain directly.
What Are Some Risks/Criticisms of the Lightning Network?
The LN is still in its infancy, and as such there are certainly some growing pains. One is that the process can still be rather technical. Tied to this, it is somewhat easier to send Bitcoin through Lightning than to receive it. There can also be issues with liquidity, as well as finding enough reliable nodes to connect to. Sometimes bugs and other issues can put personal funds at risk, so currently it is probably best to approach its use with more of an experimental mindset, at least until you feel more comfortable with how everything works. For starters it is recommended to only use small amounts of Bitcoin when transacting over Lightning, to minimize the risk of losses. Generally speaking it is not that likely that your funds would be lost entirely, but if errors occur then your coin can get locked into channels for longer periods of time than you may have anticipated. For now, don’t count on being able to pull your funds out of a channel on short notice.
Getting Started
For the purposes of this tutorial we’re going to keep it simple enough and use a tried and true wallet implementation, Eclair. Available on the Google Play store for free, Eclair has been around for years and so is one of the more battle tested wallets available.
The first time you set up your wallet, you should be given a 12 word “Seed Phrase.” Write this down and keep it safe somewhere offline. If you ever lose it you will not be able to recover this wallet, and if it falls into the wrong hands they will have full access to your funds. This is very much like most cryptocurrency wallets out there, so users should be aware of how important it is. You will also be prompted to create a pin. This will help protect your wallet in the event that you lose your phone while funds are still on it, as the pin should be required each time you access the app.
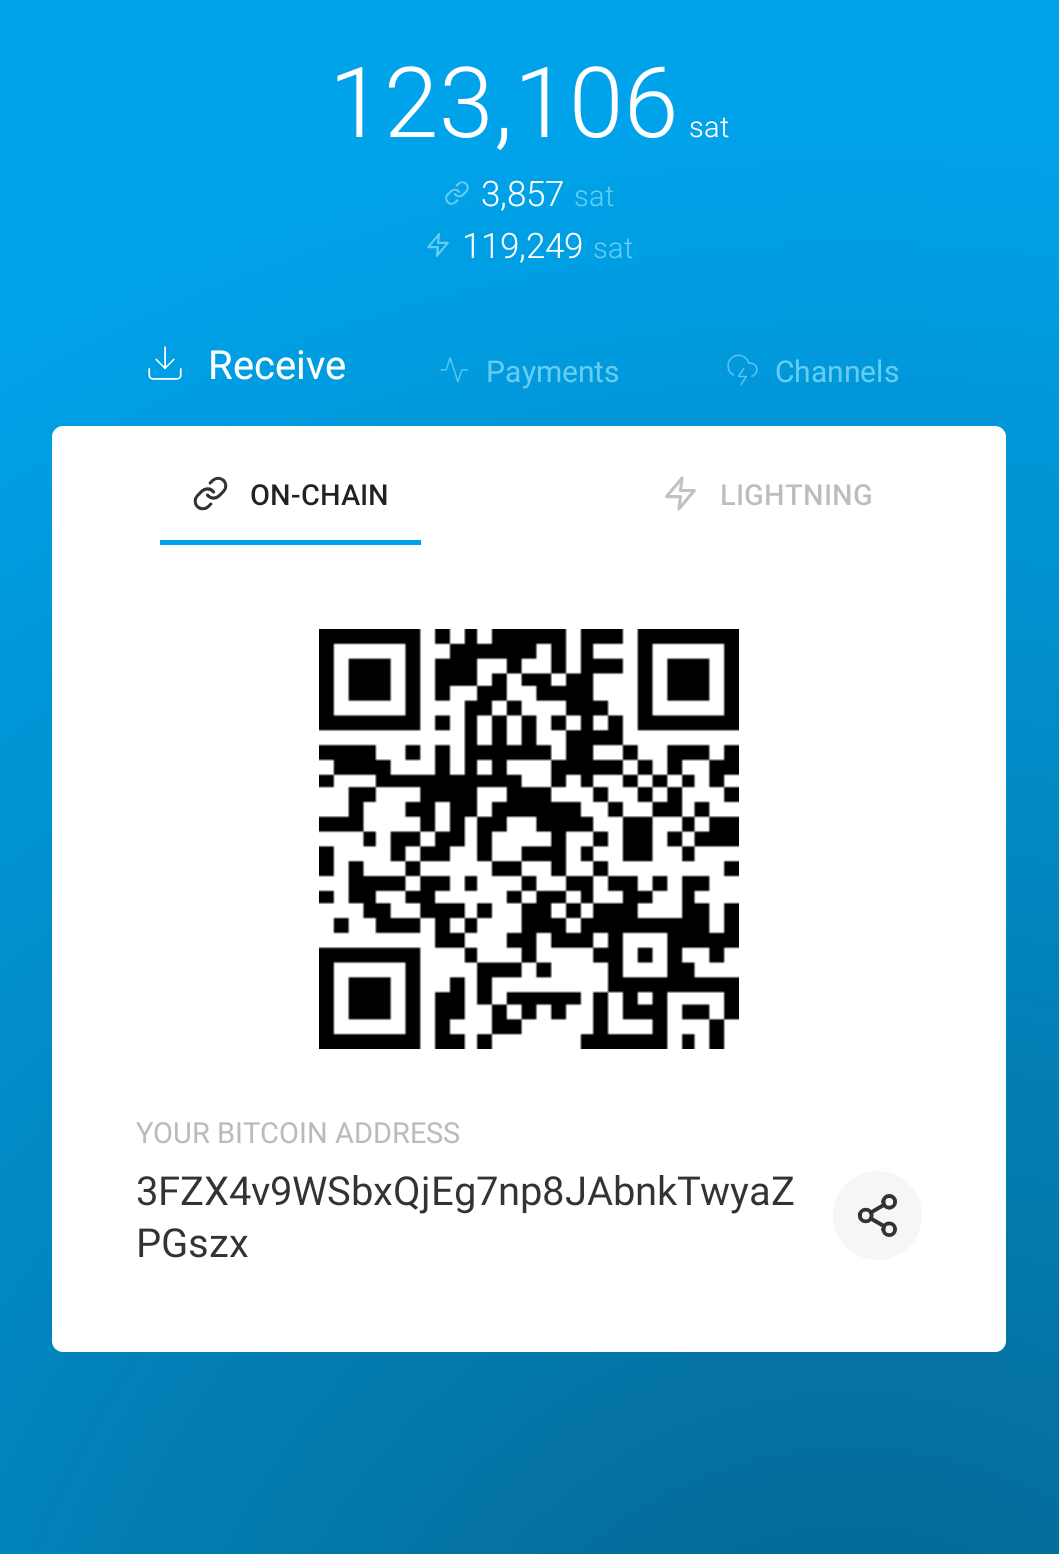
After installation, you’re going to want to add some satoshis to your wallet so that you can open your first channel. To do this, swipe to the right to the “Receive” screen, and make sure the “On-Chain” tab is highlighted. There is a tab for receiving payments through Lightning, but don’t worry about that for now. On the screen you should see a QR code and your wallet’s public Bitcoin address written below. You can obviously scan the QR code or share the address in whatever fashion you like, but this is the address you want to send a payment to. As mentioned, start small. Maybe $5-$10 USD, or whatever you are comfortable with.

Once you have sent a payment from another Bitcoin wallet, you’ll need to wait for it to confirm on the blockchain. After it has, you should see the satoshis reflected in your wallet almost immediately. The next step is to open a channel. You can open multiple channels, and you have a few options for doing so. One option is to connect to Acinq’s own Lightning Node, which should prove both reliable and fast. One downside is it does involve putting your trust in Acinq and their nodes, but this is more a philosophical issue than a practical one. You can also connect to any specific node of your choosing if you have the URI for it, and many people offer up their nodes for public use that can be found with a Google search. Of course, again you need to trust the node operator, so proceed with caution. In time, the feature should be added to connect to random nodes, which should increase security and anonymity. Other LN wallets may have different combinations of these options, and some may have an “automatic” mode, which chooses for you behind the scenes.
For this tutorial we will simply use Acinq’s nodes. Once we finalize the details and confirm, all we do is wait for the funding confirmation on the blockchain. As mentioned, only when opening and closing nodes does the wallet interact with the Bitcoin network directly, so at these times we will be subject to waits determined by the current network conditions. Once the channel is confirmed open, you should be ready to make your first Lightning payment!
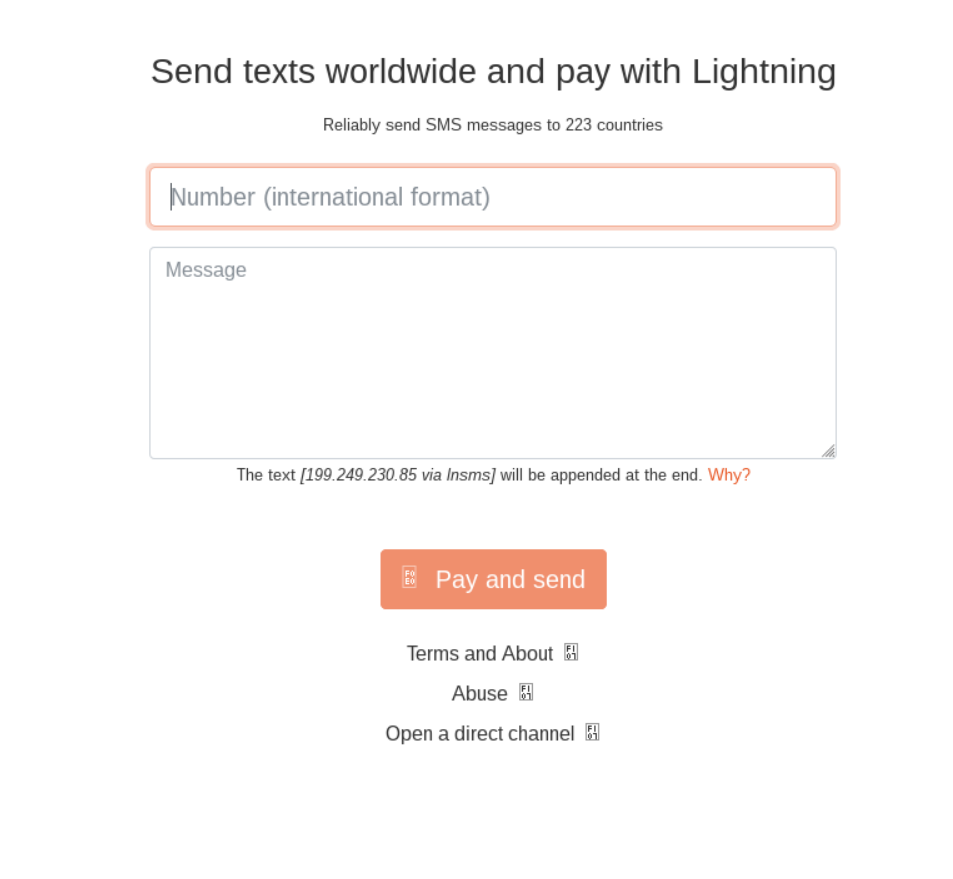
There is no shortage of websites that offer services to LN users. Some are mere novelties like feeding chickens, others are practical online shops that accept LN payments. Of course gambling and cryptocurrency exchanges are also well represented, but users should always proceed with caution on these sites. For our purposes we will be using lnsms.world, which is a simple site that allows you to send text messages to any number for a small Bitcoin fee, like 100 satoshis. Obviously for most people the site is more of a fun test for Lightning Payments than anything, and this is exactly how we will use it today.

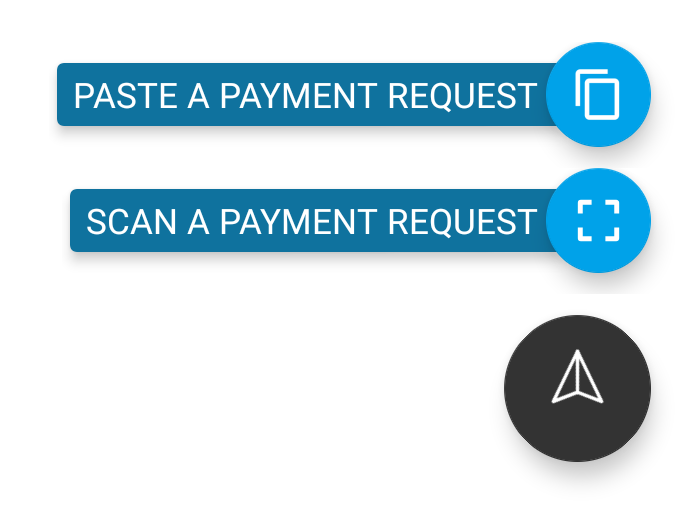
Simply fill in the number you want to send to, making sure to select the correct country as well. Write whatever message you want to transmit, and hit the “Pay and Send” button. This will generate a payment request, again in the form of both a QR code and a string of characters that can be copied and pasted. In Eclair, on the “Payments” screen, you should see a button in the lower right corner. When clicked, it offers both “Paste a Payment Request,” and “Scan a Payment Request” as options. Depending how you are accessing the website, use the method that is easiest for you.

Once the Payment Request has been entered, you should see the details of the transaction displayed in your Eclair app with the option to confirm and send the payment. If everything looks correct to you (don’t be afraid to double check the payment amount, even though it should be fine), then hit send and in literally just about a second or two you should see confirmation in the lnsms.world webpage. The actual text may take a little longer to send as it is subject to the network conditions of your cell provider. In the case used for this article, the text came in just a matter of seconds after seeing the payment confirmation on screen.
If you followed these steps and there were no problems, congratulations, you just made your first Lighnting Network payment! The biggest issue encountered in this demo was simply waiting for confirmations from the Bitcoin blockchain when funding the wallet and opening a channel. Nothing longer than is average for Bitcoin, but it does create a clear bottleneck in an otherwise very fast payment system. Obviously this tutorial was to be a proof of concept and help users “break the ice” with this new technology, so enjoy exploring the world of possibilities out there with these fast, cheap global payments.
There’s a Lot More to Learn
For anyone interested in going further with the Lightning Network, there are plenty of avenues to explore. Different wallets offer different options and sometimes even a great deal more control than what we explored today. For the most adventurous, setting up a Lightning Network node could be an interesting project to give the user even more control over their transactions. Great resources for Lightning information are available at the official Lightning Network Developer site and the self described Homepage of the Lightning Network, and as always Google can be your friend. Now that you have taken the first steps into this second-layer solution, go discover all the different ways that Lightning Network is trying to make paying for services online more practical than ever.

